
- Posts: 386
- Thank you received: 833
I need a prop,
- CeeJayP
-
 Topic Author
- Offline
- Elite Member
-

- Hi Peeps
Less
More
21 May 2013 15:01 - 21 May 2013 15:03 #1
by CeeJayP
I need a prop, was created by CeeJayP
Now on my DH 2 thread i commented about the need for a prop, being a 30" x 12" propellor (if you want to be a bit anoracky here it is a propellor as it propelling "pushing" the aeroplane along from behind whereas one on the front of a plane is pulling it along and is an airscrew!!) but hey i need one for the back of the DH2 whatever its called!!
now there is nothing wrong with the one for it at present its just along with its refurb (and being a bit mad perhaps) i thought a nice new one would be good, now you dont just trip over these size props in your LMS, and to get one made is into 3 figures, and i dont mean £9.99, i thought in a Jeremy Clarkson moment, "cant be THAT hard surely" so orf i jolly well went.
what follows is in no way advocated as THE way to carve a prop, its just my self taught way, now there is a bit of maths to get your noggin around but its only simple trigonometry so no fear there then, BUT for my first attempt i cheated. i constructed a simple MDF jig to hold the prop i allready had, marked it out at intervals along its diameter and measured up from base to centre line of the blade all the way around and marked the hight in my little note book, the prop was then turned 90 degrees and an outline drawn nice and neatly around the blade, from this i made a template to use to draw the profile onto my lump of tree
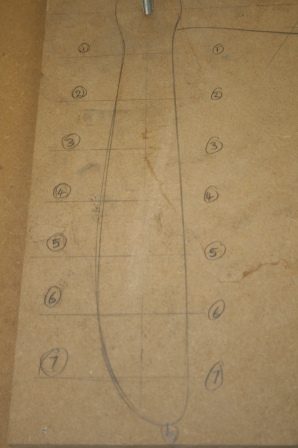
after the profile was tranfered to wood lump it was swiftly cut on band saw, new blade essential here, then it was laid onto the jig clamped in place with the big silver nut you may see in some of the pics, at the marked points the sizes aquired from the original were marked on the blank and you end up with a line of dots you join up and end up with the centreline of the blade all around the blank
the lump of tree in this case being a laminated lump of beech and mahogony. in this pic you should be able to see the laminations and the transfered pencil marks.
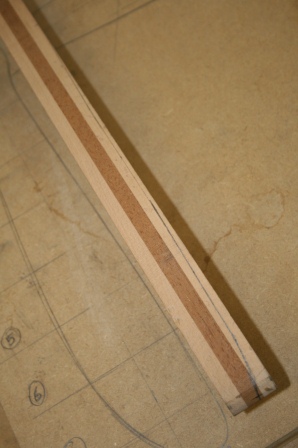
do this on both blades, and when done its out with the wood removeing equipment
chris
now there is nothing wrong with the one for it at present its just along with its refurb (and being a bit mad perhaps) i thought a nice new one would be good, now you dont just trip over these size props in your LMS, and to get one made is into 3 figures, and i dont mean £9.99, i thought in a Jeremy Clarkson moment, "cant be THAT hard surely" so orf i jolly well went.
what follows is in no way advocated as THE way to carve a prop, its just my self taught way, now there is a bit of maths to get your noggin around but its only simple trigonometry so no fear there then, BUT for my first attempt i cheated. i constructed a simple MDF jig to hold the prop i allready had, marked it out at intervals along its diameter and measured up from base to centre line of the blade all the way around and marked the hight in my little note book, the prop was then turned 90 degrees and an outline drawn nice and neatly around the blade, from this i made a template to use to draw the profile onto my lump of tree
after the profile was tranfered to wood lump it was swiftly cut on band saw, new blade essential here, then it was laid onto the jig clamped in place with the big silver nut you may see in some of the pics, at the marked points the sizes aquired from the original were marked on the blank and you end up with a line of dots you join up and end up with the centreline of the blade all around the blank
the lump of tree in this case being a laminated lump of beech and mahogony. in this pic you should be able to see the laminations and the transfered pencil marks.
do this on both blades, and when done its out with the wood removeing equipment
chris
Last edit: 21 May 2013 15:03 by CeeJayP.
Thanks: Garry Pollard
Please Log in or Create an account to join the conversation.
- CeeJayP
-
Topic Author
- Offline
- Elite Member
-
- Hi Peeps
Less
More
- Posts: 386
- Thank you received: 833
21 May 2013 15:14 - 21 May 2013 16:00 #2
by CeeJayP
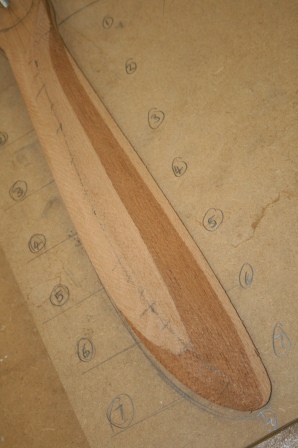
now the wood workers out ther would be wise to look away now, as i got out the spokeshaves and scrapers and then put them all away and found just what an old engineer needed, a big file, well a nice sharp half round surform to be exact :whistle: and set about removing wood.
after roughing it out to a couple of mm either side of the centreline i then drew another guide line along the thickest point on the original blade at a distance measured at the same points but back from the leading edge
then set about refining it to start to give an aerofoil shape to the blade, still only rough here but a bit more accurate, the section is a basic clarke Y with a slight undercamber when finished, but for now this is where i am at, one blade roughed out and awaiting the time to do t,other one which will take a bit longer cos now i have to keep refering to the other blade and sizes to ensure i dont end up with a 30x12 by 30 x10 3/4 :woohoo:
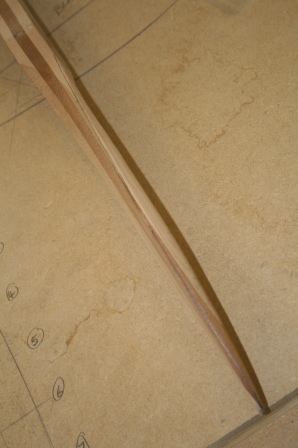
so heres the leading edge shot of the first blade
thats all for now peeps.
well all except for a slight confession, i have done a test prop to learn the art a bit before commiting deadly surgery on a nice bit of wood, and ended up with a prop shaped bit of wood, but wrong in a few area,s but it looks nice on a wall :whistle: :whistle:
chris
Replied by CeeJayP on topic I need a prop,
now the wood workers out ther would be wise to look away now, as i got out the spokeshaves and scrapers and then put them all away and found just what an old engineer needed, a big file, well a nice sharp half round surform to be exact :whistle: and set about removing wood.
after roughing it out to a couple of mm either side of the centreline i then drew another guide line along the thickest point on the original blade at a distance measured at the same points but back from the leading edge
then set about refining it to start to give an aerofoil shape to the blade, still only rough here but a bit more accurate, the section is a basic clarke Y with a slight undercamber when finished, but for now this is where i am at, one blade roughed out and awaiting the time to do t,other one which will take a bit longer cos now i have to keep refering to the other blade and sizes to ensure i dont end up with a 30x12 by 30 x10 3/4 :woohoo:
so heres the leading edge shot of the first blade
thats all for now peeps.
well all except for a slight confession, i have done a test prop to learn the art a bit before commiting deadly surgery on a nice bit of wood, and ended up with a prop shaped bit of wood, but wrong in a few area,s but it looks nice on a wall :whistle: :whistle:
chris
Last edit: 21 May 2013 16:00 by Garry Pollard.
Thanks: Garry Pollard, Klipkopwildlife, old fart
Please Log in or Create an account to join the conversation.
- old fart
-

- Offline
- Forum Veteran
-

Less
More
- Posts: 2144
- Thank you received: 705
21 May 2013 15:29 - 21 May 2013 15:30 #3
by old fart
I believe it's otherwise called a "tractor prop" used for traction.
There is nothing like a dream to create the future.
Electrickery is the work of the devil.
Replied by old fart on topic I need a prop,
CeeJayP wrote: ....if you want to be a bit anoracky here it is a propellor as it propelling "pushing" the aeroplane along from behind whereas one on the front of a plane is pulling it along and is an airscrew!!) but hey i need one for the back of the DH2 whatever its called!!
I believe it's otherwise called a "tractor prop" used for traction.
There is nothing like a dream to create the future.
Electrickery is the work of the devil.
Last edit: 21 May 2013 15:30 by old fart.
Please Log in or Create an account to join the conversation.
- CeeJayP
-
Topic Author
- Offline
- Elite Member
-
- Hi Peeps
Less
More
- Posts: 386
- Thank you received: 833
21 May 2013 15:51 - 21 May 2013 15:51 #4
by CeeJayP
Replied by CeeJayP on topic I need a prop,
could well be, it was on a US site they called it an airscrew, for an AIRPLANE i s,pose
chris
chris
Last edit: 21 May 2013 15:51 by CeeJayP.
Please Log in or Create an account to join the conversation.
- Klipkopwildlife
-

- Offline
- Administrator
-

- I'm supposed to be retired!
21 May 2013 17:19 #5
by Klipkopwildlife
Do it now, you may never get another chance
Replied by Klipkopwildlife on topic I need a prop,
Err, 'airscrew', I thought that's what you had to do to join the 'mile high club'!
Do it now, you may never get another chance
Please Log in or Create an account to join the conversation.
- Eric
-

- Offline
- Moderator
-

Less
More
- Posts: 13726
- Thank you received: 14470
21 May 2013 21:24 #6
by Eric
if you are calm and collected when all about you are going berserk - you've missed something important!
Replied by Eric on topic I need a prop,
I tried carving a prop, once, a long time ago, for a Keil Kraft elastic powered kit thingy. I ended up with a prop, BUT one blade was pulling, and one was pushing, so it wasn't very effective! :oops:
if you are calm and collected when all about you are going berserk - you've missed something important!
Please Log in or Create an account to join the conversation.
- old fart
-
- Offline
- Forum Veteran
-
Less
More
- Posts: 2144
- Thank you received: 705
21 May 2013 23:03 #7
by old fart
There is nothing like a dream to create the future.
Electrickery is the work of the devil.
Replied by old fart on topic I need a prop,
I did that too, twice when I was a kid. :lol: :lol: :lol:
There is nothing like a dream to create the future.
Electrickery is the work of the devil.
Thanks: Eric
Please Log in or Create an account to join the conversation.
- Eric
-
- Offline
- Moderator
-
Less
More
- Posts: 13726
- Thank you received: 14470
21 May 2013 23:30 #8
by Eric
if you are calm and collected when all about you are going berserk - you've missed something important!
Replied by Eric on topic I need a prop,
Not just me, then! 
if you are calm and collected when all about you are going berserk - you've missed something important!
Please Log in or Create an account to join the conversation.
- Quorneng
-

- Offline
- Forum Master
-

Less
More
- Posts: 9436
- Thank you received: 19043
22 May 2013 01:28 #9
by Quorneng
Replied by Quorneng on topic I need a prop,
I have carved a few wooden props for my scale RTP jobs.

The above is small 6x4(?) and for modest power (40W) so carved/sanded from laminated hard balsa to give a scale effect when stained. Very light it works well.
The above is small 6x4(?) and for modest power (40W) so carved/sanded from laminated hard balsa to give a scale effect when stained. Very light it works well.
Please Log in or Create an account to join the conversation.
- CeeJayP
-
Topic Author
- Offline
- Elite Member
-
- Hi Peeps
Less
More
- Posts: 386
- Thank you received: 833
22 May 2013 08:16 #10
by CeeJayP
Replied by CeeJayP on topic I need a prop,
Ah HA!!
an expert!!!
chris
an expert!!!
chris
Please Log in or Create an account to join the conversation.
- CeeJayP
-
Topic Author
- Offline
- Elite Member
-
- Hi Peeps
Less
More
- Posts: 386
- Thank you received: 833
03 Jun 2013 10:18 #11
by CeeJayP
Replied by CeeJayP on topic I need a prop,
Well the lump of wood is slowley starting to resemble a useable prop, so just to back trac a bit here is a pic of the outline template i made from MDF 6mm thick

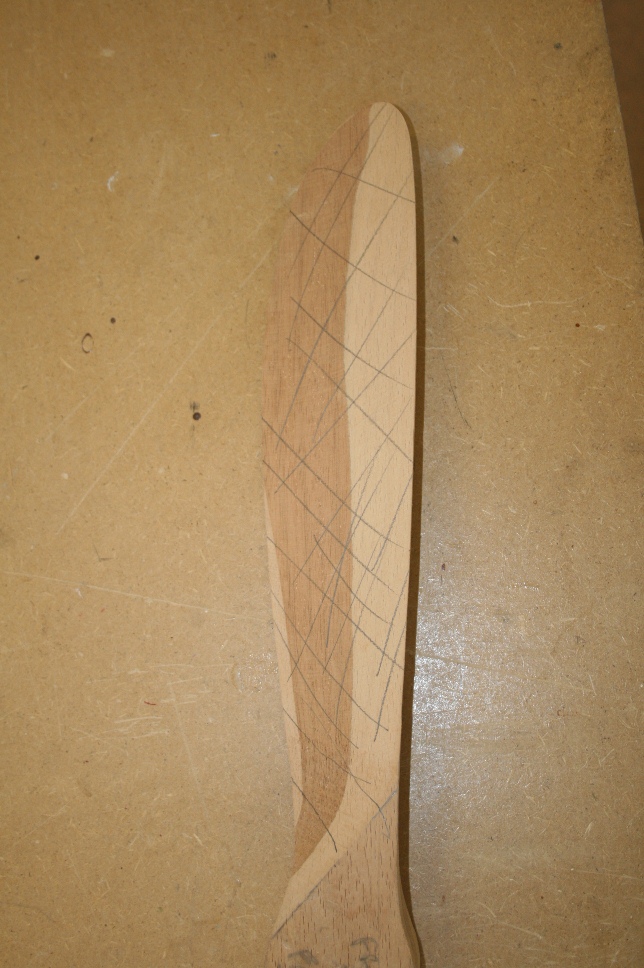
as seen before i hacked a lot of wood away to get it to roughly the correct shape then started to mark it out for the finishing bit, front of blade has the line of the thickest part of the section marked on,

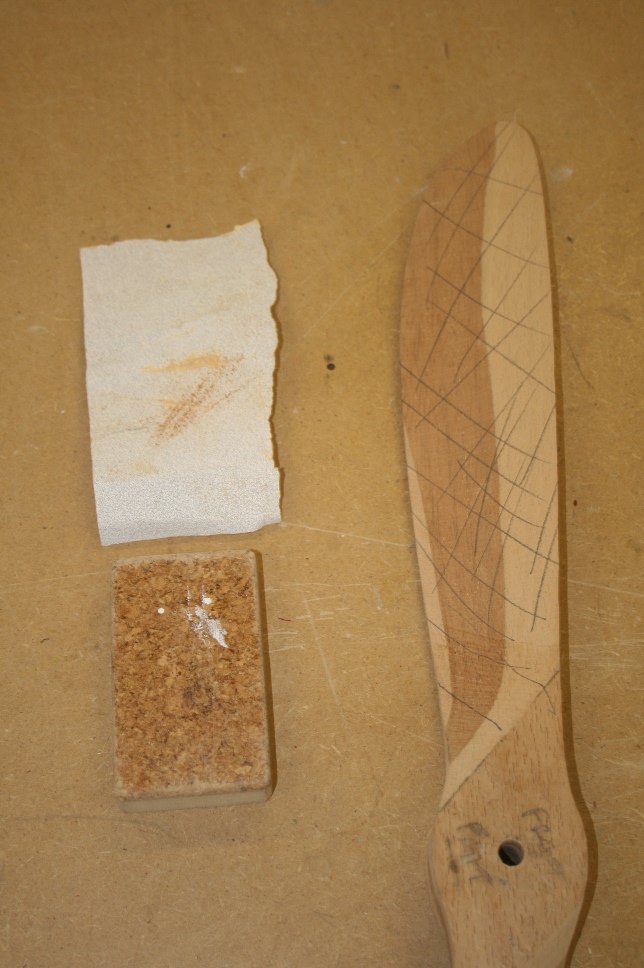
back is cross hatched to enable me to see where i sand as the rear face will eventualy be undercambered very slightly
this is done with a purpose made sanding block with the curve on its face
chris
as seen before i hacked a lot of wood away to get it to roughly the correct shape then started to mark it out for the finishing bit, front of blade has the line of the thickest part of the section marked on,
back is cross hatched to enable me to see where i sand as the rear face will eventualy be undercambered very slightly
this is done with a purpose made sanding block with the curve on its face
chris
Thanks: Eric, Klipkopwildlife, old fart
Please Log in or Create an account to join the conversation.
- CeeJayP
-
Topic Author
- Offline
- Elite Member
-
- Hi Peeps
Less
More
- Posts: 386
- Thank you received: 833
03 Jun 2013 10:21 #12
by CeeJayP
Replied by CeeJayP on topic I need a prop,
AND after a while and with me resembling a large flour grader we end up with a blade that looks like this
front

and back
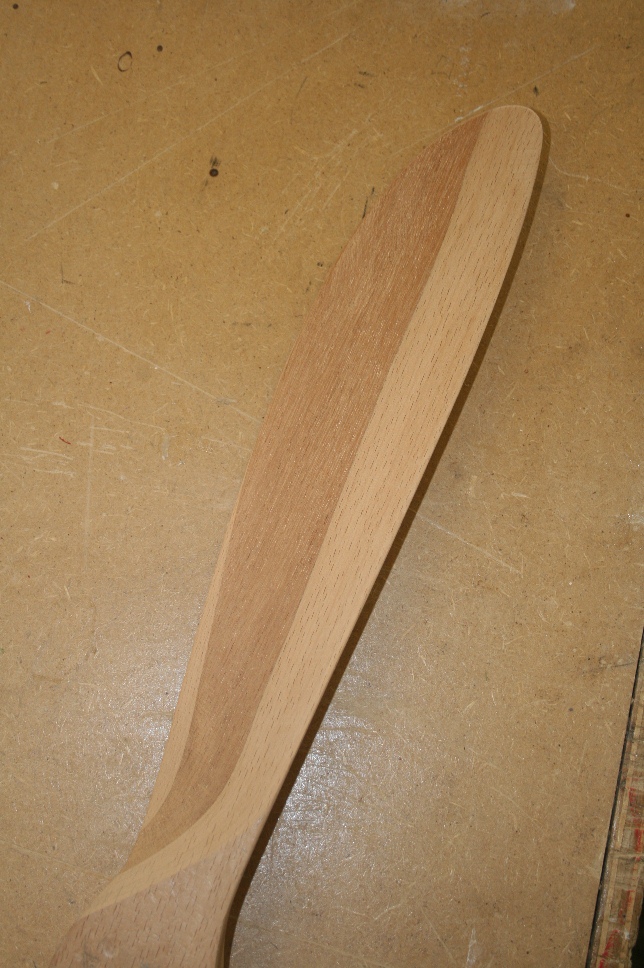
now to do the other one to match...more tommorrow!!!
chris
front
and back
now to do the other one to match...more tommorrow!!!
chris
Thanks: Garry Pollard, Eric, Klipkopwildlife, blue123, old fart
Please Log in or Create an account to join the conversation.
- Eric
-
- Offline
- Moderator
-
Less
More
- Posts: 13726
- Thank you received: 14470
03 Jun 2013 18:38 - 03 Jun 2013 18:39 #13
by Eric
if you are calm and collected when all about you are going berserk - you've missed something important!
Replied by Eric on topic I need a prop,
Looks good, Mr McDougal! (or was it Homepride?)
if you are calm and collected when all about you are going berserk - you've missed something important!
Last edit: 03 Jun 2013 18:39 by Eric. Reason: added a comment
Please Log in or Create an account to join the conversation.
- CeeJayP
-
Topic Author
- Offline
- Elite Member
-
- Hi Peeps
Less
More
- Posts: 386
- Thank you received: 833
06 Jun 2013 08:56 #14
by CeeJayP
Replied by CeeJayP on topic I need a prop,
Well then
Its finished, subject to final testing etc it will need makers logo,s and perhaps the "copper" leading edge painting on but i will see if it makes a draft first, finish sanded, checked tracking (its out less than 1mm) checked radius of each blade, cock on, and two coats of sealer sanded with very fine paper twixt each coat i ended up with this.
front

Back
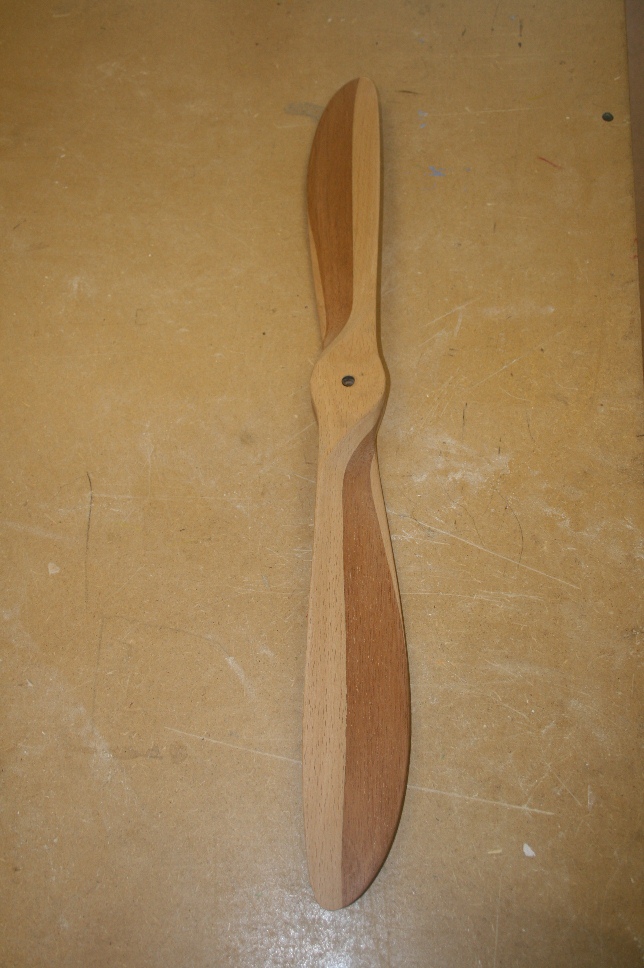
and one assembled onto prop driver
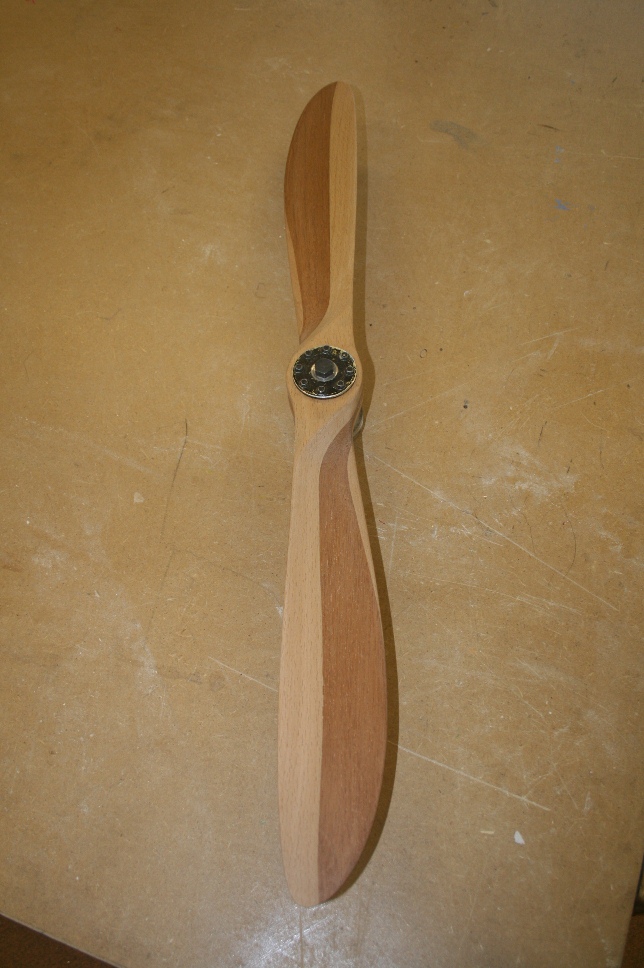
..
cheers all
chris
Its finished, subject to final testing etc it will need makers logo,s and perhaps the "copper" leading edge painting on but i will see if it makes a draft first, finish sanded, checked tracking (its out less than 1mm) checked radius of each blade, cock on, and two coats of sealer sanded with very fine paper twixt each coat i ended up with this.
front
Back
and one assembled onto prop driver
..
cheers all
chris
Thanks: old fart
Please Log in or Create an account to join the conversation.
- CeeJayP
-
Topic Author
- Offline
- Elite Member
-
- Hi Peeps
Less
More
- Posts: 386
- Thank you received: 833
06 Jun 2013 09:04 #15
by CeeJayP
Replied by CeeJayP on topic I need a prop,
missed a picture
noticed on the thread in the pics its hard to estimate the size of prop so i took this one
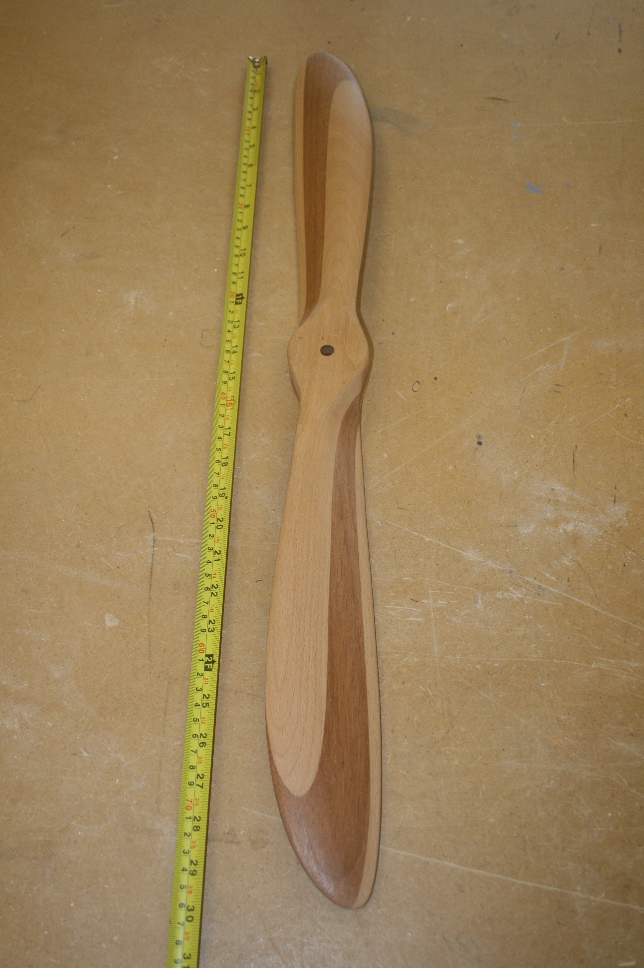
chris
noticed on the thread in the pics its hard to estimate the size of prop so i took this one
chris
Thanks: Eric, Quorneng, blue123, old fart
Please Log in or Create an account to join the conversation.
Time to create page: 1.195 seconds