
- Posts: 13729
- Thank you received: 14473
Here's one for the serious builders. Show us your ideas
Another BH Macchi C200 - placemarker
- Eric
-

- Offline
- Moderator
-

Less
More
23 Mar 2014 12:25 #31
by Eric
if you are calm and collected when all about you are going berserk - you've missed something important!
Replied by Eric on topic Another BH Macchi C200 - placemarker
I note that you also have a four-legged furry assistant, Rob!
If that lite-ply is the usual Chinese stuff, it shatters if you look at it wrong! Don't rely on it for structural strength!
If that lite-ply is the usual Chinese stuff, it shatters if you look at it wrong! Don't rely on it for structural strength!
if you are calm and collected when all about you are going berserk - you've missed something important!
Please Log in or Create an account to join the conversation.
- RobC
-
 Topic Author
- Offline
- Premium Member
-

Less
More
- Posts: 169
- Thank you received: 215
23 Mar 2014 14:14 #32
by RobC
Replied by RobC on topic Another BH Macchi C200 - placemarker
There's a pair of furry assistants floating around, both domestic long hairs which makes trying to paint anything a real pain. At a guess 10% of my diet consists of curried,
fried, grilled, poached or boiled cat fur.

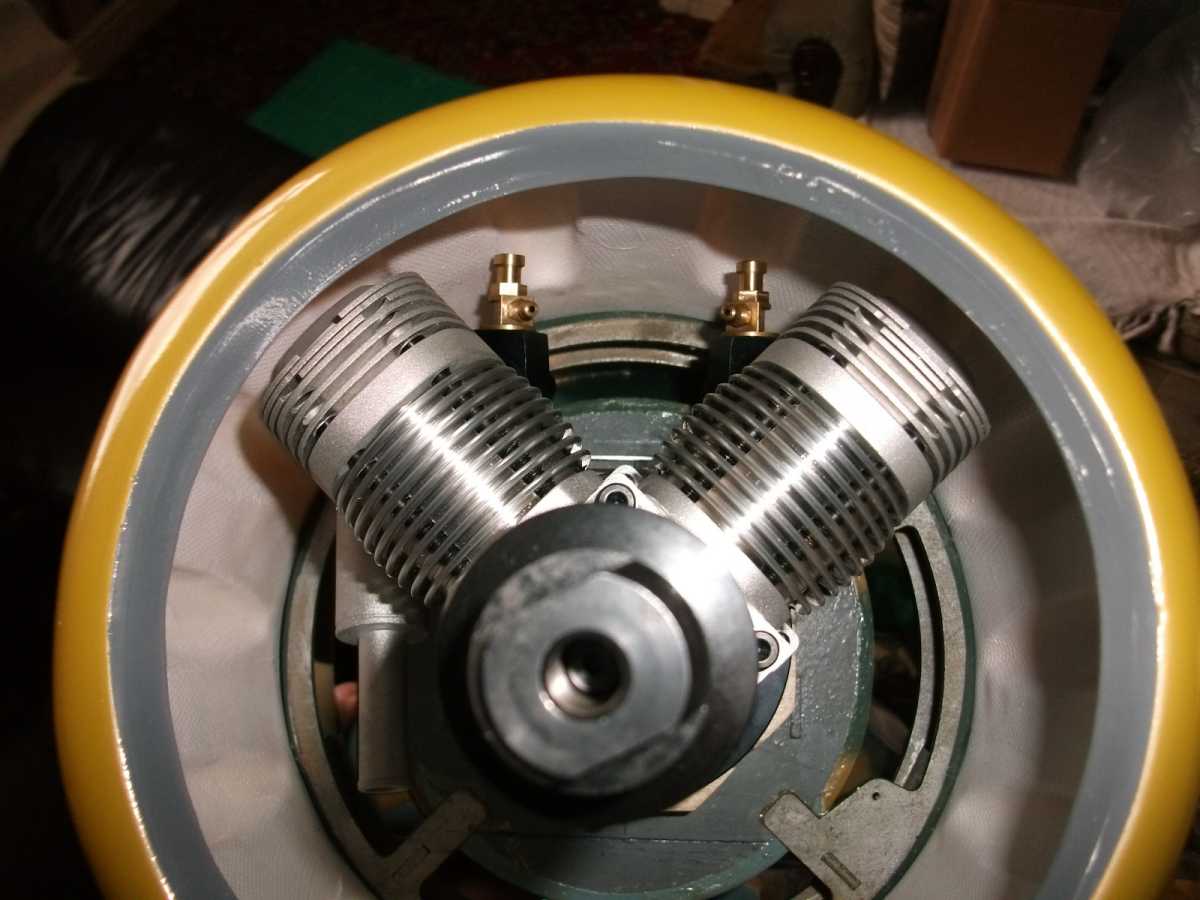
I wish I could decide which way up to mount the engine! Upright the tank is at least an inch lower than the needle level or inverted it's above by 1 1/2". Upright I end up with the top of the needles poking out the top of the cowl, inverted they stay inside - just! Upright it's easier to duct the exhaust out, but inverted gives a lower c of g to reduce tipover tendencies on landing.
Aaaaarrrrrggghhhh!
fried, grilled, poached or boiled cat fur.
I wish I could decide which way up to mount the engine! Upright the tank is at least an inch lower than the needle level or inverted it's above by 1 1/2". Upright I end up with the top of the needles poking out the top of the cowl, inverted they stay inside - just! Upright it's easier to duct the exhaust out, but inverted gives a lower c of g to reduce tipover tendencies on landing.
Aaaaarrrrrggghhhh!
Thanks: Klipkopwildlife, Quorneng, Sarah-Jane Smith, old fart, Geoff dales
Please Log in or Create an account to join the conversation.
- old fart
-

- Offline
- Forum Veteran
-

Less
More
- Posts: 2144
- Thank you received: 705
23 Mar 2014 15:42 - 23 Mar 2014 15:43 #33
by old fart
There is nothing like a dream to create the future.
Electrickery is the work of the devil.
Replied by old fart on topic Another BH Macchi C200 - placemarker
If I were you, I would forget aesthetics and concentrate on practilability, just mount the engine the best way to suite tank possitions and the neatest exhaust outlet.
Afterall, you will need to re-adjust the needle valves at some point to suit the various atmospheric conditions,,,,,,,, and you won't see them in flight.
Afterall, you will need to re-adjust the needle valves at some point to suit the various atmospheric conditions,,,,,,,, and you won't see them in flight.
There is nothing like a dream to create the future.
Electrickery is the work of the devil.
Last edit: 23 Mar 2014 15:43 by old fart.
Please Log in or Create an account to join the conversation.
- RobC
-
Topic Author
- Offline
- Premium Member
-
Less
More
- Posts: 169
- Thank you received: 215
23 Mar 2014 16:13 #34
by RobC
Replied by RobC on topic Another BH Macchi C200 - placemarker
you're right of course, and upright makes most sense. I'd rather have the tank a little low than a lot high so I guess that's how it's going in.
For now
Eric - like most ARTFs the whole structure seems to be made of liteply fretted to replicate a spaceframe, which would be ok if it was built from stripwood with the grain direction optimised or aluminium or steel tube, but it's ply so much of the structure is effectively 5-10mm wide strips of ply with the major grain at odd angles. One heavy landing and I think I'm likely to have a vinyl bag of confetti to take home :evil:
Thanks: Sarah-Jane Smith
Please Log in or Create an account to join the conversation.
- RobC
-
Topic Author
- Offline
- Premium Member
-
Less
More
- Posts: 169
- Thank you received: 215
27 Mar 2014 09:26 #35
by RobC
Replied by RobC on topic Another BH Macchi C200 - placemarker
So I fitted the tailwheel and rudder just because I could. Too late for a photo of the components, but essentially the top of the tailwheel leg is drilled axially to take an L shaped torque rod which extends up through the fuselage and is epoxied into the base of the rudder. The control horn is on the tailwheel leg, which is drilled so that the horn securing screw goes through the leg wall and clamps the rudder torque wire in place.
Still with me?
Ok, like Geoff I found the molded plastic mounting bracket for the tailwheel was tight on the leg, so I opened it up to a close running fit (or so I thought). As the bracket comes bolted into the fuselage depths there's not a lot of access.
Next I assembled this lot and mounted the rudder with it's soft wire hinge pin, epoxying it onto the torque rod. Masking tape stopped glue running down the torque rod.
Let's just say that the assembly is now a little tight. Even after working it for a while and running a few drops of ptfe lubricant down the leg it's still a bit squeaky. My guess is that the drill was too blunt and stretched the plastic molding rather than cutting it, and overnight it's returned to it's original size - does that sound feasible?
Whatever the cause I can't dismantle it for reworking as the torque rod is too tight in the leg drilling to separate without doing some damage. Bugger.
At least the 10k.cm servo doesn't appear to care, no buzzing at neutral or lack of movement, but the 2mm wire pushrod does allow for poor centreing because of the drag of the tailwheel bearing.
I'm hoping that it will free up after a couple of landings on grass :dry:
Thanks: Sarah-Jane Smith
Please Log in or Create an account to join the conversation.
- Quorneng
-

- Offline
- Forum Master
-

Less
More
- Posts: 9436
- Thank you received: 19043
27 Mar 2014 11:25 #36
by Quorneng
Replied by Quorneng on topic Another BH Macchi C200 - placemarker
Rob C
I fear your analysis of the light ply structure is quite correct. Ply is a good 'skin' material but poor as a structural beam.
It is a case of the needs of production (laser cut sheet) taking precedence over structural efficiency but then without this technique the cost of making a plane would be astronomic. :woohoo:
A tight steel in plastic bearing? Unfortunately the very flexibility of the plastic will ensure it remains tight for quite some time. At least the friction should reduce the chance of any tail wheel shimmy.
Please Log in or Create an account to join the conversation.
- RobC
-
Topic Author
- Offline
- Premium Member
-
Less
More
- Posts: 169
- Thank you received: 215
27 Mar 2014 12:22 #37
by RobC
Replied by RobC on topic Another BH Macchi C200 - placemarker
yes, I expect I'll have a vague rudder for a while. Just as well I never use it after take-off :whistle:
Please Log in or Create an account to join the conversation.
- RobC
-
Topic Author
- Offline
- Premium Member
-
Less
More
- Posts: 169
- Thank you received: 215
28 Mar 2014 14:44 - 28 Mar 2014 14:49 #38
by RobC
Replied by RobC on topic Another BH Macchi C200 - placemarker
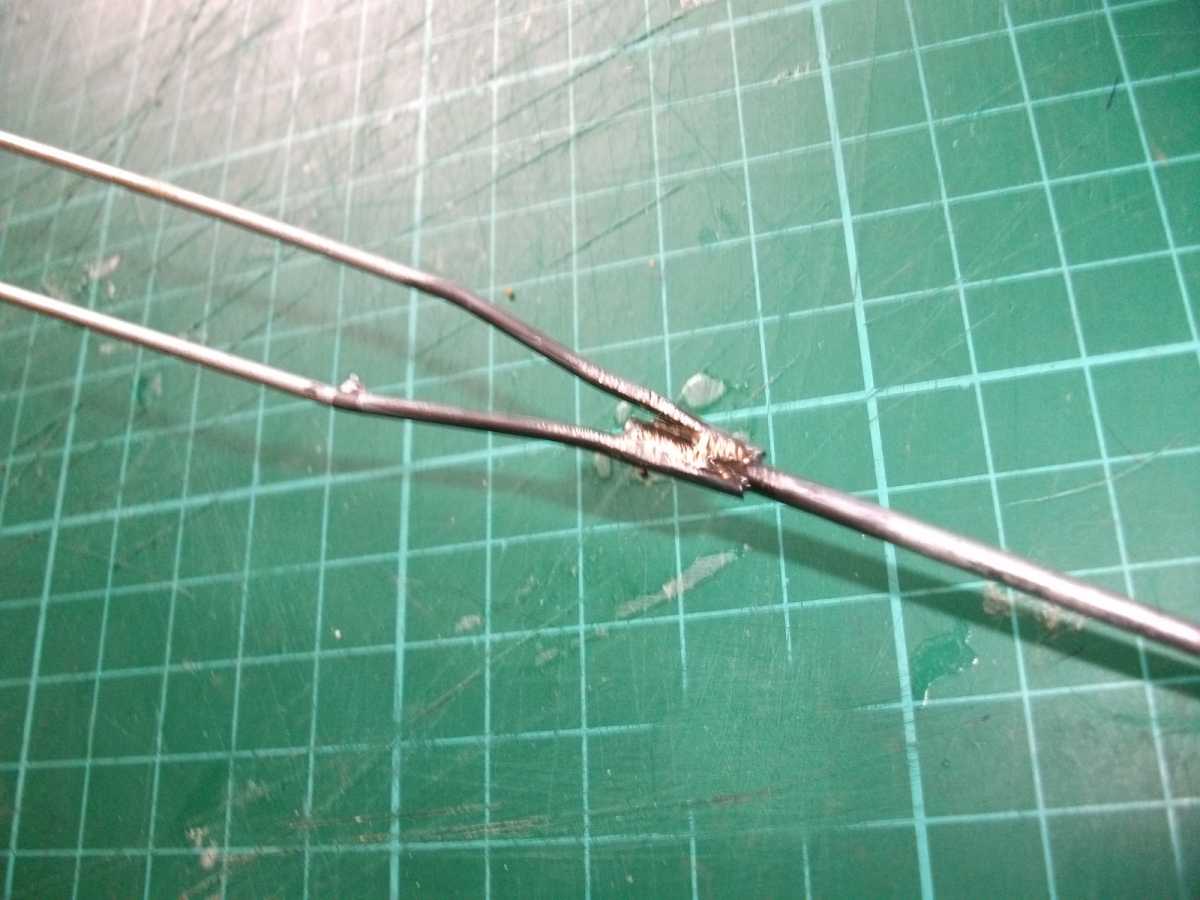
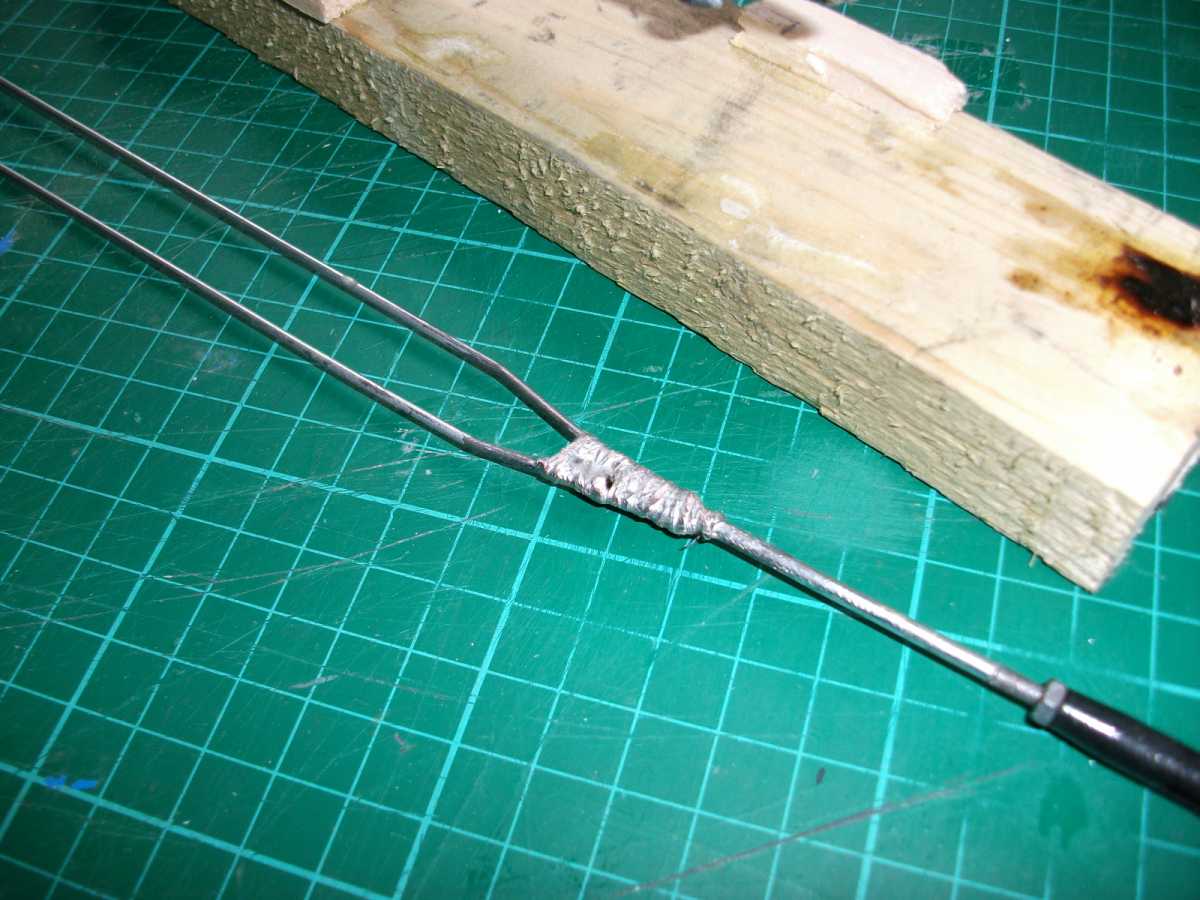
I took a soldering iron to my pushrod, it looked to be silver soldered but badly so I cleaned the joint up, wrapped it in copper wire and flooded it with solder.
Last night I tried a wing in place to see how the retracts (Lado electrics) coped with the spring loaded inner doors. I was a little surprised it worked so well,
it just needs 1/8" off the 'fingers' to allow for the bigger wheel diameter.
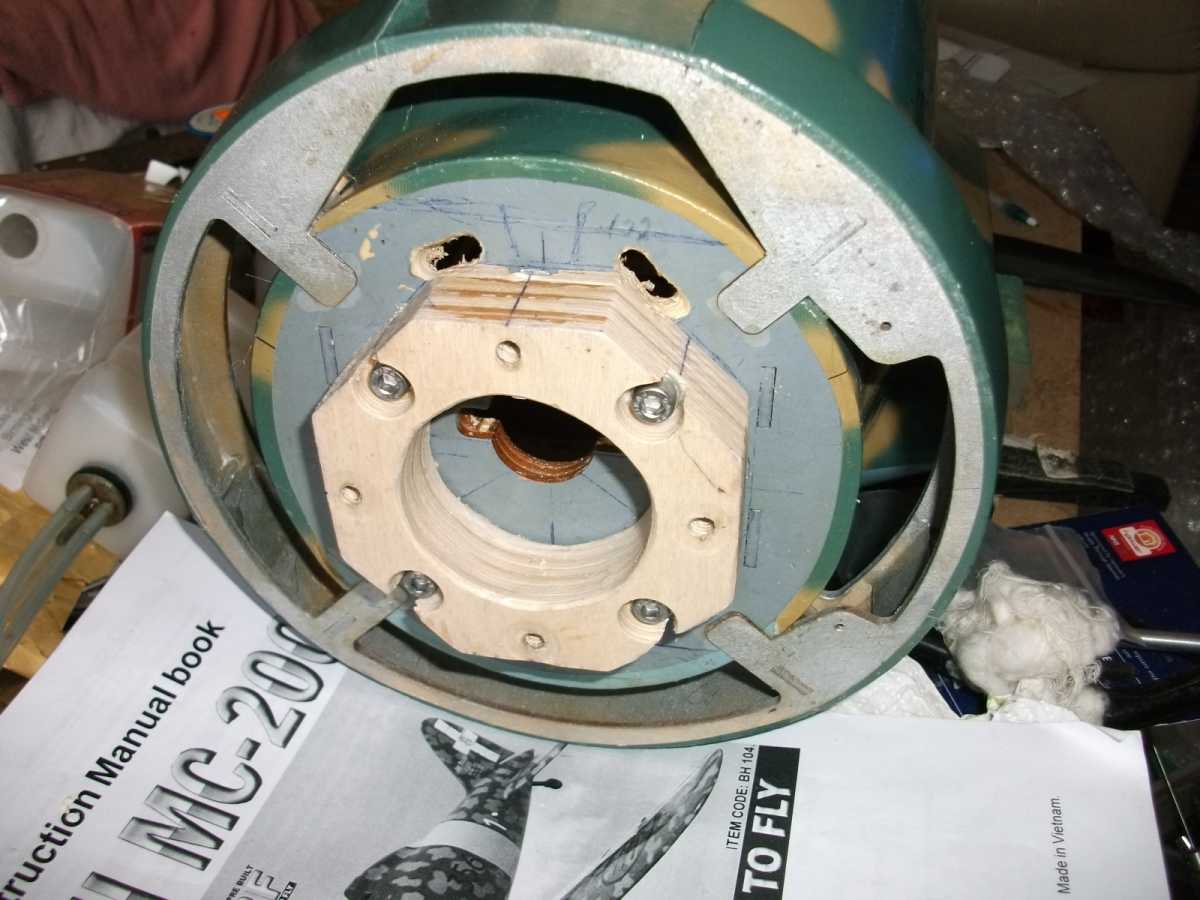
I've fitted the 1" thick engine spacer I need for the Laser and slotted the bulkhead for feed pipes,
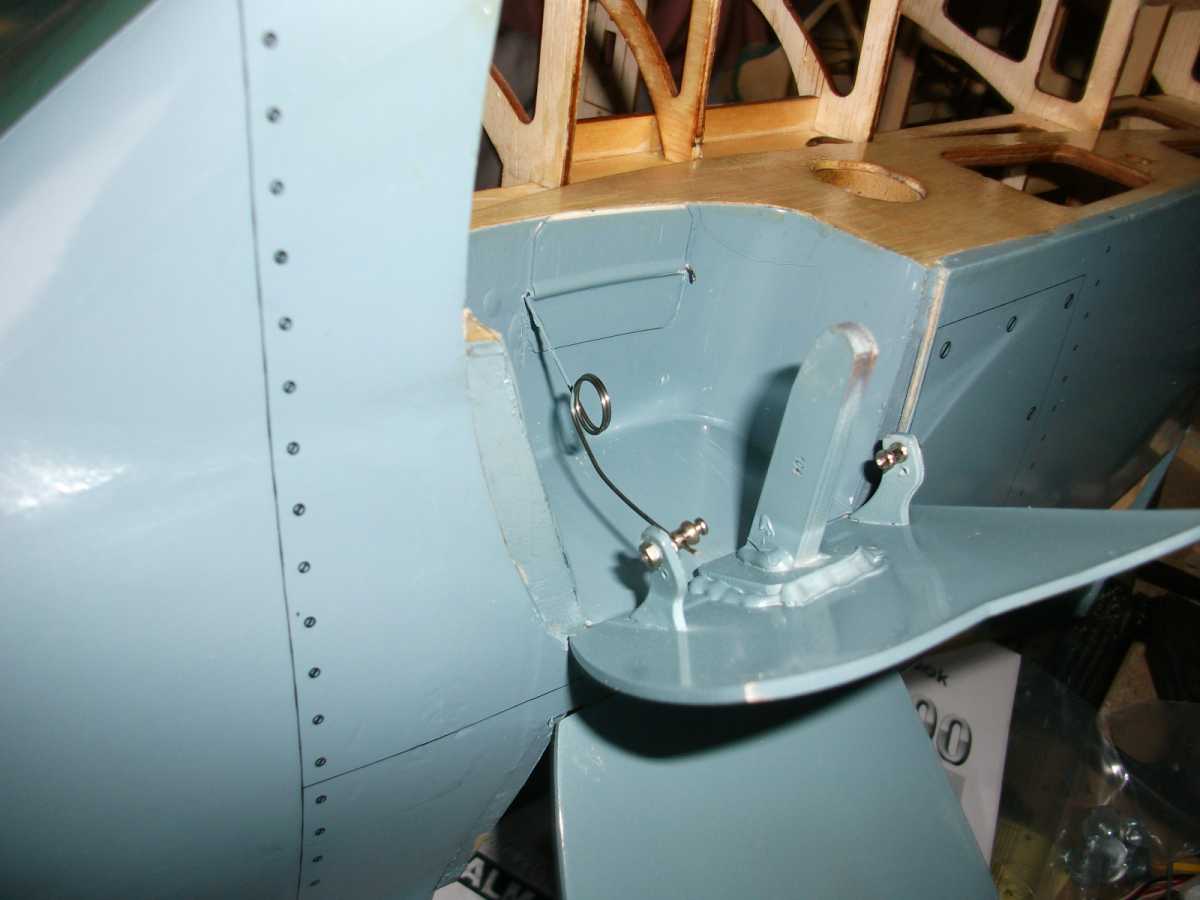
then this morning I've sealed the rudder mechanism in. I used canopy glue so I've got a chance of peeling it apart if I ever need to. The glue is still setting in the photo, once it's dry I'll touch it up with Olive green enamel.

Last night I tried a wing in place to see how the retracts (Lado electrics) coped with the spring loaded inner doors. I was a little surprised it worked so well,
it just needs 1/8" off the 'fingers' to allow for the bigger wheel diameter.
I've fitted the 1" thick engine spacer I need for the Laser and slotted the bulkhead for feed pipes,
then this morning I've sealed the rudder mechanism in. I used canopy glue so I've got a chance of peeling it apart if I ever need to. The glue is still setting in the photo, once it's dry I'll touch it up with Olive green enamel.
Last edit: 28 Mar 2014 14:49 by RobC.
Thanks: Klipkopwildlife, Quorneng, Sarah-Jane Smith, old fart
Please Log in or Create an account to join the conversation.
- RobC
-
Topic Author
- Offline
- Premium Member
-
Less
More
- Posts: 169
- Thank you received: 215
28 Mar 2014 14:51 - 28 Mar 2014 17:29 #39
by RobC
I give up, the mounting photo won't insert - is there a maximum number of images per post or something?
there was just a placemarker in the post above, but when I inserted it in this post it appeared in the previous post???? now removed to see what happens
Replied by RobC on topic Another BH Macchi C200 - placemarker
I give up, the mounting photo won't insert - is there a maximum number of images per post or something?
there was just a placemarker in the post above, but when I inserted it in this post it appeared in the previous post???? now removed to see what happens
Last edit: 28 Mar 2014 17:29 by .
Thanks: Klipkopwildlife, blue123, Sarah-Jane Smith, Geoff dales
Please Log in or Create an account to join the conversation.
- Geoff dales
-

- Offline
- Premium Member
-
Less
More
- Posts: 118
- Thank you received: 265
28 Mar 2014 21:41 #40
by Geoff dales
I fancy twins
Replied by Geoff dales on topic Another BH Macchi C200 - placemarker
Coming on Rob good idea about using cockpit glue for mouldings
I fancy twins
Please Log in or Create an account to join the conversation.
- RobC
-
Topic Author
- Offline
- Premium Member
-
Less
More
- Posts: 169
- Thank you received: 215
29 Mar 2014 13:31 #41
by RobC
Replied by RobC on topic Another BH Macchi C200 - placemarker
Well, the tank didn't last long 
While inserting the bung, one of the pre-bent plastic feed pipes dropped off! A DuBro 20oz is the same cross section but a little longer, so that's going in. Meanwhile the first coat of satin on the fuselage is drying off - about time for the second coat. The size of the thing I can't get everyting in in one go so it's one unit at a time.
While inserting the bung, one of the pre-bent plastic feed pipes dropped off! A DuBro 20oz is the same cross section but a little longer, so that's going in. Meanwhile the first coat of satin on the fuselage is drying off - about time for the second coat. The size of the thing I can't get everyting in in one go so it's one unit at a time.
Please Log in or Create an account to join the conversation.
- RobC
-
Topic Author
- Offline
- Premium Member
-
Less
More
- Posts: 169
- Thank you received: 215
31 Mar 2014 10:38 #42
by RobC
Replied by RobC on topic Another BH Macchi C200 - placemarker
2 cans of Flair Spectrum satin fuel proofer later I think I need some new filters for my paint mask. After gobbing on two coats on Saturday I felt distinctly under the weather for the rest of the weekend. I think I've got a couple of runs under one wingtip, I guess that's what you get for spraying after being called out for work three times overnight.
So now it all stays in the garage until all traces of solvents have gone.
So now it all stays in the garage until all traces of solvents have gone.
Please Log in or Create an account to join the conversation.
- User
-

Less
More
- Thank you received: 0
31 Mar 2014 10:42 #43
by
Replied by on topic Another BH Macchi C200 - placemarker
Wise move Rob. Used to affect me the same way
Garry
Garry
Please Log in or Create an account to join the conversation.
- Geoff dales
-
- Offline
- Premium Member
-
Less
More
- Posts: 118
- Thank you received: 265
31 Mar 2014 11:08 #44
by Geoff dales
I fancy twins
Replied by Geoff dales on topic Re:Another BH Macchi C200 - placemarker
Good idea about the dubro tank Rob. Think ive got one in the cupboard woukd certainly save me from having to pack the kit tank bank a bit so the pipes wull clear
my smart phone is more clever than me
my smart phone is more clever than me
I fancy twins
Please Log in or Create an account to join the conversation.
- RobC
-
Topic Author
- Offline
- Premium Member
-
Less
More
- Posts: 169
- Thank you received: 215
31 Mar 2014 12:46 #45
by RobC
Geoff, your petrol motor will have a pump so you shouldn't have any problem fitting the DuBro tank in the designated place or anywhere else that you choose, but with the Laser I've had to jack the tank up as far as possible which means whatever tank I use will come up against the second ply ring former and upper fuselage stringers. The DuBro end up with a fair bit protruding back into the radio bay but with the bung 'on the bottom' I get clear runs for the feed pipes.
Replied by RobC on topic Another BH Macchi C200 - placemarker
I use a proper carbon filtered mask to save what's left of my lungs, that worked fine with Solarlac paints but didn't seem to work for the solvents in the Flair fuel proofer. The last Flair paint I used was Cub Yellow and clear gloss neither of which seemed particularly toxic (relatively speaking) but this one was nasty.Garry Pollard wrote: Wise move Rob. Used to affect me the same way
Garry
Geoff, your petrol motor will have a pump so you shouldn't have any problem fitting the DuBro tank in the designated place or anywhere else that you choose, but with the Laser I've had to jack the tank up as far as possible which means whatever tank I use will come up against the second ply ring former and upper fuselage stringers. The DuBro end up with a fair bit protruding back into the radio bay but with the bung 'on the bottom' I get clear runs for the feed pipes.
Please Log in or Create an account to join the conversation.
Time to create page: 0.920 seconds