
- Posts: 8
- Thank you received: 6
Keil Kraft 23" Pixie
- DavidW
- Topic Author
- Offline
- New Member
-

Less
More
20 Jun 2020 14:00 #1
by DavidW
Keil Kraft 23" Pixie was created by DavidW
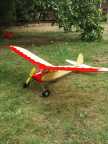
I am a beginner trying to build the 23” Pixie for my grandson. I originally bought the kit for my daughter 30 years ago but she was not that interested and it never got built. I recently discovered the Pixie box again; it was opened but seemed to contain everything that was needed including the plan and all the parts. I have now built the basic frame and the wings but am struggling with how the landing carriage and the wing struts should be built and attached to the frame. Should there be an instruction manual as well as the plan? If so is there anyway to get a copy. I have an information sheet that talks about the rubber motor and also how to cover the plane; however there is nothing about how to build the plane.
Any advice or information you can give would be very gratefully received
Many thanks
David
Any advice or information you can give would be very gratefully received
Many thanks
David
Thanks: Klipkopwildlife
Please Log in or Create an account to join the conversation.
- Quorneng
-

- Offline
- Forum Master
-

Less
More
- Posts: 10058
- Thank you received: 19043
20 Jun 2020 20:38 - 20 Jun 2020 20:40 #2
by Quorneng
Replied by Quorneng on topic Keil Kraft 23" Pixie
Hi DavidW
In my youth I have built a number of KK rubber powered planes but never the Pixie.
The plan certainly does not appear to have much in the way of instructions which is unusual as many similar kits of the period had the full instructions printed on the plan.
Is your cover sheet "Building and Flying the Pixie" as in this picture?

I would expect that sheet to have some building instructions and a the very least a full scale diagram of undercarriage wire and how to fix it.
The Pixie is not the simplest of builds as it has individual 'knock off' wings held in place by a rubber band across the top of the fuselage stretched from hooks made from a bent pin at the root of each wing. The wing struts are similar with a rubber band running through a tube across the bottom of the fuselage but I may be wrong.
Could you post a picture of what you have built so far?
The Auster Arrow of which I have build several was rather simpler. All the parts were simply glued together.

In my youth I have built a number of KK rubber powered planes but never the Pixie.
The plan certainly does not appear to have much in the way of instructions which is unusual as many similar kits of the period had the full instructions printed on the plan.
Is your cover sheet "Building and Flying the Pixie" as in this picture?
I would expect that sheet to have some building instructions and a the very least a full scale diagram of undercarriage wire and how to fix it.
The Pixie is not the simplest of builds as it has individual 'knock off' wings held in place by a rubber band across the top of the fuselage stretched from hooks made from a bent pin at the root of each wing. The wing struts are similar with a rubber band running through a tube across the bottom of the fuselage but I may be wrong.
Could you post a picture of what you have built so far?
The Auster Arrow of which I have build several was rather simpler. All the parts were simply glued together.
Last edit: 20 Jun 2020 20:40 by Quorneng.
Thanks: Klipkopwildlife, Flytilbroke
Please Log in or Create an account to join the conversation.
- Klipkopwildlife
-

- Offline
- Administrator
-

- I'm supposed to be retired!
21 Jun 2020 10:17 #3
by Klipkopwildlife
Do it now, you may never get another chance
Replied by Klipkopwildlife on topic Keil Kraft 23" Pixie
A warm welcome from me DavidW, a careful search of this site should find you quite a few hints and tips on covering. Quorneng and Pauld are both mines of information on this subject.
My take is as follows (I am not an expert) 23" sounds a bit small for a beginning aircraft, it's very difficult to get it light enough. There are tissues and tissues, to my mind Esaki is the best if you can get it. Most tissues have a grain, getting the direction right is one of the key issues. Gluing the tissue to the structure is a subject on its own, Prit seems popular as does painting thick dope on the attachment points and allowing it to dry, then you place the tissue over the structure, try and use a whole piece with particular attention to the grain. Stick one end by painting thinners on the outside of the tissue, the thinners softens the dope which migrates through the tissue, when dry then gently pull the tissue to the other extremity and stick using the same method.
Once all the tissue is stuck hold lightly down on a flat surface and spray with cold water, once dry the tissue will have tautened, you can then dope the surface to give it strength. I know that Pauld uses Ezidope and a sponge.
Rubber motors is another subject (black art) that is a book on its own and one I know nothing about! Even the lubrication causes power differences. Good luck.
My take is as follows (I am not an expert) 23" sounds a bit small for a beginning aircraft, it's very difficult to get it light enough. There are tissues and tissues, to my mind Esaki is the best if you can get it. Most tissues have a grain, getting the direction right is one of the key issues. Gluing the tissue to the structure is a subject on its own, Prit seems popular as does painting thick dope on the attachment points and allowing it to dry, then you place the tissue over the structure, try and use a whole piece with particular attention to the grain. Stick one end by painting thinners on the outside of the tissue, the thinners softens the dope which migrates through the tissue, when dry then gently pull the tissue to the other extremity and stick using the same method.
Once all the tissue is stuck hold lightly down on a flat surface and spray with cold water, once dry the tissue will have tautened, you can then dope the surface to give it strength. I know that Pauld uses Ezidope and a sponge.
Rubber motors is another subject (black art) that is a book on its own and one I know nothing about! Even the lubrication causes power differences. Good luck.
Do it now, you may never get another chance
Please Log in or Create an account to join the conversation.
- paul d
-
- Offline
- Forum Veteran
-

Less
More
- Posts: 2074
- Thank you received: 2292
22 Jun 2020 19:52 #4
by paul d
balsa is best.
Replied by paul d on topic Keil Kraft 23" Pixie
Hi David, what a lovely little model!
I've had a look at the plan and the wing struts are bound to the main spar at one end and need little wire hooks binding to there other end, these are joined with a rubber band passing through the plastic tube built into the fuselage ( just behind the first former) the undercarriage wire is simply sewn to to the first former ( a smear of epoxy will lock it in).
below is a copy of the Keil Kraft plan I down loaded from outerzone, presume yours is the same?
come back to us if you need more help, love to see the finished model, fancy one myself now

I've had a look at the plan and the wing struts are bound to the main spar at one end and need little wire hooks binding to there other end, these are joined with a rubber band passing through the plastic tube built into the fuselage ( just behind the first former) the undercarriage wire is simply sewn to to the first former ( a smear of epoxy will lock it in).
below is a copy of the Keil Kraft plan I down loaded from outerzone, presume yours is the same?
come back to us if you need more help, love to see the finished model, fancy one myself now
balsa is best.
Thanks: Klipkopwildlife
Please Log in or Create an account to join the conversation.
- Eric
-

- Offline
- Moderator
-

Less
More
- Posts: 15407
- Thank you received: 14309
22 Jun 2020 21:27 #5
by Eric
if you are calm and collected when all about you are going berserk - you've missed something important!
Replied by Eric on topic Keil Kraft 23" Pixie
Is that an Australian copy? ![[badass]](/media/kunena/emoticons/bad_boys_20.gif "[badass]")
if you are calm and collected when all about you are going berserk - you've missed something important!
Please Log in or Create an account to join the conversation.
- paul d
-
- Offline
- Forum Veteran
-
Less
More
- Posts: 2074
- Thank you received: 2292
23 Jun 2020 06:53 #6
by paul d
balsa is best.
Replied by paul d on topic Keil Kraft 23" Pixie
It's really strange but pictures via my phone seem to have a mind of there own????
balsa is best.
Please Log in or Create an account to join the conversation.
- DavidW
- Topic Author
- Offline
- New Member
-
Less
More
- Posts: 8
- Thank you received: 6
23 Jun 2020 16:59 #7
by DavidW
Replied by DavidW on topic Keil Kraft 23" Pixie
To Quorneng
Many thanks for your very helpful and speedy response, much appreciated
In fact I do not have the sheet labelled "Building and Flying the Pixie" as shown in your picture. I am sure that would have been extremelly helpful. Indeed I still have little idea of how to fix the tail plane. However your email has certainly helped me sort out the wheels and also how the wing struts are meant to attach. ( I was very unclear what to do with the plastic tube, could have been for the undercarriage, I couldn't see how it would fix to the wing struts but I understand better now.
I had planned on gluing the wings onto the fuselage as well as using rubber bands, Do you see any problem with doing that?
I will send a picture. However as I said I am a beginner (although I did make some keil kraft models when 11/12 years old at school). Anyway I have made a lot of mistakes/catastrophes, some of which I have recovered from and others I fear I have not. The end result is a rather misshapen thing which I fear will never fly. However I see it as a challenge and intend to finish it as best I can.
My outstanding problems are
1. how to fix the tail-plane
2. finding an elastic band of the right length, diameter etc to fit in the plastic tube
3. ditto elastic bands of right length etc for attaching the wings
4. attaching the tissue covering to the plane. However I have seen quite a lot of advice about this on the web so I think I at least know what I am trying to do.
5. working out how long the wing struts should be. The plane doesn't show this.
6.. Fitting the rubber band engine and knowing how many turns will be safe.
Again any advice etc gratefully received.
I found attaching the under carriage quite simple till it came to the last bit of bending the end to keep the wheels secure. I suspect there may be a knack to this since my attempt was not very successful.
My major catastrophe has been finding out, much too late, that one of the main struts had cracked sending the whole fuselarge out of kilter. I did not find a good way to fix this.
Many thanks for your help
Dave W
Many thanks for your very helpful and speedy response, much appreciated
In fact I do not have the sheet labelled "Building and Flying the Pixie" as shown in your picture. I am sure that would have been extremelly helpful. Indeed I still have little idea of how to fix the tail plane. However your email has certainly helped me sort out the wheels and also how the wing struts are meant to attach. ( I was very unclear what to do with the plastic tube, could have been for the undercarriage, I couldn't see how it would fix to the wing struts but I understand better now.
I had planned on gluing the wings onto the fuselage as well as using rubber bands, Do you see any problem with doing that?
I will send a picture. However as I said I am a beginner (although I did make some keil kraft models when 11/12 years old at school). Anyway I have made a lot of mistakes/catastrophes, some of which I have recovered from and others I fear I have not. The end result is a rather misshapen thing which I fear will never fly. However I see it as a challenge and intend to finish it as best I can.
My outstanding problems are
1. how to fix the tail-plane
2. finding an elastic band of the right length, diameter etc to fit in the plastic tube
3. ditto elastic bands of right length etc for attaching the wings
4. attaching the tissue covering to the plane. However I have seen quite a lot of advice about this on the web so I think I at least know what I am trying to do.
5. working out how long the wing struts should be. The plane doesn't show this.
6.. Fitting the rubber band engine and knowing how many turns will be safe.
Again any advice etc gratefully received.
I found attaching the under carriage quite simple till it came to the last bit of bending the end to keep the wheels secure. I suspect there may be a knack to this since my attempt was not very successful.
My major catastrophe has been finding out, much too late, that one of the main struts had cracked sending the whole fuselarge out of kilter. I did not find a good way to fix this.
Many thanks for your help
Dave W
Thanks: Klipkopwildlife, Flytilbroke
Please Log in or Create an account to join the conversation.
- DavidW
- Topic Author
- Offline
- New Member
-
Less
More
- Posts: 8
- Thank you received: 6
23 Jun 2020 17:04 #8
by DavidW
Replied by DavidW on topic Keil Kraft 23" Pixie
To Klipkopwildlife
many thanks for your helpful reply and advice on tissues. The Pixie comes with its own tissue which I plan to use. Not sure how good it is (specially after over 30 years!). However I will give it a go.
Thanks again
David W
many thanks for your helpful reply and advice on tissues. The Pixie comes with its own tissue which I plan to use. Not sure how good it is (specially after over 30 years!). However I will give it a go.
Thanks again
David W
Please Log in or Create an account to join the conversation.
- Quorneng
-
- Offline
- Forum Master
-
Less
More
- Posts: 10058
- Thank you received: 19043
23 Jun 2020 18:12 - 23 Jun 2020 18:12 #9
by Quorneng
Replied by Quorneng on topic Keil Kraft 23" Pixie
DavidW
The intention was that the wing were not glued into the fuselage. The wing tongues simply slide into the slots in the top of the fuselage and the rubber band is there to hold the tongues in.
On their own the tongues would not be strong enough so the rigidity of the wing comes from the wing strut, just as it does on full size.
One end of the strut is hooked into a small tube bound onto the underside of the wing. The other end of the strut is hooked onto a rubber band stretched through the tube in the bottom of the fuselage. This rubber band has to be strong enough to resist the tension of the struts when it is in flight BUT the whole thing has to be flexible enough that in the event of a crash the bands allow the wing to move. Ultimately it is hoped that the rubber bands fly off their hooks leaving the wings completely free and hopefully with everything undamaged so it can simply be all hooked back together and flown again.
As far I can tell the tail plane and fin are simply glued in place after they have been covered and doped.
The tissue may still be usable although it is probably a bit 'yellowed' after such a long period.
On the other hand if the rubber for the motor was included do not use it. It will have long since lost its flexibility but it would give you the size needed for replacement.
The number of turns is not important at this stage. The first step when it fully complete is to glide it to check that its centre of gravity is in the right place. The initial powered flights would use no more than 50 turns which is well within the capability of the rubber and hopefully the planes structure.
Any chance of a picture or two of what you have built so far.
The intention was that the wing were not glued into the fuselage. The wing tongues simply slide into the slots in the top of the fuselage and the rubber band is there to hold the tongues in.
On their own the tongues would not be strong enough so the rigidity of the wing comes from the wing strut, just as it does on full size.
One end of the strut is hooked into a small tube bound onto the underside of the wing. The other end of the strut is hooked onto a rubber band stretched through the tube in the bottom of the fuselage. This rubber band has to be strong enough to resist the tension of the struts when it is in flight BUT the whole thing has to be flexible enough that in the event of a crash the bands allow the wing to move. Ultimately it is hoped that the rubber bands fly off their hooks leaving the wings completely free and hopefully with everything undamaged so it can simply be all hooked back together and flown again.
As far I can tell the tail plane and fin are simply glued in place after they have been covered and doped.
The tissue may still be usable although it is probably a bit 'yellowed' after such a long period.
On the other hand if the rubber for the motor was included do not use it. It will have long since lost its flexibility but it would give you the size needed for replacement.
The number of turns is not important at this stage. The first step when it fully complete is to glide it to check that its centre of gravity is in the right place. The initial powered flights would use no more than 50 turns which is well within the capability of the rubber and hopefully the planes structure.
Any chance of a picture or two of what you have built so far.
Last edit: 23 Jun 2020 18:12 by Quorneng.
Please Log in or Create an account to join the conversation.
- Eric
-
- Offline
- Moderator
-
Less
More
- Posts: 15407
- Thank you received: 14309
23 Jun 2020 18:19 - 23 Jun 2020 18:20 #10
by Eric
if you are calm and collected when all about you are going berserk - you've missed something important!
Replied by Eric on topic Keil Kraft 23" Pixie
Simon beat me to it by a few seconds.
Do NOT glue the main wings on, they are designed to knock off when the ground jumps up and hits the model (and it will!)
Test glide in an open space with long grass, not a 10yard square back yard! And keep well away from trees and ponds. They are fatally attractive to model aircraft!
Trimming these tiny models to fly straight(ish) is a black art, you have to learn it to make progress.
That's about my limit of knowledge with these elastic powered things. My field is larger electric powered aircraft of various sorts - fixed and rotary wing. My flight battery that goes into the model is probably heavier than your completed Pixie will be!
Do NOT glue the main wings on, they are designed to knock off when the ground jumps up and hits the model (and it will!)
Test glide in an open space with long grass, not a 10yard square back yard! And keep well away from trees and ponds. They are fatally attractive to model aircraft!
Trimming these tiny models to fly straight(ish) is a black art, you have to learn it to make progress.
That's about my limit of knowledge with these elastic powered things. My field is larger electric powered aircraft of various sorts - fixed and rotary wing. My flight battery that goes into the model is probably heavier than your completed Pixie will be!
if you are calm and collected when all about you are going berserk - you've missed something important!
Last edit: 23 Jun 2020 18:20 by Eric. Reason: added a comment
Thanks: Klipkopwildlife, Quorneng
Please Log in or Create an account to join the conversation.
- DavidW
- Topic Author
- Offline
- New Member
-
Less
More
- Posts: 8
- Thank you received: 6
23 Jun 2020 18:23 #11
by DavidW
Replied by DavidW on topic Keil Kraft 23" Pixie
To Paul d
many thanks for your advice, much appreciated.
Yes I have the same plan as the one you sent me. However I do not have any build and fly instructions. Still with your help I am making progress. I listed my outstanding issues in an earlier reply.
Thanks again
Dave W
many thanks for your advice, much appreciated.
Yes I have the same plan as the one you sent me. However I do not have any build and fly instructions. Still with your help I am making progress. I listed my outstanding issues in an earlier reply.
Thanks again
Dave W
Please Log in or Create an account to join the conversation.
- DavidW
- Topic Author
- Offline
- New Member
-
Less
More
- Posts: 8
- Thank you received: 6
23 Jun 2020 18:45 #12
by DavidW
Replied by DavidW on topic Keil Kraft 23" Pixie
OK, I will NOT glue the wings! I will also make sure that I test it first with some long grass, although there isn't much of that here in North London. As you will see from the attached pictures, the fuselage is bent so I doubt that this is going to fly at all, let alone under power. However I note advice about the rubber as well. So I may need to buy a replacement. Any advice where to buy it from?
I am attaching pictures of what I have done so far. I have not fixed the bent pins on top of the wings yet so cannot show the plane with the wings on. Also have yet to build the tail-plane. However that seems relatively simple. I think I understand how to glue it to the fuselage but it does not seem to me that it will be very secure.
Again many thanks for your help and advice, it is giving me confidence and motivation to at least get it finished even if it never flies!
Dave W
I am attaching pictures of what I have done so far. I have not fixed the bent pins on top of the wings yet so cannot show the plane with the wings on. Also have yet to build the tail-plane. However that seems relatively simple. I think I understand how to glue it to the fuselage but it does not seem to me that it will be very secure.
Again many thanks for your help and advice, it is giving me confidence and motivation to at least get it finished even if it never flies!
Dave W
Thanks: Klipkopwildlife
Please Log in or Create an account to join the conversation.
- DavidW
- Topic Author
- Offline
- New Member
-
Less
More
- Posts: 8
- Thank you received: 6
23 Jun 2020 18:50 - 24 Jun 2020 10:11 #13
by DavidW
Replied by DavidW on topic Keil Kraft 23" Pixie
Oops forgot to attach pictures


Done
Done
Last edit: 24 Jun 2020 10:11 by Klipkopwildlife.
Thanks: Klipkopwildlife
Please Log in or Create an account to join the conversation.
- Klipkopwildlife
-
- Offline
- Administrator
-
- I'm supposed to be retired!
23 Jun 2020 18:52 #14
by Klipkopwildlife
Do it now, you may never get another chance
Replied by Klipkopwildlife on topic Keil Kraft 23" Pixie
I see you say something's cracked on the fuselage, as long as you use scarf joints it shouldn't be too difficult to fix. A heavier alternative is to just glue another piece next to the cracked one.
Do it now, you may never get another chance
Please Log in or Create an account to join the conversation.
- paul d
-
- Offline
- Forum Veteran
-
Less
More
- Posts: 2074
- Thank you received: 2292
23 Jun 2020 20:57 #15
by paul d
balsa is best.
Replied by paul d on topic Keil Kraft 23" Pixie
Oh! that is a bit of banana! youll have to do a little judicious cutting to straighten it out.
wouldn't worry about glueing the tail on it'll be plenty strong enough.
wouldn't worry about glueing the tail on it'll be plenty strong enough.
balsa is best.
Please Log in or Create an account to join the conversation.
Time to create page: 0.244 seconds