
- Posts: 10058
- Thank you received: 19043
Rebuild of the Hawker P1081
- Quorneng
-
 Topic Author
- Offline
- Forum Master
-

Less
More
22 Jul 2026 21:55 - 22 Jul 2026 21:57 #1
by Quorneng
Rebuild of the Hawker P1081 was created by Quorneng
As reported in "Been Flying" the crash on the 20 Jun 26 did a lot of damage.
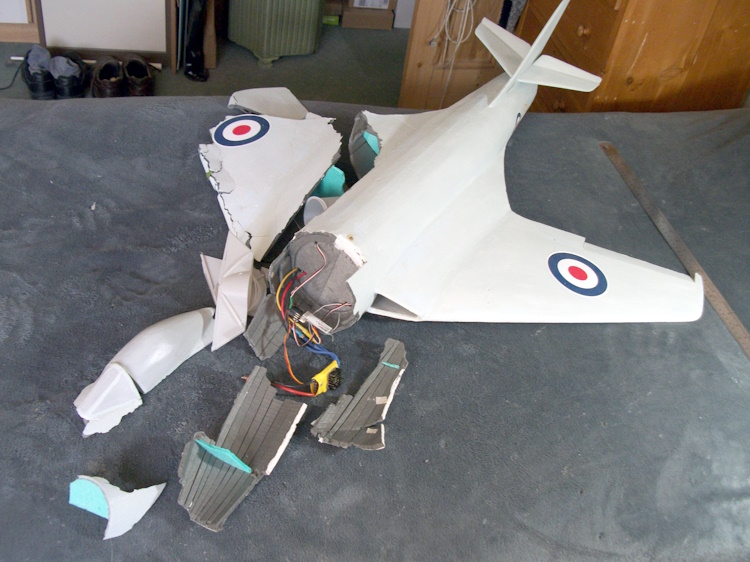
As the printed duct with the EDF was assembled first and then used as a spine to build the planked fuselage around it. One half of the fuselage was first built over the plan, the complete duct nd EDF inserted into it. and the opposite half then completed. My initial thoughts were repairs were not possible in a realistic time scale.
After some thought I arrived as a novel solution. Cut away the damage half of the fuselage.
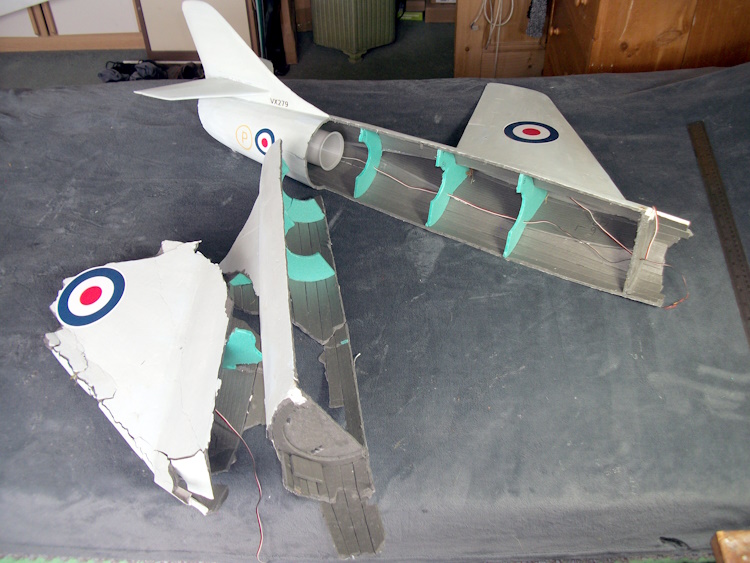
Reprint the damaged parts of the duct, reinsert it into the good half fuselage and then rebuild the cut away part of the fuselage and make a new RH wing - simples!
As the printed duct with the EDF was assembled first and then used as a spine to build the planked fuselage around it. One half of the fuselage was first built over the plan, the complete duct nd EDF inserted into it. and the opposite half then completed. My initial thoughts were repairs were not possible in a realistic time scale.
After some thought I arrived as a novel solution. Cut away the damage half of the fuselage.
Reprint the damaged parts of the duct, reinsert it into the good half fuselage and then rebuild the cut away part of the fuselage and make a new RH wing - simples!
Attachments:
Last edit: 22 Jul 2026 21:57 by Quorneng.
Thanks: Eric, Klipkopwildlife, Flytilbroke, jon.in.swansea
Please Log in or Create an account to join the conversation.
- Quorneng
-
Topic Author
- Offline
- Forum Master
-
Less
More
- Posts: 10058
- Thank you received: 19043
24 Jul 2026 14:18 - 24 Jul 2026 14:23 #2
by Quorneng
Replied by Quorneng on topic Rebuild of the Hawker P1081
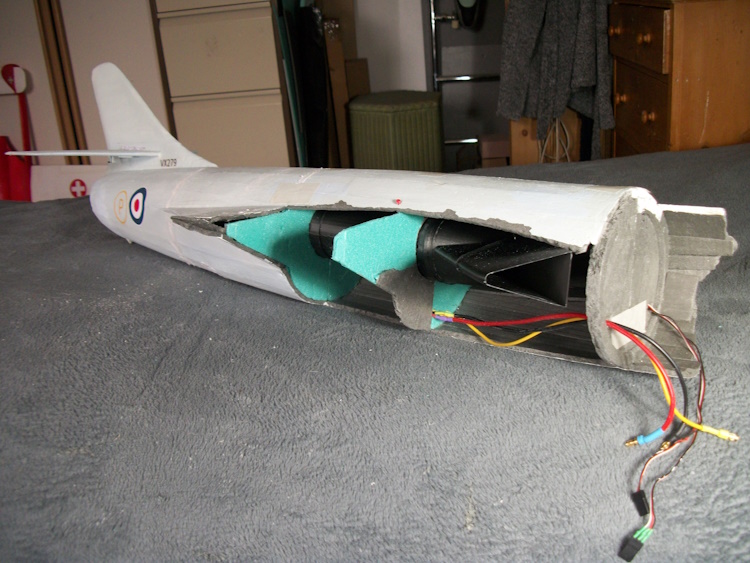
Some modest progress on the P1081. After rather too many hours printing, and reprinting, the EDF and duct are back in place although not yet glued in. In many cases it required a part to be printed before it was possible to determine that it did not fit so needed some adjustment and to be printing again. In some cases a repeated process!


From this point rebuilding the fuselage maybe time consuming and fiddly but at least the method is tried and tested.
From this point rebuilding the fuselage maybe time consuming and fiddly but at least the method is tried and tested.
Attachments:
Last edit: 24 Jul 2026 14:23 by Quorneng.
Thanks: Eric, Klipkopwildlife, Flytilbroke, Ralpharr2001, jon.in.swansea
Please Log in or Create an account to join the conversation.
- SimonC
- Offline
- Junior Member
-

Less
More
- Posts: 39
- Thank you received: 121
25 Jul 2026 17:28 #3
by SimonC
Replied by SimonC on topic Rebuild of the Hawker P1081
Having cut away much of the damaged RH side of the fuselage to get access to rebuild the EDF ducting it occured to me that quite a bit of it could be reused once the ducting and EDF were permanently in place.
The LH inlet has a new printed bell mouth.
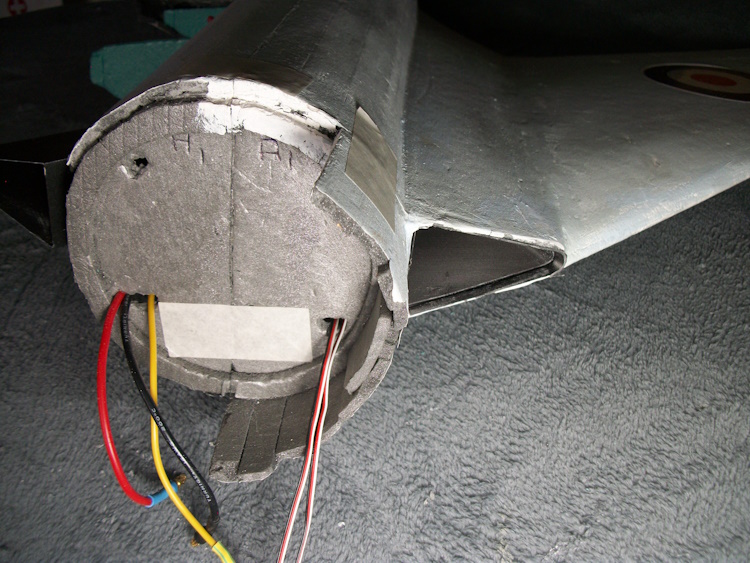
So now all that needs doing is:-
The RH wing root.
The complete RH wing.
The cockpit & nose.
At least the canopy & windscreen survived!
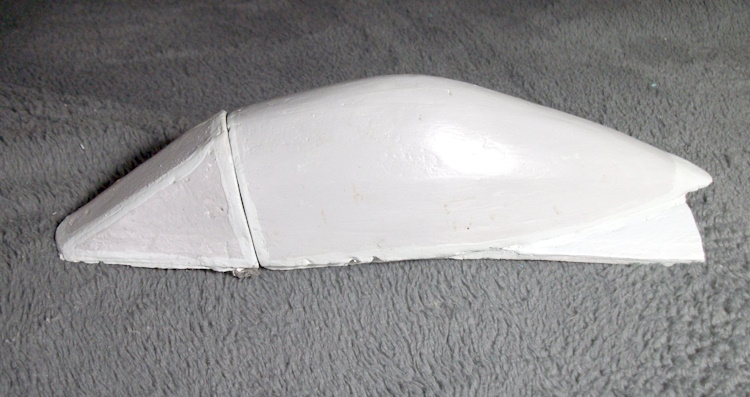
The LH inlet has a new printed bell mouth.
So now all that needs doing is:-
The RH wing root.
The complete RH wing.
The cockpit & nose.
At least the canopy & windscreen survived!
Attachments:
Thanks: Eric, Klipkopwildlife, Flytilbroke, THE BLACKBIRD, jon.in.swansea
Please Log in or Create an account to join the conversation.
- SimonC
- Offline
- Junior Member
-
Less
More
- Posts: 39
- Thank you received: 121
27 Jul 2026 22:00 - 27 Jul 2026 22:02 #4
by SimonC
Replied by SimonC on topic Rebuild of the Hawker P1081
This is getting rather fiddly!
I have managed to salvage quite bit of the original RH wing root and fuselage underside although much has been a bit of a patchwork of bits temporarily held in place using pins and masking tape whilst the glue sets.

It is just as well on 5mm sheet foam a Technicqll glued joint is as strong the foam itself.
I have just about enough 5mm sheet remaining to complete the fuselage but I have had to order some more big sheets to create the new RH wing.
One advantage of skinning everything in 5mm thick foam sheet is it does leave a bit of "head room" to fill & sand to achieve a smooth final profile and the "Sky" acrylic paint is also pretty thick.

I have managed to salvage quite bit of the original RH wing root and fuselage underside although much has been a bit of a patchwork of bits temporarily held in place using pins and masking tape whilst the glue sets.
It is just as well on 5mm sheet foam a Technicqll glued joint is as strong the foam itself.
I have just about enough 5mm sheet remaining to complete the fuselage but I have had to order some more big sheets to create the new RH wing.
One advantage of skinning everything in 5mm thick foam sheet is it does leave a bit of "head room" to fill & sand to achieve a smooth final profile and the "Sky" acrylic paint is also pretty thick.
Attachments:
Last edit: 27 Jul 2026 22:02 by SimonC.
Thanks: Eric, Klipkopwildlife, THE BLACKBIRD, jon.in.swansea
Please Log in or Create an account to join the conversation.
- SimonC
- Offline
- Junior Member
-
Less
More
- Posts: 39
- Thank you received: 121
29 Jul 2026 19:47 - 29 Jul 2026 19:48 #5
by SimonC
Replied by SimonC on topic Rebuild of the Hawker P1081
Getting there!
The fuselage is structurally virtually finished.
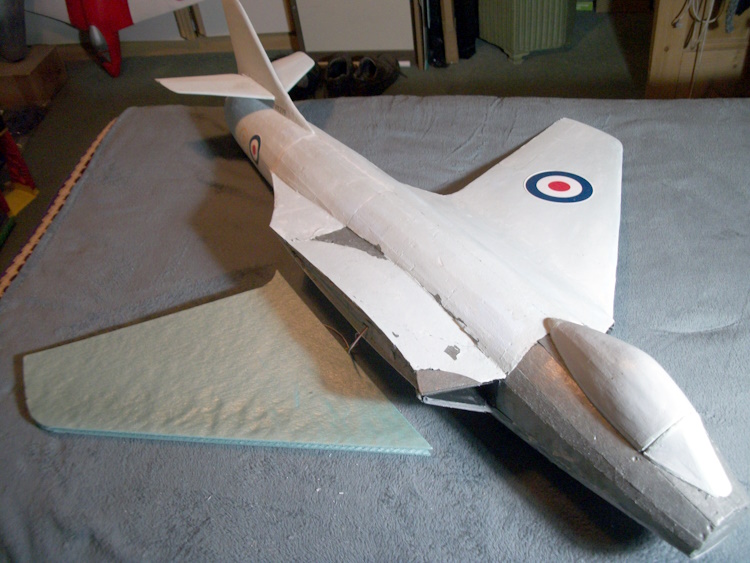
There will be a lot of filling and sanding!
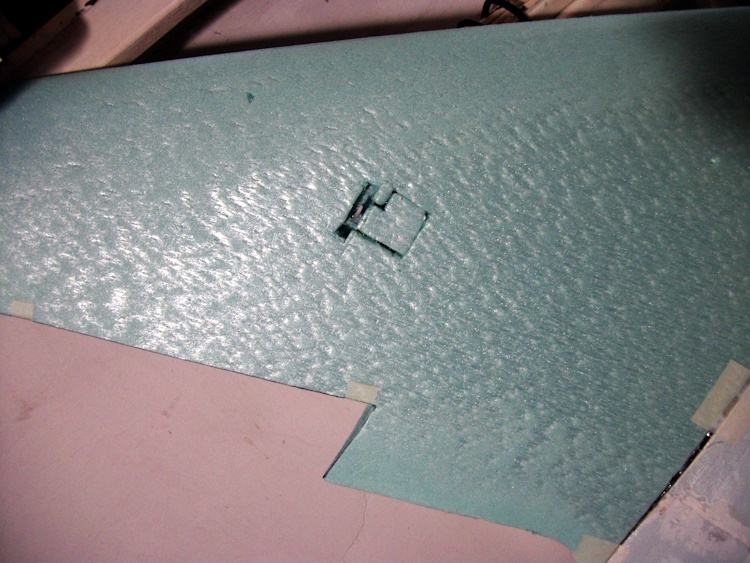
The big sheets of 5mm foam have arrived so the top and bottom wing skins cut out. It was marked out buy laying on the plan and pricking the outline with a pin. You could even see the old pin holes in the plan I used to mark out the original skin!
The fuselage is structurally virtually finished.
There will be a lot of filling and sanding!
The big sheets of 5mm foam have arrived so the top and bottom wing skins cut out. It was marked out buy laying on the plan and pricking the outline with a pin. You could even see the old pin holes in the plan I used to mark out the original skin!
Attachments:
Last edit: 29 Jul 2026 19:48 by SimonC.
Thanks: Eric, Klipkopwildlife, Flytilbroke, Ralpharr2001, jon.in.swansea
Please Log in or Create an account to join the conversation.
- SimonC
- Offline
- Junior Member
-
Less
More
- Posts: 39
- Thank you received: 121
02 Aug 2026 10:29 - 02 Aug 2026 10:30 #6
by SimonC
Replied by SimonC on topic Rebuild of the Hawker P1081
The fuselage is now complete and is being painted, initially white before the final pale sky blue.
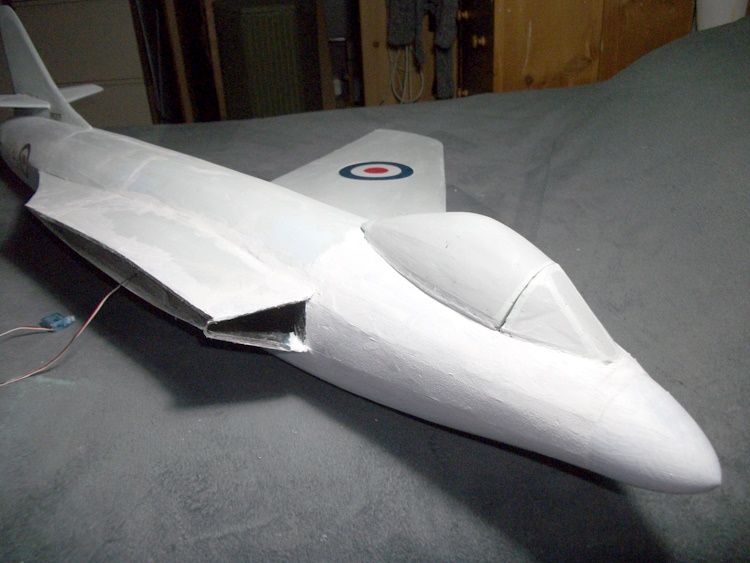
Actually construction is a bit out of sequence as I wanted to build and add the RH wing before final filling and paint but I now realise the wings were made of 6mm Foam not the 5mm I recently bought. Doh! Over the large unsupported areas of the wing that extra 1 mm thickness makes quite a difference. Anyway construction of the wing is delayed until the correct foam is delivered.
Actually construction is a bit out of sequence as I wanted to build and add the RH wing before final filling and paint but I now realise the wings were made of 6mm Foam not the 5mm I recently bought. Doh! Over the large unsupported areas of the wing that extra 1 mm thickness makes quite a difference. Anyway construction of the wing is delayed until the correct foam is delivered.
Attachments:
Last edit: 02 Aug 2026 10:30 by SimonC.
Thanks: Eric, Klipkopwildlife, jon.in.swansea
Please Log in or Create an account to join the conversation.
- SimonC
- Offline
- Junior Member
-
Less
More
- Posts: 39
- Thank you received: 121
08 Aug 2026 00:17 #7
by SimonC
Replied by SimonC on topic Rebuild of the Hawker P1081
With the 6mm thick foam the RH wing is at last built and glued on.
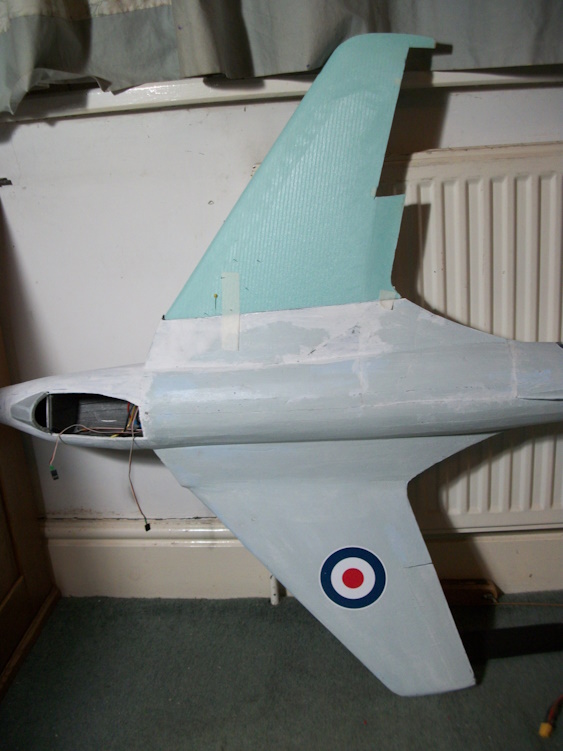
It will have to sit like that for at least 24 hours for the glue to go rock hard!
It will have to sit like that for at least 24 hours for the glue to go rock hard!
Attachments:
Thanks: Eric, Klipkopwildlife, Flytilbroke, THE BLACKBIRD, jon.in.swansea
Please Log in or Create an account to join the conversation.
- SimonC
- Offline
- Junior Member
-
Less
More
- Posts: 39
- Thank you received: 121
09 Aug 2026 00:32 #8
by SimonC
Replied by SimonC on topic Rebuild of the Hawker P1081
What the above picture does not show is the aileron servo.
The original servo was salvaged from the broken RH wing along with its servo wire which lead all the way to the cockpit. This meant the servo had to be fed through the hollow wing and glued in place before the wing itself was glued to the fuselage!
Before doing all this I both checked that the servo still worked and that its servo arm position at neutral matched that of the LH aileron servo. Important as the aileron servos are on a Y lead so are not individually transmitter adjustable.
The original servo was salvaged from the broken RH wing along with its servo wire which lead all the way to the cockpit. This meant the servo had to be fed through the hollow wing and glued in place before the wing itself was glued to the fuselage!
Before doing all this I both checked that the servo still worked and that its servo arm position at neutral matched that of the LH aileron servo. Important as the aileron servos are on a Y lead so are not individually transmitter adjustable.
Attachments:
Thanks: Eric, Klipkopwildlife, Flytilbroke, Ralpharr2001, jon.in.swansea
Please Log in or Create an account to join the conversation.
- SimonC
- Offline
- Junior Member
-
Less
More
- Posts: 39
- Thank you received: 121
15 Aug 2026 17:34 #9
by SimonC
Replied by SimonC on topic Rebuild of the Hawker P1081
It is now complete.

In true "economy mode" all but one of the decals have been salvaged!

I fear it will remain "hanging on the wall" for some time.
In true "economy mode" all but one of the decals have been salvaged!
I fear it will remain "hanging on the wall" for some time.
Attachments:
Thanks: Eric, Klipkopwildlife, Flytilbroke, jon.in.swansea
Please Log in or Create an account to join the conversation.
Time to create page: 0.186 seconds