
- Posts: 293
- Thank you received: 680
×
For those of you with deep enough pockets
PST Reaction
- Si_B
-
 Topic Author
- Offline
- Elite Member
-

Less
More
07 Apr 2014 11:01 - 07 Apr 2014 11:05 #1
by Si_B
PST Reaction was created by Si_B
Still waiting to fly the Bommerang (this Friday at Abbingdon hopefully!!), so time to start a project I bought nearly a year ago. I think I'm its third owner, so lots of stuff stuck in which either I don't like or don't want. Unfortunately I have to ignore some of it as trying to remove it will damage the composite airframe.

First thing to sort out was the turbine mount. Luckily the Jetcat mount is quite wide, so even though it doesn't look pretty underneath, it is well secured to the solid part of the mount. Again I toyed with the idea of trying to grind the ply mounts out and start from fresh, but the risk outweighed the gain and to be honest you can hardly see the mount (even less so when the turbine is in place). Managed to knock out most of the dents and creases in the heat shield, and I'm happy with the fit now.

Next thing was to pull all the plumbing out. Apart from the clunk, I've replaced all the pipes and fitted a new bracket to hold the shut off valve. Pretty easy to plumb this in as the pump and solenoids are in the front of the turbine, so just need to run a pipe off down to the noisey bit at the back.

Currently working on replacing all the install plates as these were hacked around and covered in a sort of grey spackle paint which people seem to like, but I don't. Loads of space this time, but all the batteries are tucked up the front.

Thats about it for the moment. All the retracts are out as I will start the plumbing from scratch, I also need to look at the front mounting rails as these are a mess and I want to get some strength back in there. Still waiting for my air tanks to turn up, but hoping this should be ready in the next few weeks.
Cheers,
Simon
First thing to sort out was the turbine mount. Luckily the Jetcat mount is quite wide, so even though it doesn't look pretty underneath, it is well secured to the solid part of the mount. Again I toyed with the idea of trying to grind the ply mounts out and start from fresh, but the risk outweighed the gain and to be honest you can hardly see the mount (even less so when the turbine is in place). Managed to knock out most of the dents and creases in the heat shield, and I'm happy with the fit now.
Next thing was to pull all the plumbing out. Apart from the clunk, I've replaced all the pipes and fitted a new bracket to hold the shut off valve. Pretty easy to plumb this in as the pump and solenoids are in the front of the turbine, so just need to run a pipe off down to the noisey bit at the back.
Currently working on replacing all the install plates as these were hacked around and covered in a sort of grey spackle paint which people seem to like, but I don't. Loads of space this time, but all the batteries are tucked up the front.
Thats about it for the moment. All the retracts are out as I will start the plumbing from scratch, I also need to look at the front mounting rails as these are a mess and I want to get some strength back in there. Still waiting for my air tanks to turn up, but hoping this should be ready in the next few weeks.
Cheers,
Simon
Last edit: 07 Apr 2014 11:05 by Si_B.
Thanks: Klipkopwildlife, Quorneng
Please Log in or Create an account to join the conversation.
- The Beard
-

- Offline
- Forum Master
-

Less
More
- Posts: 9272
- Thank you received: 2167
07 Apr 2014 11:53 #2
by The Beard
Replied by The Beard on topic PST Reaction
Give us a tune on the guitar whilst we wait.How much are the engines and are they complex in operation
Please Log in or Create an account to join the conversation.
- Si_B
-
Topic Author
- Offline
- Elite Member
-
Less
More
- Posts: 293
- Thank you received: 680
07 Apr 2014 12:25 #3
by Si_B
Replied by Si_B on topic PST Reaction
Can't comment on the cost....you never know who is watching  but all of my turbines are second hand, mainly bought off other modellers who changed their mind about having a turbine. My models are used as well but that's really the only way I could justify the cost. Brand new retracts and airframes even at the cheap end are relatively expensive, but good deals are around.
The turbines are pretty simple, I guess the fun starts when something doesn't work. This is my only Jetcat, my other turbines are Wrens and I've been really happy with the support I've received when ringing with questions. I've had a few flame outs with my original Wren 54, but after tweaking a few settings it seems to be fine now. Had 4 great flights at Long Marston a few weeks back.
You learn a lot at the jet meetings as well. Everyone is helpful and there are loads of models around to have a good look inside.
but all of my turbines are second hand, mainly bought off other modellers who changed their mind about having a turbine. My models are used as well but that's really the only way I could justify the cost. Brand new retracts and airframes even at the cheap end are relatively expensive, but good deals are around.The turbines are pretty simple, I guess the fun starts when something doesn't work. This is my only Jetcat, my other turbines are Wrens and I've been really happy with the support I've received when ringing with questions. I've had a few flame outs with my original Wren 54, but after tweaking a few settings it seems to be fine now. Had 4 great flights at Long Marston a few weeks back.
You learn a lot at the jet meetings as well. Everyone is helpful and there are loads of models around to have a good look inside.
Thanks: Klipkopwildlife
Please Log in or Create an account to join the conversation.
- The Beard
-
- Offline
- Forum Master
-
Less
More
- Posts: 9272
- Thank you received: 2167
07 Apr 2014 13:03 #4
by The Beard
Replied by The Beard on topic PST Reaction
Thanks for that we cant fly jets at our site and the only member who flys them,Steve Pridaux flies his Bandit every year ar Blackbushe,truely awesome
Please Log in or Create an account to join the conversation.
- Eric
-

- Offline
- Moderator
-

Less
More
- Posts: 15423
- Thank you received: 14351
07 Apr 2014 13:07 #5
by Eric
if you are calm and collected when all about you are going berserk - you've missed something important!
Replied by Eric on topic PST Reaction
I might be missing something obvious - but what model is it?
if you are calm and collected when all about you are going berserk - you've missed something important!
Please Log in or Create an account to join the conversation.
- old fart
-

- Offline
- Forum Veteran
-

Less
More
- Posts: 2571
- Thank you received: 705
07 Apr 2014 15:02 - 07 Apr 2014 15:05 #6
by old fart
There is nothing like a dream to create the future.
Electrickery is the work of the devil.
Replied by old fart on topic PST Reaction
The clue is in the thread title Eric. 
There is nothing like a dream to create the future.
Electrickery is the work of the devil.
Last edit: 07 Apr 2014 15:05 by old fart.
Please Log in or Create an account to join the conversation.
- Eric
-
- Offline
- Moderator
-
Less
More
- Posts: 15423
- Thank you received: 14351
07 Apr 2014 17:44 #7
by Eric
if you are calm and collected when all about you are going berserk - you've missed something important!
Replied by Eric on topic PST Reaction
Ah!  I thought that was a response from his wife when he brought the thing home!
I thought that was a response from his wife when he brought the thing home! if you are calm and collected when all about you are going berserk - you've missed something important!
Please Log in or Create an account to join the conversation.
- Si_B
-
Topic Author
- Offline
- Elite Member
-
Less
More
- Posts: 293
- Thank you received: 680
07 Apr 2014 18:28 #8
by Si_B
Replied by Si_B on topic PST Reaction
Golden rule....never bring a model home when the wife is about 
Thanks: Klipkopwildlife, kamco kid
Please Log in or Create an account to join the conversation.
- Si_B
-
Topic Author
- Offline
- Elite Member
-
Less
More
- Posts: 293
- Thank you received: 680
16 Apr 2014 11:19 - 16 Apr 2014 11:22 #9
by Si_B
Replied by Si_B on topic PST Reaction
Bit more work done on the electronics mounting plates. Built in a recess for the nose wheel rather than leaving it open to keep debris away from my electrics.

Got the ECU and the twin rx's mounted. Most of the wiring loom is in, but will not start connecting up till the air lines are finished.

New mounting brackets made for the air tanks. Was only running on one before and it looked a bit battered so replaced with twin tanks to give a bit more air capacity.

Quick shot showing the plates installed. Covers a lot of crap underneath and makes the jet much much better.

Need to make a little bracket to mount the air valves on and then it's time to start plumbing in the retracts and see how well they work. Really hoping not to find anymore problems.
Cheers,
Simon
Got the ECU and the twin rx's mounted. Most of the wiring loom is in, but will not start connecting up till the air lines are finished.
New mounting brackets made for the air tanks. Was only running on one before and it looked a bit battered so replaced with twin tanks to give a bit more air capacity.
Quick shot showing the plates installed. Covers a lot of crap underneath and makes the jet much much better.
Need to make a little bracket to mount the air valves on and then it's time to start plumbing in the retracts and see how well they work. Really hoping not to find anymore problems.
Cheers,
Simon
Last edit: 16 Apr 2014 11:22 by Si_B.
Thanks: Eric, Klipkopwildlife, Quorneng, blue123, old fart
Please Log in or Create an account to join the conversation.
- THE BLACKBIRD
-

- Offline
- Forum Master
-
Less
More
- Posts: 6789
- Thank you received: 10743
16 Apr 2014 13:10 #10
by THE BLACKBIRD
Replied by THE BLACKBIRD on topic PST Reaction
Looks good Simon, why the two receivers ? was you one chanal short. i had it with my Navy Cat so i connected the brake to full down flap, works ok, in fact next time i fly it im going to use full flap for landing that way when the mains touch the ground with the brakes on it should slap the nose down with no bounce, then release full flap instantly, thats the thiery anyway
Please Log in or Create an account to join the conversation.
- Si_B
-
Topic Author
- Offline
- Elite Member
-
Less
More
- Posts: 293
- Thank you received: 680
16 Apr 2014 13:19 #11
by Si_B
Replied by Si_B on topic PST Reaction
I had two of these receivers so was always planning to run them together. Might split some of the main functions in case I lose a signal to one. Never used brakes before so should be fun setting up. I know a few mates land with a bit of brake on to keep it on the ground, might even help with the bouncing.
Got the plate in for the retract and brake valve, so will need to let that dry. Might run some air lines tonight if I get time. Hoping to fly this in a few weeks.
Got the plate in for the retract and brake valve, so will need to let that dry. Might run some air lines tonight if I get time. Hoping to fly this in a few weeks.
Please Log in or Create an account to join the conversation.
- Si_B
-
Topic Author
- Offline
- Elite Member
-
Less
More
- Posts: 293
- Thank you received: 680
17 Apr 2014 12:27 #12
by Si_B
Replied by Si_B on topic PST Reaction
Starting to get busy in the front. Valves mounted, nose leg back in and plumbed.

Need to start working my way through the wings and then maybe time to put her together to test the air systems.
Simon
Need to start working my way through the wings and then maybe time to put her together to test the air systems.
Simon
Thanks: Eric, Klipkopwildlife, THE BLACKBIRD, blue123, old fart
Please Log in or Create an account to join the conversation.
- Si_B
-
Topic Author
- Offline
- Elite Member
-
Less
More
- Posts: 293
- Thank you received: 680
20 Apr 2014 21:30 - 20 Apr 2014 21:46 #13
by Si_B
Replied by Si_B on topic PST Reaction
After earning some brownie points building the brick edge to the new lawn in the front garden I spent a few hours on the jet today. Pulled all the wing servos out, made new extensions with Ashlok connectors, braided all the wires and made sure everything was neatly secured so nothing flapping about.
Put both retracts back in, all plumbed up etc. not really worthy of a photo.
Got the rudder and elevator servos to check out and some air line connections for splitting at the wing join. Turbine is 4 bolts and one connector plus the fuel line.
Had a result today as I managed to find a replacement nose leg steering spring which is missing off mine (keeps nose wheel centred when retracting). Got my fingers crossed that it will fit.
Next big job is to refit the electronic plates and plug everything in. If my Sprint was anything to go by, I will take these out at least another 30 times!!
Then it's time to bolt her together for the first time and put some air in to test the retracts. I've had this for over a year and have only seen it together on the day I bought it. I have a picture somewhere, will see if I can find it.
Put both retracts back in, all plumbed up etc. not really worthy of a photo.
Got the rudder and elevator servos to check out and some air line connections for splitting at the wing join. Turbine is 4 bolts and one connector plus the fuel line.
Had a result today as I managed to find a replacement nose leg steering spring which is missing off mine (keeps nose wheel centred when retracting). Got my fingers crossed that it will fit.
Next big job is to refit the electronic plates and plug everything in. If my Sprint was anything to go by, I will take these out at least another 30 times!!
Then it's time to bolt her together for the first time and put some air in to test the retracts. I've had this for over a year and have only seen it together on the day I bought it. I have a picture somewhere, will see if I can find it.
Last edit: 20 Apr 2014 21:46 by Si_B.
Thanks: Eric, blue123
Please Log in or Create an account to join the conversation.
- Si_B
-
Topic Author
- Offline
- Elite Member
-
Less
More
- Posts: 293
- Thank you received: 680
20 Apr 2014 21:44 #14
by Si_B
Replied by Si_B on topic PST Reaction
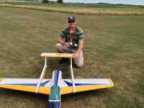
I'm 6' 2" and that fuselage is longer than me

Really looking forward to flying this one. I like my Boomerang, but it will be good the fly something without the twin booms. Supposed to be an amazing plane to fly......next jet meet is the 17th May....no pressure then!!
Really looking forward to flying this one. I like my Boomerang, but it will be good the fly something without the twin booms. Supposed to be an amazing plane to fly......next jet meet is the 17th May....no pressure then!!
Thanks: Klipkopwildlife, Quorneng, THE BLACKBIRD, blue123, old fart
Please Log in or Create an account to join the conversation.
- Si_B
-
Topic Author
- Offline
- Elite Member
-
Less
More
- Posts: 293
- Thank you received: 680
24 Apr 2014 23:28 #15
by Si_B
Replied by Si_B on topic PST Reaction
Little bit more completed......but it gets exciting when the turbine comes out the box.

Bolts all loctited and fuel line run the the shut off valve at the front.

Finished all the wiring to the servos at the back. Now time to plug everything in and he done air in the system to check over the retracts and brakes.
Cheers,
Simon
Bolts all loctited and fuel line run the the shut off valve at the front.
Finished all the wiring to the servos at the back. Now time to plug everything in and he done air in the system to check over the retracts and brakes.
Cheers,
Simon
Thanks: Phil Wood, Eric, Klipkopwildlife, Quorneng, THE BLACKBIRD, blue123, old fart
Please Log in or Create an account to join the conversation.
Time to create page: 0.384 seconds