
- Posts: 293
- Thank you received: 680
×
For those of you with deep enough pockets
Pilot RC Dolphin
- Si_B
-
 Topic Author
- Offline
- Elite Member
-

Less
More
30 May 2016 13:48 #1
by Si_B
Pilot RC Dolphin was created by Si_B
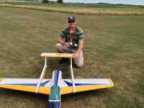
Bought this off a mate who wanted the turbine but not the model. Always fancied one as its good to have a sports jet made from wood as I can repair that !!
Was hoping to just put my turbine in as model has been built with servos etc, but after finding a few things I wasn't happy with (servo wire glued to thrust pipe) I decided to completely strip it and start again.


Was hoping to just put my turbine in as model has been built with servos etc, but after finding a few things I wasn't happy with (servo wire glued to thrust pipe) I decided to completely strip it and start again.
Thanks: Klipkopwildlife, Quorneng, THE BLACKBIRD
Please Log in or Create an account to join the conversation.
- Si_B
-
Topic Author
- Offline
- Elite Member
-
Less
More
- Posts: 293
- Thank you received: 680
30 May 2016 13:54 #2
by Si_B
Replied by Si_B on topic Pilot RC Dolphin
I think it was excess epoxy glue from the vertical fin being put on which dripped down onto pipe and stuck the servo wire to it.

Pipe had to come out to get the excess glue of and I was not keen on the method being used for connecting the air and servos to the wing, so all the wiring was taken out as well.
Then I removed the rudder servo cover.

Not a good idea to use super glue on such dense wood. Now expoxied and and additional screw through into the blocks for security.
Pipe had to come out to get the excess glue of and I was not keen on the method being used for connecting the air and servos to the wing, so all the wiring was taken out as well.
Then I removed the rudder servo cover.
Not a good idea to use super glue on such dense wood. Now expoxied and and additional screw through into the blocks for security.
Thanks: Klipkopwildlife, Quorneng, THE BLACKBIRD
Please Log in or Create an account to join the conversation.
- Si_B
-
Topic Author
- Offline
- Elite Member
-
Less
More
- Posts: 293
- Thank you received: 680
30 May 2016 13:59 #3
by Si_B
Replied by Si_B on topic Pilot RC Dolphin
The servo plates had been cut about to suit a different installation. Started working on the first one. Filled in any holes I didn't need and had a go at my first bit of glassing. Been watching a few videos using the peel ply method. Can't wait to see if has worked the way I expected.

Wanted to have a go at it and also wanted to paint the trays, so will give me a good finish to prepare for spraying. Got a lot of holes on the other plate to deal with.
Got lots of little bits to repair as I change things to my own preferences. Will post pictures as I go showing the new wiring and air system going in.
Wanted to have a go at it and also wanted to paint the trays, so will give me a good finish to prepare for spraying. Got a lot of holes on the other plate to deal with.
Got lots of little bits to repair as I change things to my own preferences. Will post pictures as I go showing the new wiring and air system going in.
Thanks: Klipkopwildlife, THE BLACKBIRD
Please Log in or Create an account to join the conversation.
- Quorneng
-

- Offline
- Forum Master
-

Less
More
- Posts: 10058
- Thank you received: 19043
30 May 2016 14:00 #4
by Quorneng
Probably very wise move to redo everything else as well.
Replied by Quorneng on topic Pilot RC Dolphin
A good spot!servo wire glued to thrust pipe
Probably very wise move to redo everything else as well.
Thanks: Si_B
Please Log in or Create an account to join the conversation.
- Si_B
-
Topic Author
- Offline
- Elite Member
-
Less
More
- Posts: 293
- Thank you received: 680
30 May 2016 14:04 #5
by Si_B
Replied by Si_B on topic Pilot RC Dolphin
The model has never flown, which might have been a good thing. It's a big fuselage, I'm over six foot and it's longer than me.
Simon
Simon
Please Log in or Create an account to join the conversation.
- Si_B
-
Topic Author
- Offline
- Elite Member
-
Less
More
- Posts: 293
- Thank you received: 680
30 May 2016 19:50 #6
by Si_B
Replied by Si_B on topic Pilot RC Dolphin
Little bit more time tonight and got the second tray patched up and glassed.

Be good to have them both dry tomorrow. Not looking like the weather to be spraying the primer outside for next few days, so will start pulling all the retracts and servos out of the wings.
Simon
Be good to have them both dry tomorrow. Not looking like the weather to be spraying the primer outside for next few days, so will start pulling all the retracts and servos out of the wings.
Simon
Thanks: Klipkopwildlife, Quorneng, THE BLACKBIRD
Please Log in or Create an account to join the conversation.
- Si_B
-
Topic Author
- Offline
- Elite Member
-
Less
More
- Posts: 293
- Thank you received: 680
31 May 2016 10:14 #7
by Si_B
Replied by Si_B on topic Pilot RC Dolphin
Peel ply came off and left a nice surface ready for the primer.

A slight ripple on the front board where there might have been a bit of excess resin under the cloth or a fault in the surface which I didn't notice. I did the first one stippling with a brush and the second with a scraper to spread the resin. The one I did with the brush looks much more consistent. Was worth experimenting with both as the surface will not effect anything. I could just leave them as bare wood.
Will get some paint and primer on later in the week when the weather improves.
Simon
A slight ripple on the front board where there might have been a bit of excess resin under the cloth or a fault in the surface which I didn't notice. I did the first one stippling with a brush and the second with a scraper to spread the resin. The one I did with the brush looks much more consistent. Was worth experimenting with both as the surface will not effect anything. I could just leave them as bare wood.
Will get some paint and primer on later in the week when the weather improves.
Simon
Thanks: Eric, Quorneng, THE BLACKBIRD
Please Log in or Create an account to join the conversation.
- Eric
-

- Offline
- Moderator
-

Less
More
- Posts: 15423
- Thank you received: 14351
31 May 2016 13:12 #8
by Eric
if you are calm and collected when all about you are going berserk - you've missed something important!
Replied by Eric on topic Pilot RC Dolphin
Stipple, then scrape, perhaps?
if you are calm and collected when all about you are going berserk - you've missed something important!
Thanks: Si_B
Please Log in or Create an account to join the conversation.
- THE BLACKBIRD
-

- Offline
- Forum Master
-
Less
More
- Posts: 6789
- Thank you received: 10743
31 May 2016 14:20 #9
by THE BLACKBIRD
Replied by THE BLACKBIRD on topic Pilot RC Dolphin
Looking at one very experienced guy with fibre glass and on a flat surface like you have Simon he always scraped it with a single edge razor blade,
He;s called Hornit Pilot on you tube the man is brilliant
Looks a nice model, we cannot fly ours until the middle of July and only then for 6 weeks, bloody birdy people
And 4 of them im in the uk
He;s called Hornit Pilot on you tube the man is brilliant
Looks a nice model, we cannot fly ours until the middle of July and only then for 6 weeks, bloody birdy people
And 4 of them im in the uk
Thanks: Si_B
Please Log in or Create an account to join the conversation.
- Si_B
-
Topic Author
- Offline
- Elite Member
-
Less
More
- Posts: 293
- Thank you received: 680
31 May 2016 17:42 - 31 May 2016 17:46 #10
by Si_B
Replied by Si_B on topic Pilot RC Dolphin
I've watched his videos numerous times. Would love to have the time to produce moulds to that standard. Going to have a play over the summer on a few little things.
I've seen a few different methods including using little foam brushes. I had ordered some but they arrived today (too impatient). It only has a ripple in a small area, I'm being quite picky and it's not called a learning curve for nothing. I can see that I was just a bit too generous with the resin assuming the peel ply would sort it. I'm happy for my first attempt.
Been working on the wings today. Same issue with the servo blocks. These had an added screw, but once that was taken out you could just break them off with no effort.

Now expoxied on so going nowhere.
Simon
I've seen a few different methods including using little foam brushes. I had ordered some but they arrived today (too impatient). It only has a ripple in a small area, I'm being quite picky and it's not called a learning curve for nothing. I can see that I was just a bit too generous with the resin assuming the peel ply would sort it. I'm happy for my first attempt.
Been working on the wings today. Same issue with the servo blocks. These had an added screw, but once that was taken out you could just break them off with no effort.
Now expoxied on so going nowhere.
Simon
Last edit: 31 May 2016 17:46 by Si_B.
Thanks: THE BLACKBIRD
Please Log in or Create an account to join the conversation.
- Si_B
-
Topic Author
- Offline
- Elite Member
-
Less
More
- Posts: 293
- Thank you received: 680
31 May 2016 17:44 #11
by Si_B
Replied by Si_B on topic Pilot RC Dolphin
Took all the wiring out and replaced with my own crimps and double Ashlok, so only one connection to make when putting each wing on.

Simon
Simon
Thanks: THE BLACKBIRD, Ralpharr2001
Please Log in or Create an account to join the conversation.
- Si_B
-
Topic Author
- Offline
- Elite Member
-
Less
More
- Posts: 293
- Thank you received: 680
31 May 2016 18:04 - 15 Jun 2016 20:53 #12
by Si_B
Replied by Si_B on topic Pilot RC Dolphin
New airlines are in, making sure that I know the lengths so the other wing can be made identical.

All servo connections are shrink wrapped so they should never need checking. The retract is now back in and I've gone over the covering with the sealing iron to get rid of some wrinkles and handling marks which were already there.
Now to repeat the process on the other wing.
Simon
All servo connections are shrink wrapped so they should never need checking. The retract is now back in and I've gone over the covering with the sealing iron to get rid of some wrinkles and handling marks which were already there.
Now to repeat the process on the other wing.
Simon
Last edit: 15 Jun 2016 20:53 by .
Thanks: Quorneng, THE BLACKBIRD, blue123
Please Log in or Create an account to join the conversation.
- Si_B
-
Topic Author
- Offline
- Elite Member
-
Less
More
- Posts: 293
- Thank you received: 680
02 Jun 2016 13:12 #13
by Si_B
Replied by Si_B on topic Pilot RC Dolphin
The Jetmunts 100 is a very small turbine so had to make some adaptor plates to get it to fit.

Still need to paint the trays but both wings are done, now need to mount retract and fuel valves.
Getting there slowly.
Simon
Still need to paint the trays but both wings are done, now need to mount retract and fuel valves.
Getting there slowly.
Simon
Thanks: Quorneng, THE BLACKBIRD
Please Log in or Create an account to join the conversation.
- Si_B
-
Topic Author
- Offline
- Elite Member
-
Less
More
- Posts: 293
- Thank you received: 680
03 Jun 2016 12:25 #14
by Si_B
Replied by Si_B on topic Pilot RC Dolphin
Got a lot done this morning. Fuel valves are in and all connections lock wired. Only connection to tank need to be done once I've sorted it out and put it back.

Retract valve and all the airlines are in place. Front retract is back in as well.

Got to get the trays painted so I can mount the electronics and start connecting things up. As normal, most of the wires from the turbine are too short so a bit of wiring and soldering work still to do.
Simon
Retract valve and all the airlines are in place. Front retract is back in as well.
Got to get the trays painted so I can mount the electronics and start connecting things up. As normal, most of the wires from the turbine are too short so a bit of wiring and soldering work still to do.
Simon
Thanks: Eric, Quorneng, THE BLACKBIRD
Please Log in or Create an account to join the conversation.
- Si_B
-
Topic Author
- Offline
- Elite Member
-
Less
More
- Posts: 293
- Thank you received: 680
04 Jun 2016 21:32 #15
by Si_B
Replied by Si_B on topic Pilot RC Dolphin
Painted the trays, will get some clear coat on in the morning. Finish is not perfect as I didn't buy filler primer, so weave is still visible, but still had fun doing it and learnt a lot. Hoped the green would be more like the colour on the tin, but it turned out both dark and metallic.
Will still look smart when installed I think.
Simon
Will still look smart when installed I think.
Simon
Please Log in or Create an account to join the conversation.
Time to create page: 0.387 seconds