
- Posts: 6368
- Thank you received: 10842
Tiger Moth
- THE BLACKBIRD
-

- Offline
- Forum Master
-

Less
More
02 Feb 2018 20:01 #46
by THE BLACKBIRD
Replied by THE BLACKBIRD on topic Tiger Moth
i would have thought the cowling would give you the position of the thrust line
No good putting it where you think it should be only to fined it will not fit the cowl
Just my two cents
No good putting it where you think it should be only to fined it will not fit the cowl
Just my two cents
Thanks: Klipkopwildlife, boz
Please Log in or Create an account to join the conversation.
- Klipkopwildlife
-
 Topic Author
- Offline
- Administrator
-

- I'm supposed to be retired!
03 Feb 2018 13:34 #47
by Klipkopwildlife
Do it now, you may never get another chance
Replied by Klipkopwildlife on topic Tiger Moth
The cowl is a rattle fit, so a bit difficult to position! On the assumption that the foremost point of the cowl will be the thrust line I did a bit of guesstimating.


Which when offered up to the fuselage looks about right.

Which when offered up to the fuselage looks about right.
Do it now, you may never get another chance
Thanks: Eric, THE BLACKBIRD, boz, Squirrelnet
Please Log in or Create an account to join the conversation.
- one tenor
-

- Offline
- Forum Veteran
-

- johnpcalex@gmail.com
- Klipkopwildlife
-
Topic Author
- Offline
- Administrator
-
- I'm supposed to be retired!
03 Feb 2018 13:53 #49
by Klipkopwildlife
Do it now, you may never get another chance
Replied by Klipkopwildlife on topic Tiger Moth
I wasn't sure about engines but thought that a 4 stroke should be first choice. The anticipated all up weight is 2.5 - 3kgs (5 -6lbs) I have a new in box OS 52
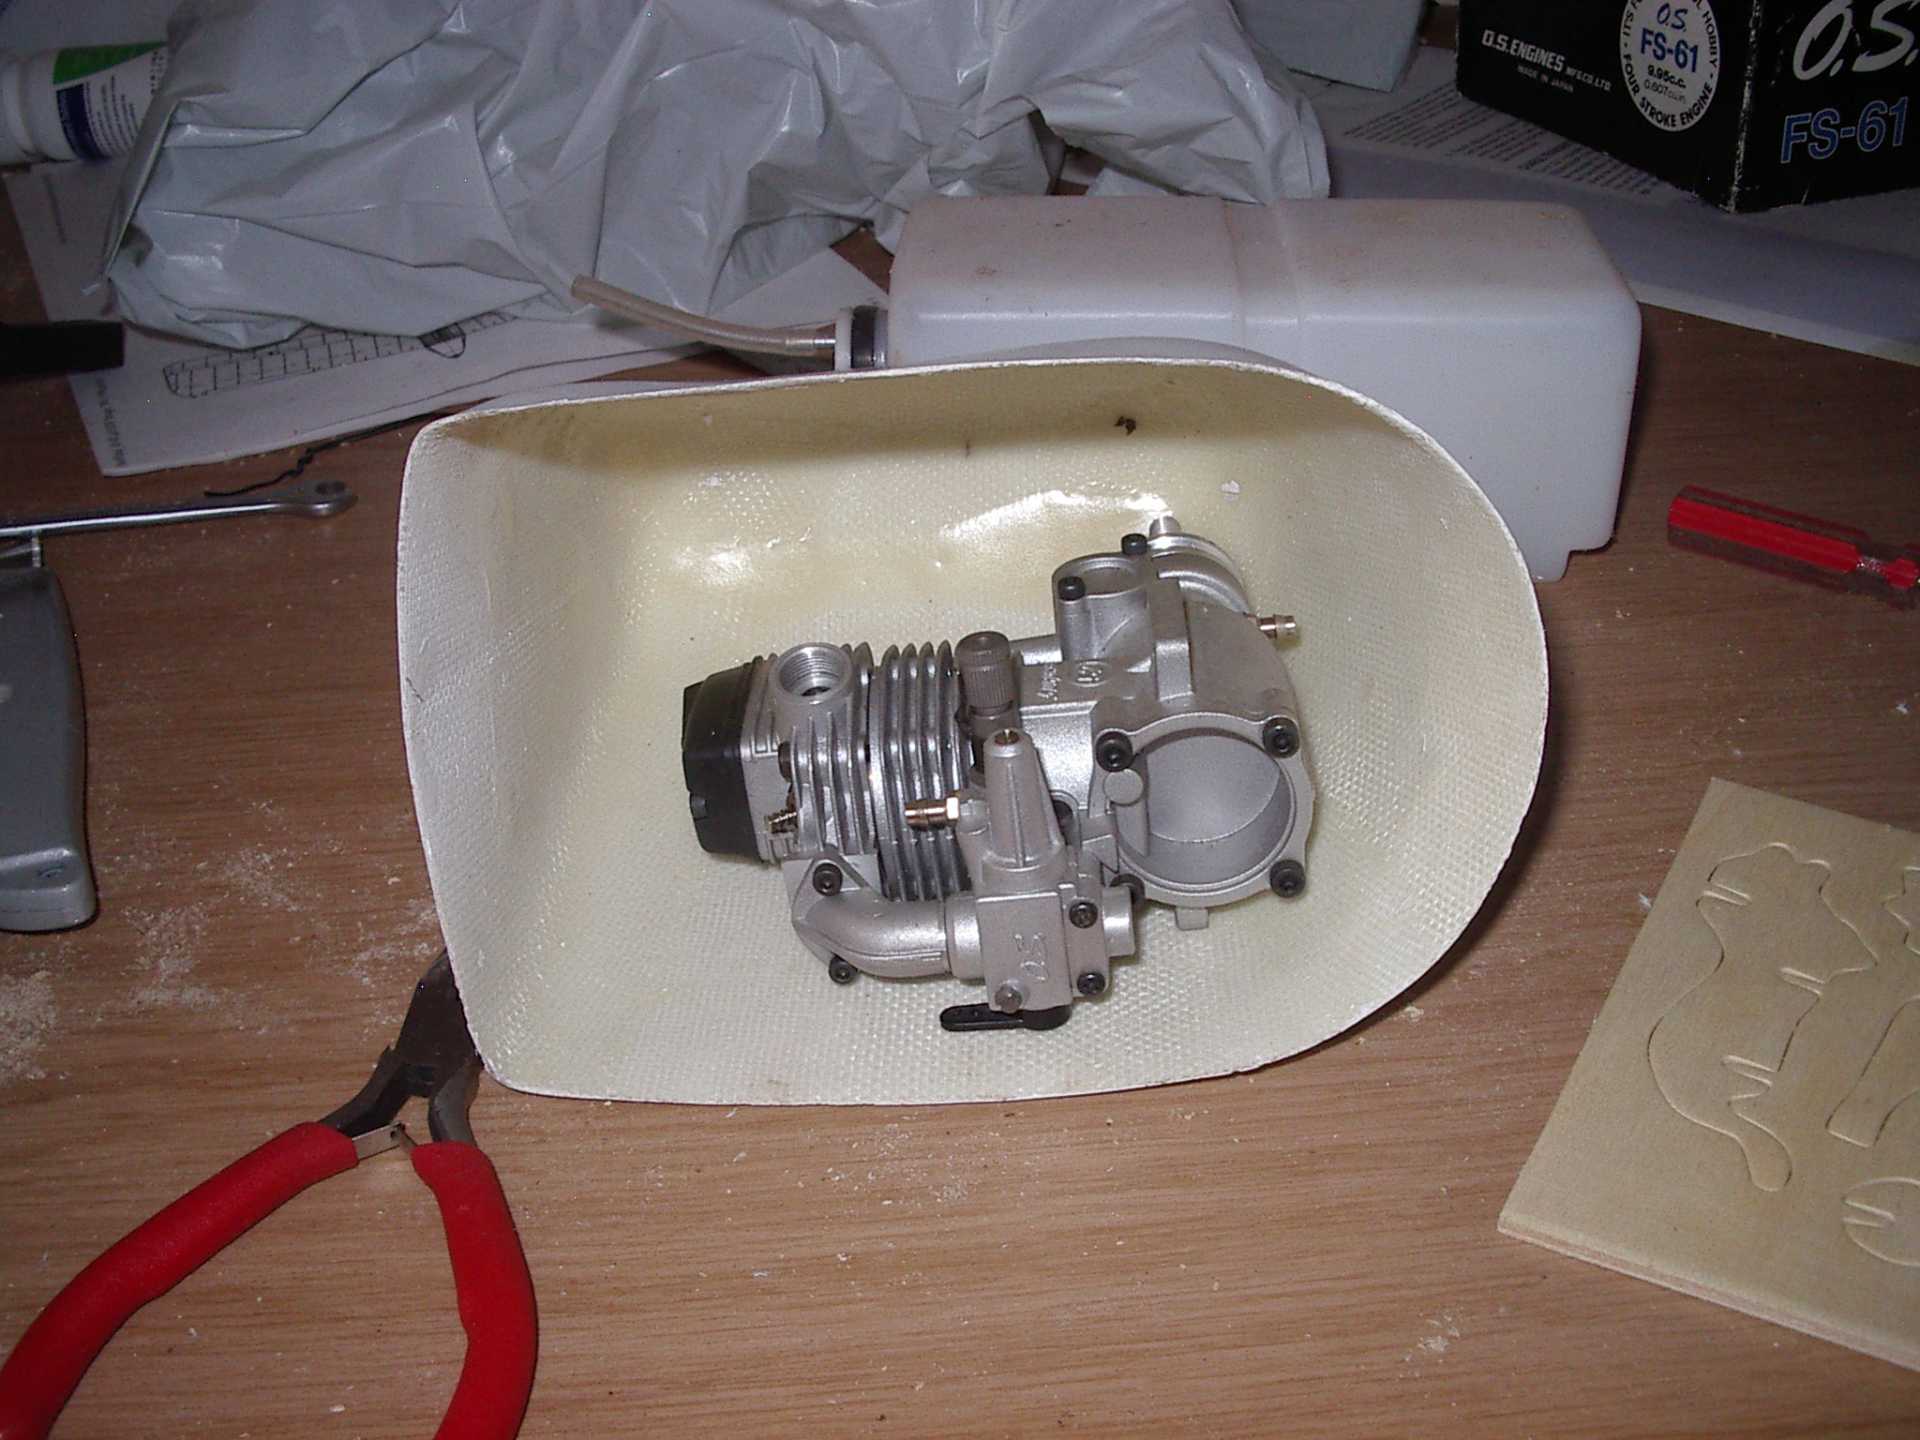
which frankly looks lost in the cowl

An OS 61 FS looks slightly less so. I was thinking about an old open rocker OS60 FS but when I ran it up it ran fine but sounded like a bucket of bolts. New bearings will be ordered but in the mean time I'll go with the OS61FS
which frankly looks lost in the cowl
An OS 61 FS looks slightly less so. I was thinking about an old open rocker OS60 FS but when I ran it up it ran fine but sounded like a bucket of bolts. New bearings will be ordered but in the mean time I'll go with the OS61FS
Do it now, you may never get another chance
Thanks: Eric, Quorneng, THE BLACKBIRD, boz, Squirrelnet
Please Log in or Create an account to join the conversation.
- Klipkopwildlife
-
Topic Author
- Offline
- Administrator
-
- I'm supposed to be retired!
04 Feb 2018 17:17 - 04 Feb 2018 17:21 #50
by Klipkopwildlife
Do it now, you may never get another chance
Replied by Klipkopwildlife on topic Tiger Moth
Having decided on the engine and thrust line my thoughts returned to the tank.

It's not as big as I would have liked at 9ozs but everything seems to want to get in the way when I try and put anything bigger.

As I thought, A14 (the centre spacer) is exactly where I want to put the tank, but it is what it is! The bottom of the tank will be roughly on the centre line of the carburettor.
I can expect the 61 to use about .8ozs/minute, about 11minutes at WOT and nothing to spare!
It's not as big as I would have liked at 9ozs but everything seems to want to get in the way when I try and put anything bigger.
As I thought, A14 (the centre spacer) is exactly where I want to put the tank, but it is what it is! The bottom of the tank will be roughly on the centre line of the carburettor.
I can expect the 61 to use about .8ozs/minute, about 11minutes at WOT and nothing to spare!
Do it now, you may never get another chance
Last edit: 04 Feb 2018 17:21 by Klipkopwildlife.
Thanks: Eric, Quorneng, THE BLACKBIRD, boz, Squirrelnet
Please Log in or Create an account to join the conversation.
- one tenor
-
- Offline
- Forum Veteran
-
- johnpcalex@gmail.com
05 Feb 2018 11:14 #51
by one tenor
Anything will fly given enough power
Replied by one tenor on topic Tiger Moth
Isn't that a little high Tony?
Anything will fly given enough power
Please Log in or Create an account to join the conversation.
- Klipkopwildlife
-
Topic Author
- Offline
- Administrator
-
- I'm supposed to be retired!
09 Feb 2018 17:18 - 09 Feb 2018 17:19 #52
by Klipkopwildlife
Do it now, you may never get another chance
Replied by Klipkopwildlife on topic Tiger Moth
Damn right John!
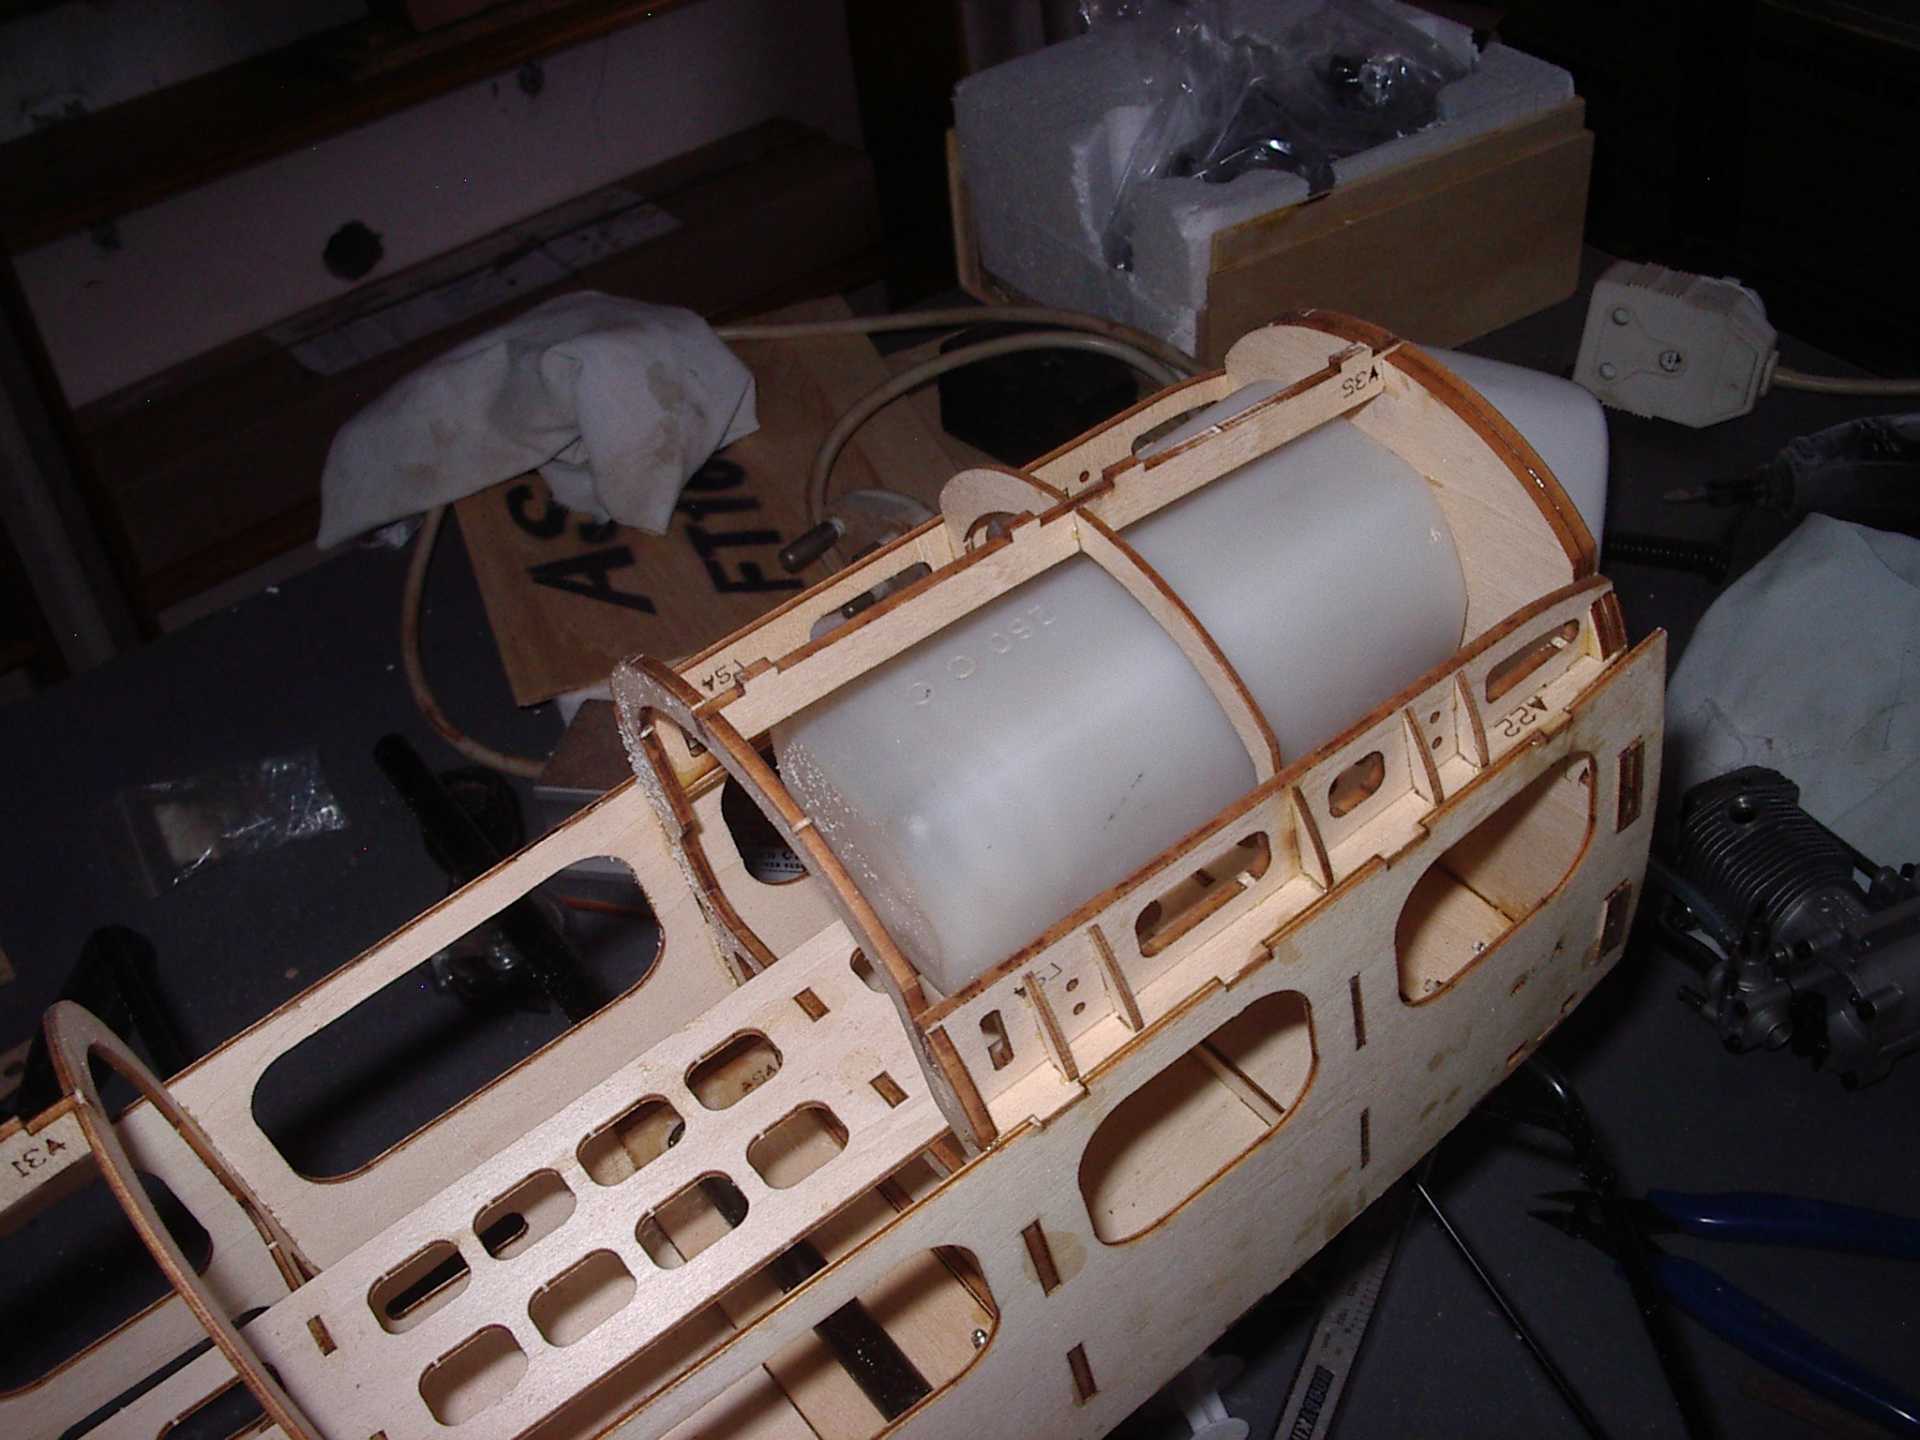
The main former A14 sits exactly where I want to put the tank.
Having settled on the thrust line I've fitted the engine mount.
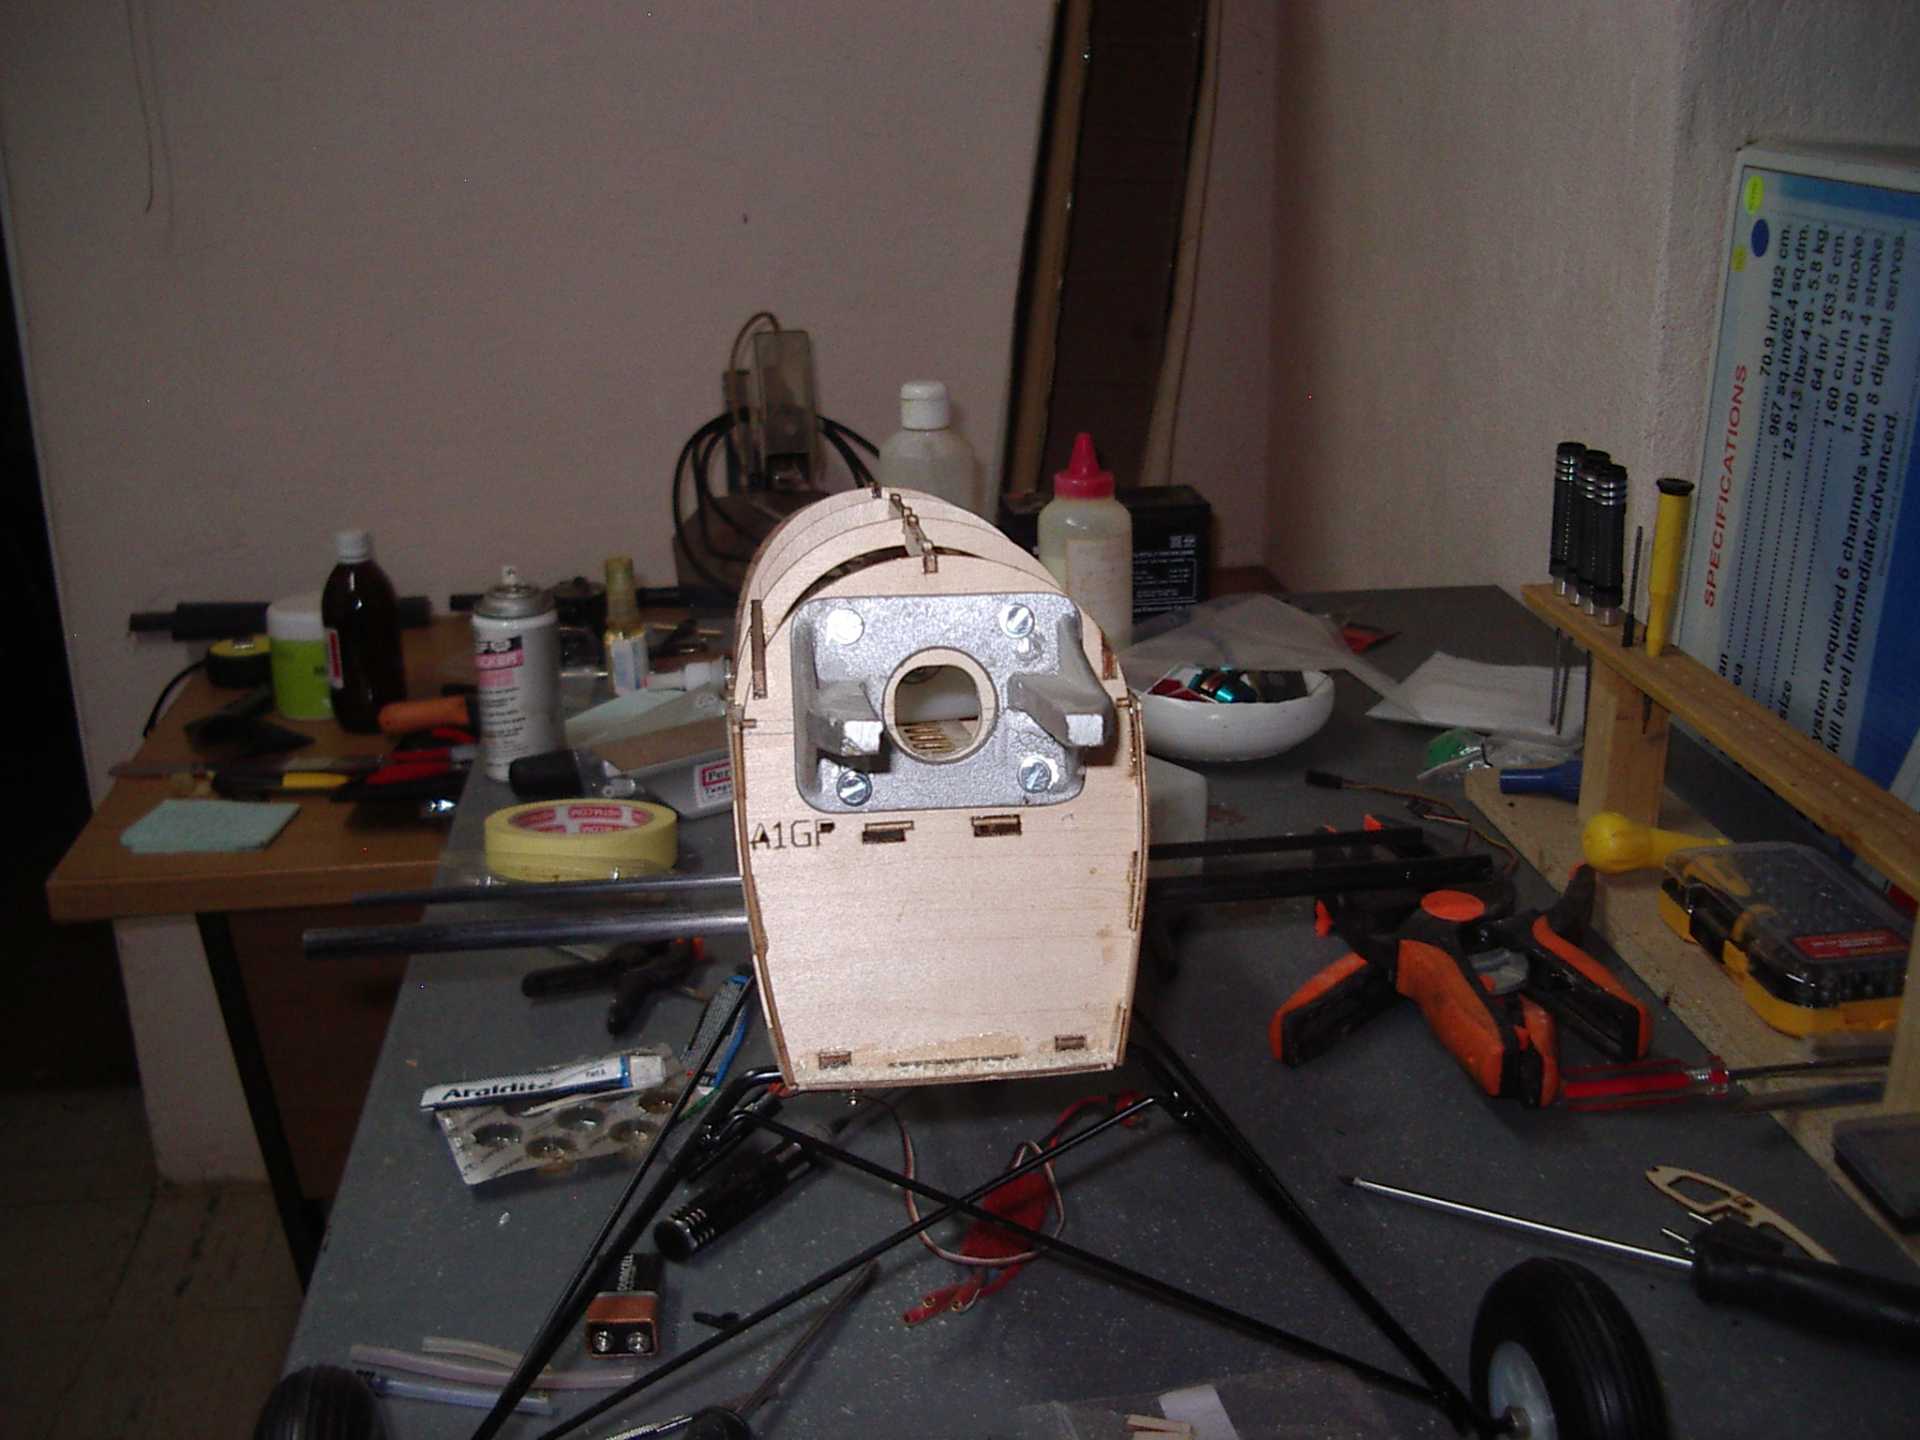
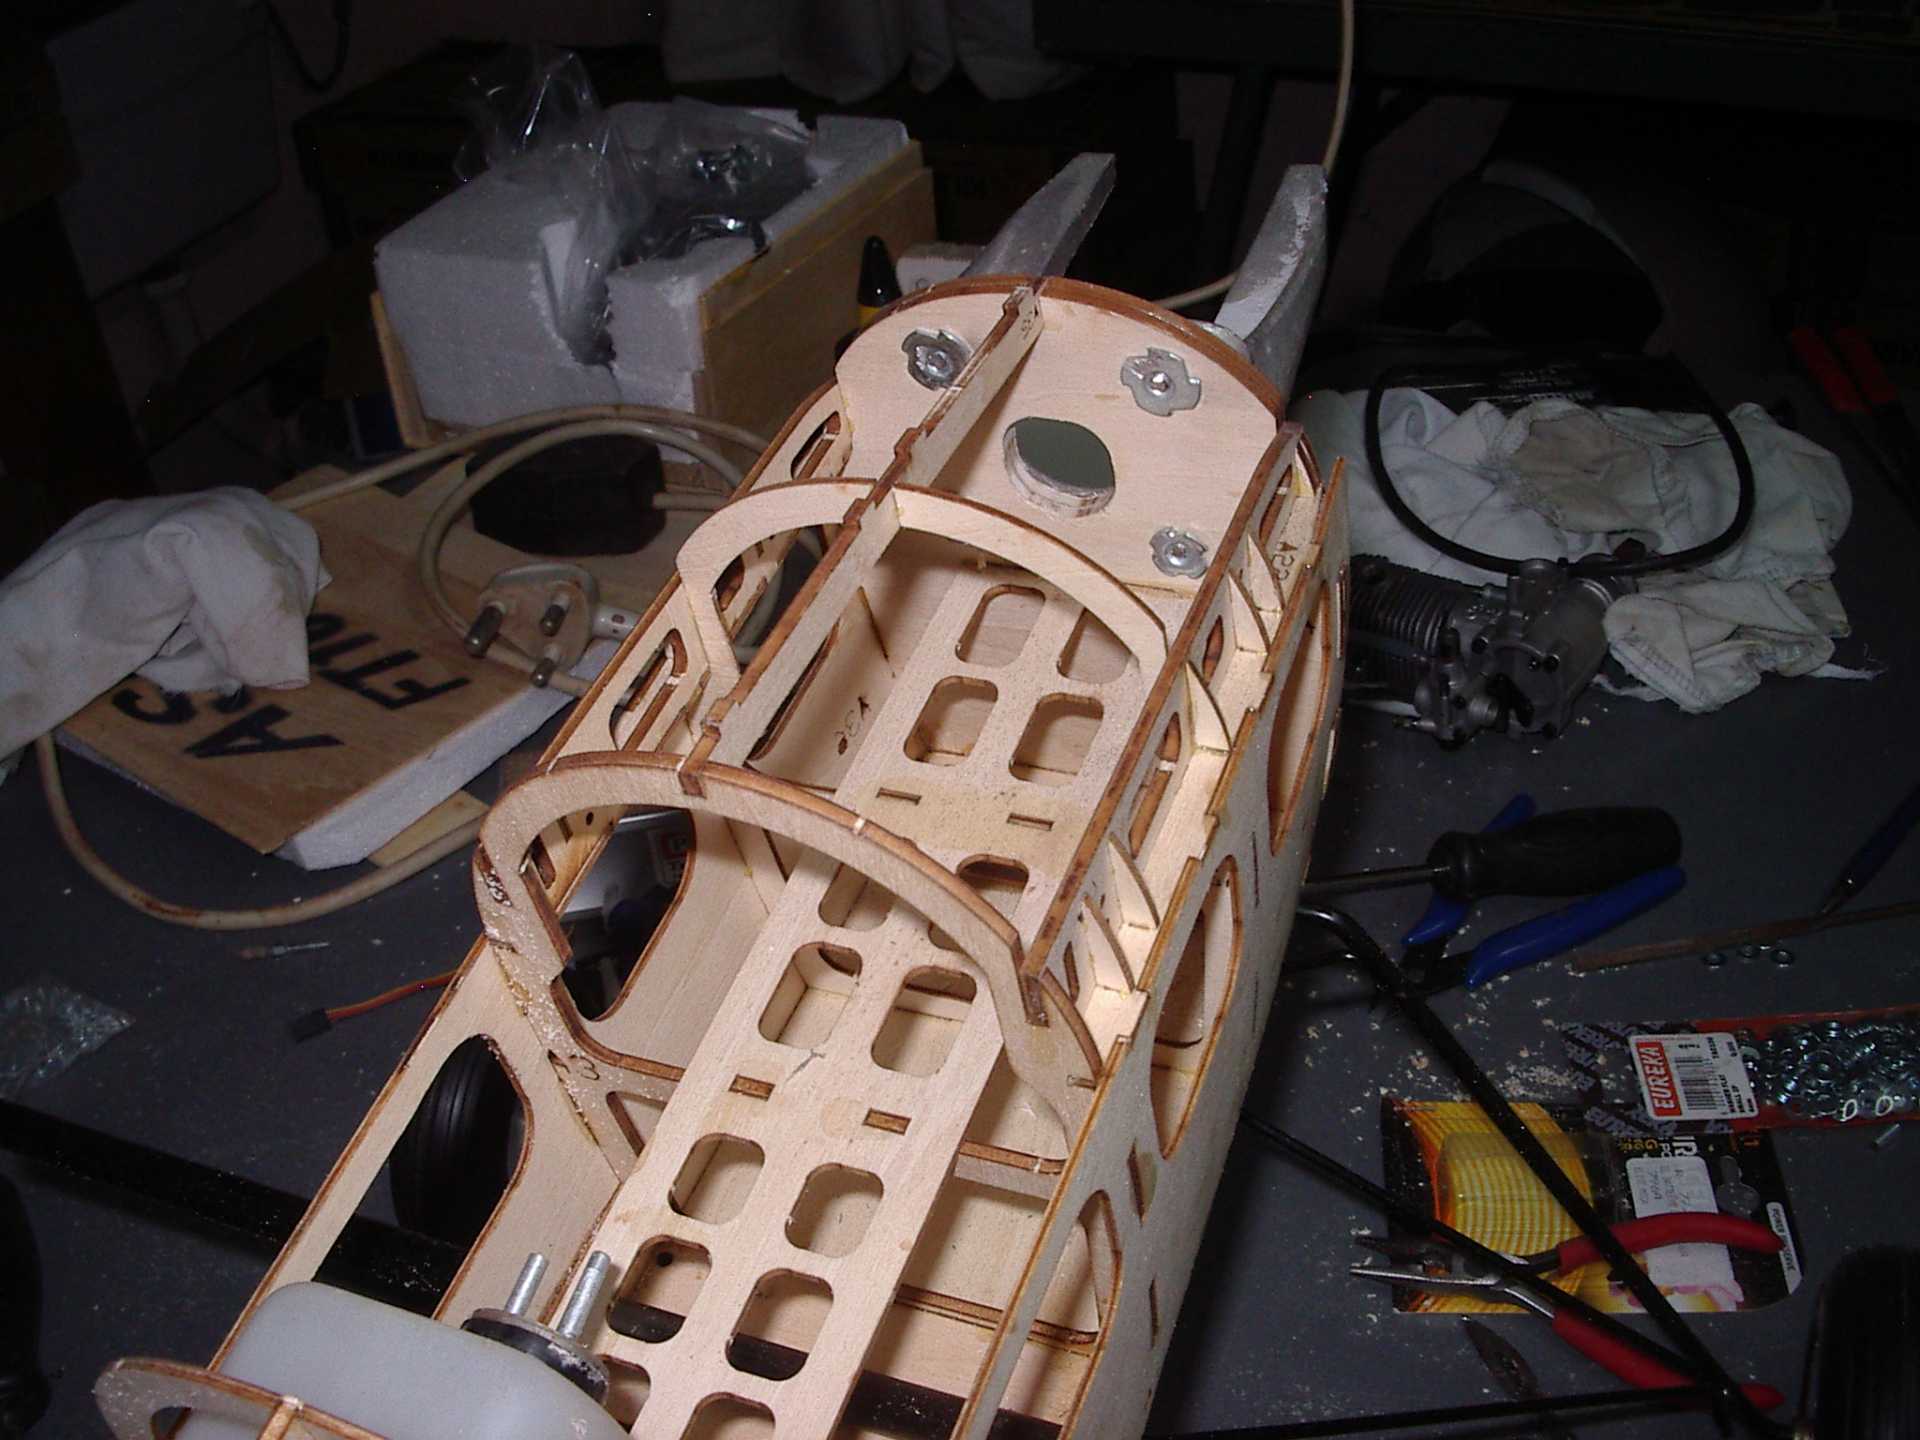
Next will be to fit the throttle servo, all these 'little' things seem to take the most time!
The main former A14 sits exactly where I want to put the tank.
Having settled on the thrust line I've fitted the engine mount.
Next will be to fit the throttle servo, all these 'little' things seem to take the most time!
Do it now, you may never get another chance
Last edit: 09 Feb 2018 17:19 by Klipkopwildlife.
Thanks: Quorneng, THE BLACKBIRD, boz
Please Log in or Create an account to join the conversation.
- one tenor
-
- Offline
- Forum Veteran
-
- johnpcalex@gmail.com
09 Feb 2018 18:29 #53
by one tenor
Anything will fly given enough power
Replied by one tenor on topic Tiger Moth
But won't that position tend towards flooding the carb? I always understood that the carb should line up with the centre line of the tank. Is that right or have I missed something.
Anything will fly given enough power
Thanks: boz
Please Log in or Create an account to join the conversation.
- THE BLACKBIRD
-
- Offline
- Forum Master
-
Less
More
- Posts: 6368
- Thank you received: 10842
09 Feb 2018 21:13 #54
by THE BLACKBIRD
Replied by THE BLACKBIRD on topic Tiger Moth
I thought it was to John but it looks like Tony has no choice in the matter
Looks a nice kit
Looks a nice kit
Please Log in or Create an account to join the conversation.
- one tenor
-
- Offline
- Forum Veteran
-
- johnpcalex@gmail.com
- Eric
-

- Offline
- Moderator
-

Less
More
- Posts: 13726
- Thank you received: 14467
09 Feb 2018 23:15 #56
by Eric
if you are calm and collected when all about you are going berserk - you've missed something important!
Replied by Eric on topic Tiger Moth
Electric models don't HAVE a fuel tank! (smug grin), and a lipo would fit nicely into that space.
Perhaps Tony was supposed to remove that half of that former, for an i/c model? (but that would leave the front very weak!)
Perhaps Tony was supposed to remove that half of that former, for an i/c model? (but that would leave the front very weak!)
if you are calm and collected when all about you are going berserk - you've missed something important!
Thanks: Flytilbroke, boz
Please Log in or Create an account to join the conversation.
- one tenor
-
- Offline
- Forum Veteran
-
- johnpcalex@gmail.com
10 Feb 2018 02:00 #57
by one tenor
Anything will fly given enough power
Replied by one tenor on topic Tiger Moth
Ah but would it? It;s pretty tough looking
Anything will fly given enough power
Please Log in or Create an account to join the conversation.
- Klipkopwildlife
-
Topic Author
- Offline
- Administrator
-
- I'm supposed to be retired!
10 Feb 2018 12:53 #58
by Klipkopwildlife
Then came mufflers and we could use back pressure to lessen the effect, it was still there but nowhere near as bad.
With RC engines we have an adjustable carburettor, and throttle cut so I don't expect too much fuel leakage while the model is standing, plus it's an inverted setup so any leakage runs out, not in.
Do it now, you may never get another chance
Replied by Klipkopwildlife on topic Tiger Moth
You've missed nothing John, in the old days when engines were flat out or out of fuel, the fuel would drain into the carburettor, sometimes with disastrous results in an upright setup. In an inverted it didn't matter so much because the fuel runs straight out! We set the centre of the tank on the carburettor centre line and sent the model off slightly rich, knowing it would lean out during the run.one tenor wrote: But won't that position tend towards flooding the carb? I always understood that the carb should line up with the centre line of the tank. Is that right or have I missed something.
Then came mufflers and we could use back pressure to lessen the effect, it was still there but nowhere near as bad.
With RC engines we have an adjustable carburettor, and throttle cut so I don't expect too much fuel leakage while the model is standing, plus it's an inverted setup so any leakage runs out, not in.
Do it now, you may never get another chance
Thanks: boz
Please Log in or Create an account to join the conversation.
- Klipkopwildlife
-
Topic Author
- Offline
- Administrator
-
- I'm supposed to be retired!
10 Feb 2018 13:13 #59
by Klipkopwildlife
Do it now, you may never get another chance
Replied by Klipkopwildlife on topic Tiger Moth
Well I've done a little more, I got side tracked with an engine light problem on my KZ-TE diesel.
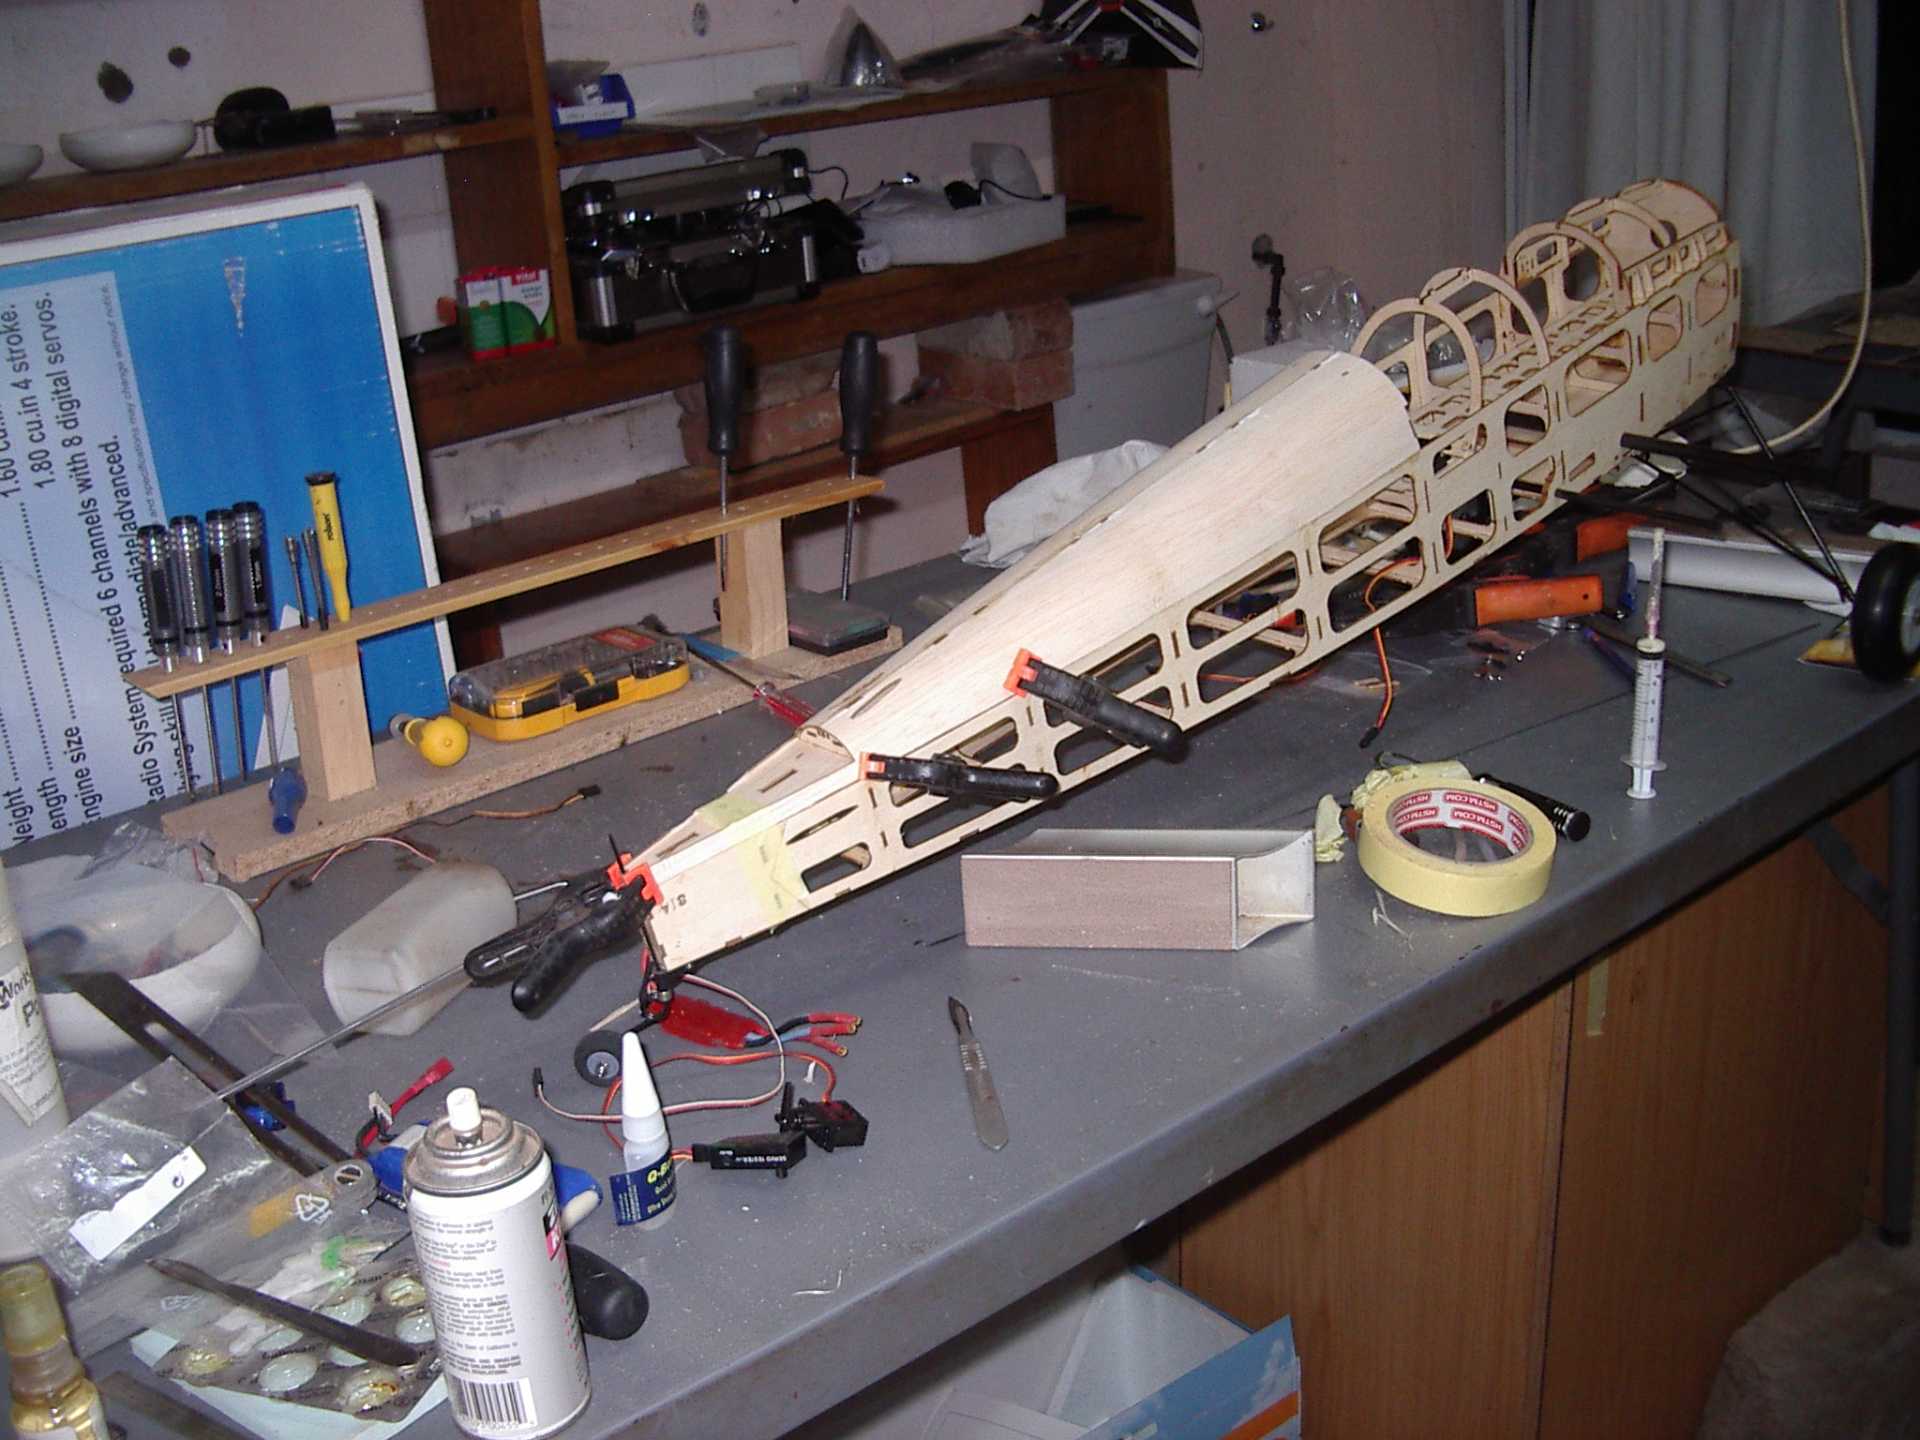
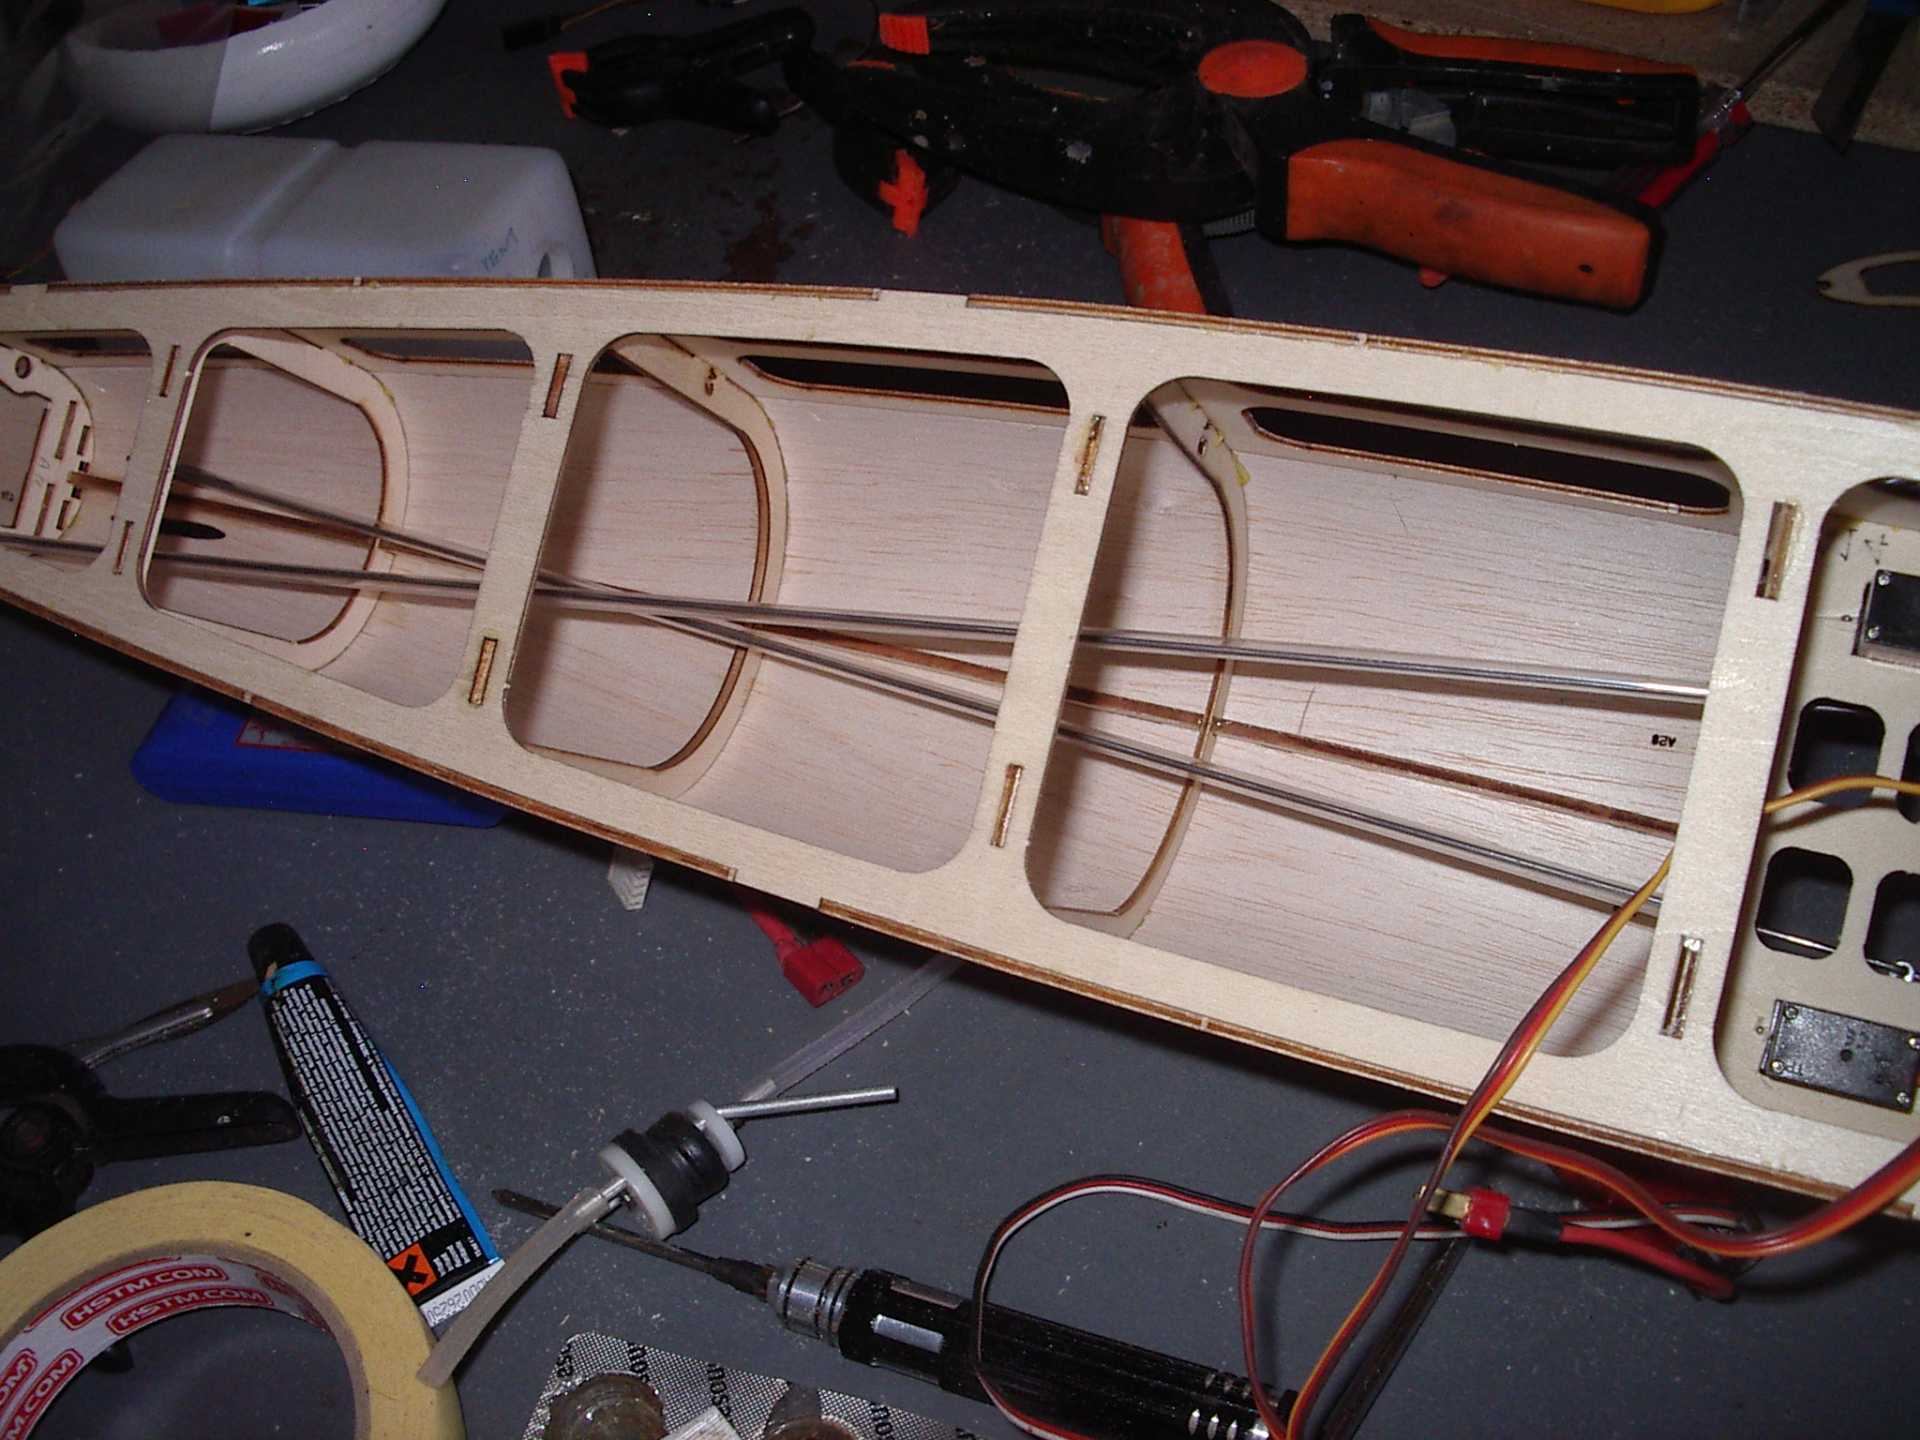
Needed to know more about push rod exits and the like so I've put the rear decking on. I was going to put just one side on but, wouldn't you know it? I put the wrong half on first!
Now I can see what's happening I've worked out where the servo arms must come and put extra blocks in so the rod comes exactly in the centre of the snake. Once that was done I could drill the push rod holes so that, on centre the rod was close to the outside of the snake. Remember the rod is 1.5mm and the snake inside is 3mm so I've got .75mm to play with. I've fitted the servos and I get 75% travel in each direction before the rod fouls on the rudder snake and 90% on the elevator.

The snakes will have to be supported inside the fuselage.
Needed to know more about push rod exits and the like so I've put the rear decking on. I was going to put just one side on but, wouldn't you know it? I put the wrong half on first!
Now I can see what's happening I've worked out where the servo arms must come and put extra blocks in so the rod comes exactly in the centre of the snake. Once that was done I could drill the push rod holes so that, on centre the rod was close to the outside of the snake. Remember the rod is 1.5mm and the snake inside is 3mm so I've got .75mm to play with. I've fitted the servos and I get 75% travel in each direction before the rod fouls on the rudder snake and 90% on the elevator.
The snakes will have to be supported inside the fuselage.
Do it now, you may never get another chance
Thanks: boz, Squirrelnet
Please Log in or Create an account to join the conversation.
- Klipkopwildlife
-
Topic Author
- Offline
- Administrator
-
- I'm supposed to be retired!
10 Feb 2018 13:21 - 10 Feb 2018 13:22 #60
by Klipkopwildlife
Do it now, you may never get another chance
Replied by Klipkopwildlife on topic Tiger Moth
While I was forming 'Z' bends on the push rods a new problem popped up, the rod is too hard!

The first attempt just broke! On this one I've softened the rod just a bit (heated it up to blue) and it's split the surface. I had to take the rod to full red heat and cool before I could get a decent bend. No I have not re-hardened the rod! It's only the last half inch and the servo will break out before the rod bends. In my opinion a 1.5mm rod on a model this size is way over the top.
The first attempt just broke! On this one I've softened the rod just a bit (heated it up to blue) and it's split the surface. I had to take the rod to full red heat and cool before I could get a decent bend. No I have not re-hardened the rod! It's only the last half inch and the servo will break out before the rod bends. In my opinion a 1.5mm rod on a model this size is way over the top.
Do it now, you may never get another chance
Last edit: 10 Feb 2018 13:22 by Klipkopwildlife. Reason: Punctuation
Thanks: boz, Squirrelnet
Please Log in or Create an account to join the conversation.
Time to create page: 2.447 seconds