
- Posts: 13
- Thank you received: 38
Help with film covering
- Alan
- Topic Author
- Offline
- New Member
-

Less
More
21 Oct 2023 20:23 - 22 Oct 2023 18:30 #1
by Alan
Help with film covering was created by Alan
Hi All, I am in the middle of building a model and need some advice with covering. I apologise for the fairly lengthy post. I agreed to finish a model for a lady whose son died before he was able to complete it. It is a Hachette Red Baron (1/8th scale tri-plane). It is one of those where the parts are collected with weekly magazines (100 in this case) and is around 20 years old. It is a bit of a hybrid, in that the wings are normal construction of wooden ribs and spars, but the fuselage is made out of brass rods and cast metal parts. He had started it but but not got very far and it has suffered over the years with many parts broken which I have repaired and I am nearing the point where I need to cover it. The covering supplied with the kit is some kind of iron on vinyl, not sure what make as it is not marked. The bulk of the covering is obviously red, and this has a peal off film covering the adhesive side and when I apply heat, it does adhere to the wooden ribs, but the adhesive appears weak. I am not sure how well it will adhere to the metal. The tail/rudder is white and has a small square of covering provided, this however, does not have a peal off film and shows no signs of having any adhesive on it, although the instruction clearly state it is iron on.
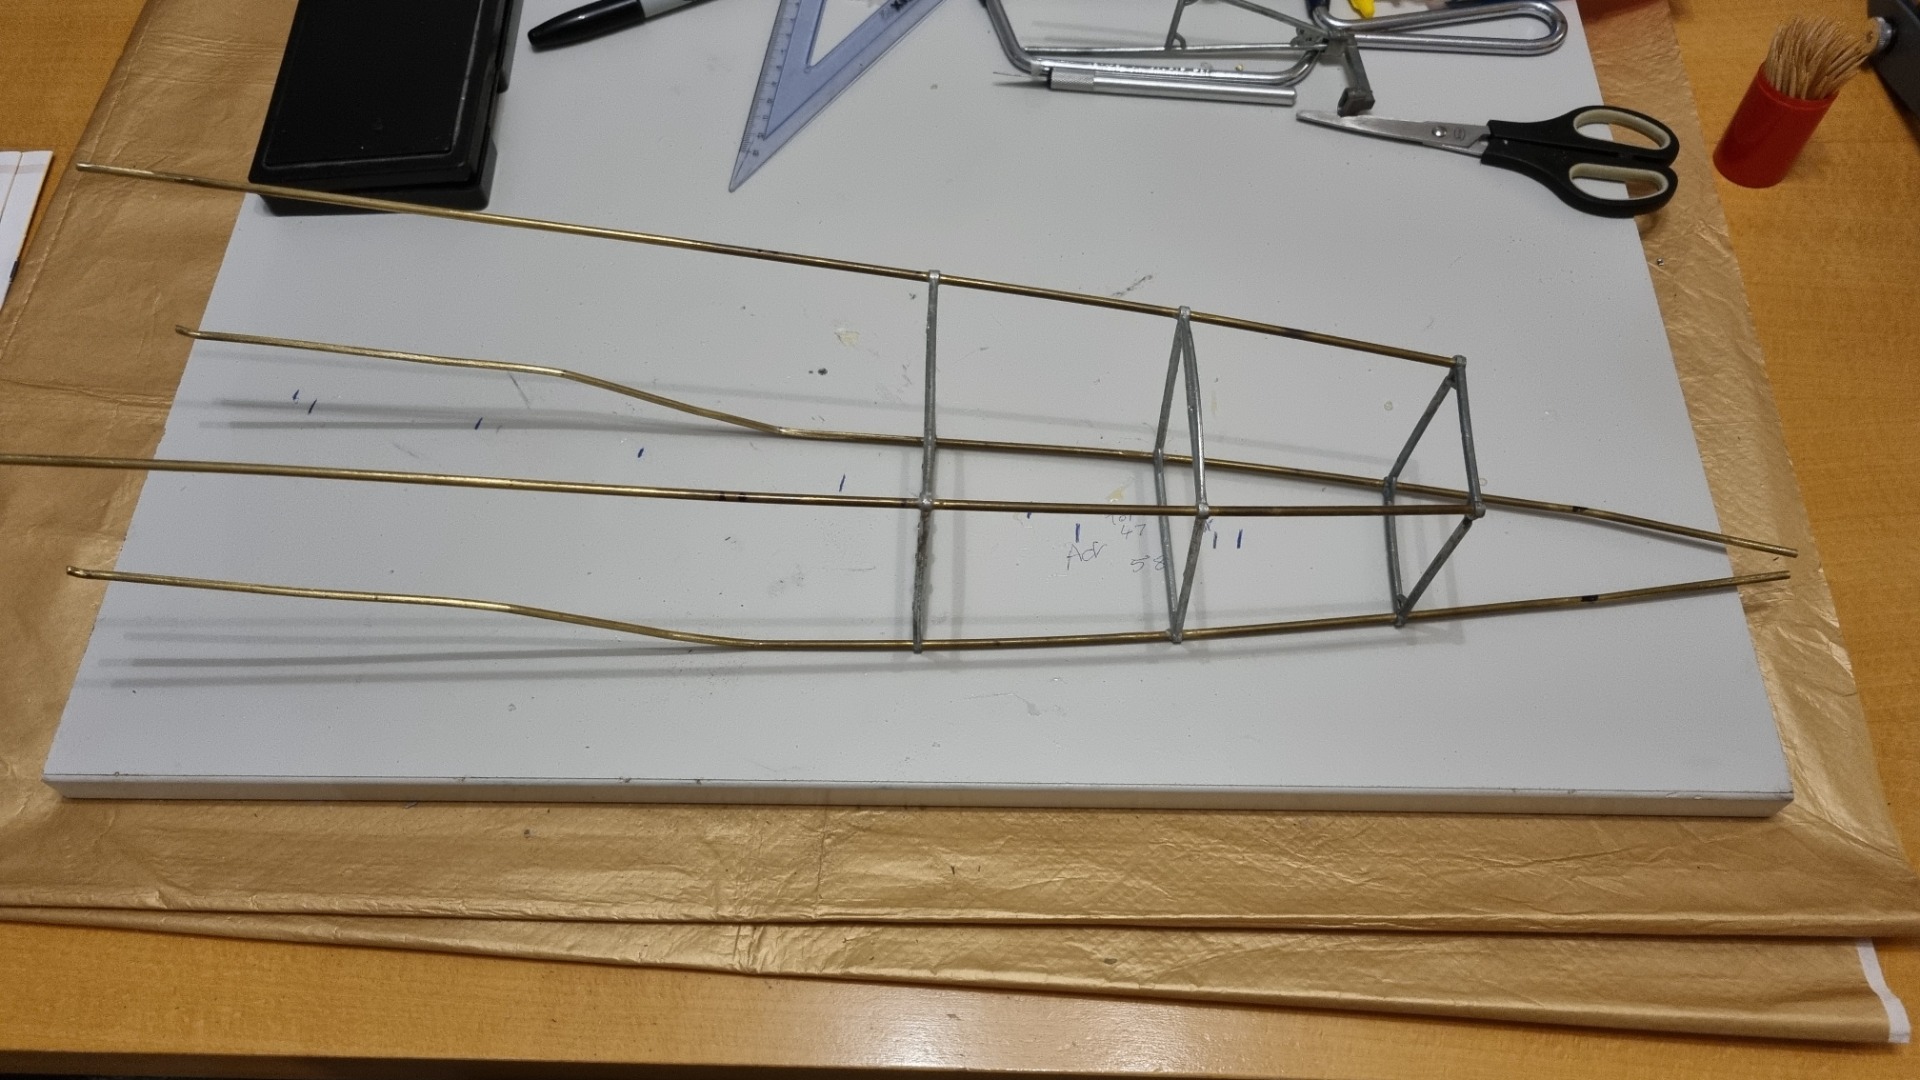
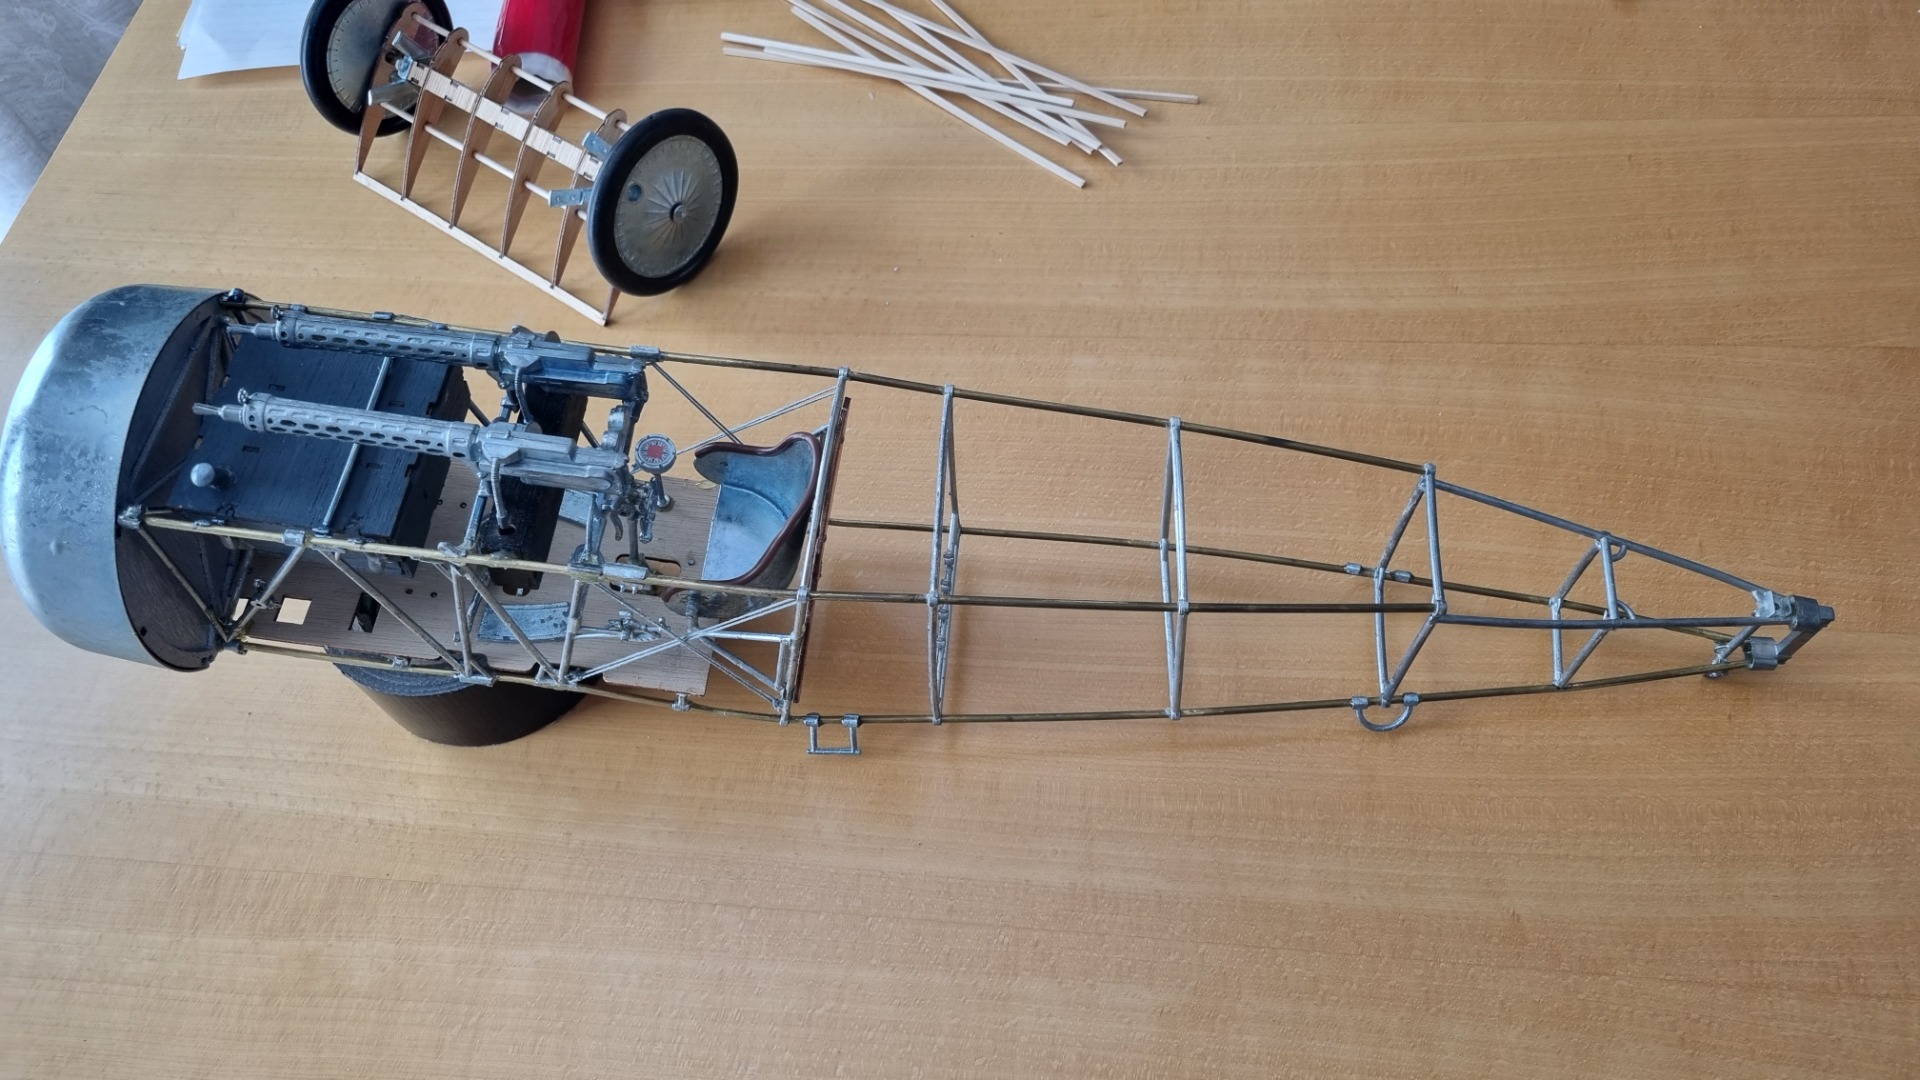
So to my question, can I use some kind adhesive with the film, if so what. My main concern is the white film as this will not adhere without some adhesive, but I am also concerned about how well the red film with adhere to the metal frame.
So to my question, can I use some kind adhesive with the film, if so what. My main concern is the white film as this will not adhere without some adhesive, but I am also concerned about how well the red film with adhere to the metal frame.
Last edit: 22 Oct 2023 18:30 by Eric. Reason: images moved
Thanks: Flytilbroke, jon.in.swansea
Please Log in or Create an account to join the conversation.
- Eric
-

- Offline
- Moderator
-

Less
More
- Posts: 13726
- Thank you received: 14467
22 Oct 2023 08:41 #2
by Eric
if you are calm and collected when all about you are going berserk - you've missed something important!
Replied by Eric on topic Help with film covering
Welcome to the group, Alan.
First off, I have yet to see any of these magazine 'kits' fly, so I would build it as a looking-at display model, not a flyable one.
As the covering material is 20 years old, it is likely that the - probably inexpensive - heat-activated adhesive has 'died' of old age.
Is there any indication of what it is/was, a brand name, or anything, either on the covering, or in the instructions? There are many on the market, all requiring different treatment.
Bonding it to the metal tubes - you will be very lucky! You would need to thoroughly degrease and clean the metal parts first, possibly with IPA or similar solvents. Any preserving oil or oxides on the surface will weaken the bond!
To get heat-shrink covering to adhere to such a small surface area would be difficult enough for an expert.
What are you using to bond the covering with? (a domestic clothes iron, a hair-dryer, etc?) The temperature is important.
As you are aware, metal is a good heat conductor, so to get the metal hot enough for the covering to bond to it will be a fine art, a shade too cool and it won't stick, a shade too hot, and the film will literally vanish into a molten hole!
Do you have any model-flying skills, yourself? If not, then that is another reason to have this as a display model only, or it will not last very long.
Weight and balance is critical - and with a very short-nosed WW1 aircraft - which was not easy to fly in the first place - getting enough weight forwards - (without adding any!) - and keeping the back end light, is a common problem. Being partly metal, it will be heavy enough as it is!
If you think of the full-size one, it had a huge iron lump on the front, and the rest of it was air-space held in shape by tiny tubes and sticks.
In the full-size world, covering fabric is stitched onto the airframe, but to do that in model size would be almost impossible.
Whereabouts in the country are you? Don't give away your street name, just the area - and I would advise you to try to find a local to you model flying club, where hopefully someone can give you hands-on guidance and assistance. Have a look on this site - bmfa.justgo.com/clubFinder.html - to see if there is one near you. You can zoom in to your locality.
Please let us know how you get on with it!
When you added your photo's, you missed a step out, when youj have 'added' then you have to 'insert' or you just get the thumbnails, as you did. Clicking on them gives the full image.
if you are calm and collected when all about you are going berserk - you've missed something important!
Thanks: Klipkopwildlife, Flytilbroke, THE BLACKBIRD, jon.in.swansea, Alan
Please Log in or Create an account to join the conversation.
- Alan
- Topic Author
- Offline
- New Member
-
Less
More
- Posts: 13
- Thank you received: 38
22 Oct 2023 09:15 #3
by Alan
Replied by Alan on topic Help with film covering
Thanks for getting back to me. It will definitely be a static model, it was never designed to fly and it will be incredibly heavy for what it is. I do have some flying model experience from years ago, but this is my first time using iron on film. I have a travel iron and hair dryer that I will be using and what you say about the metal conducting heat is a very good point I hadn't considered. The wings should be straightforward given they are made of wood, but I can see that the fuselage, rudder and tailplane will be an issue. I may try sticking the white film on the rudder with glue, letting it dry then heat shrinking it to stretch it. As there is no sign of any adhesive on the white film I have nothing to loose. With regards to the red film, I will try it on the undercarriage winglet first as that is the smallest wooden part and it will be a good starting point.
I can see the attraction of these weekly kits, but they are very expensive, this one cost close to £400 19 years ago. I can also see why many are started and never finished because the construction order dictated by the order in which that parts are supplied doesn't really work, the only way is to collect all the issues over a 2 year period and then start. And finally, never try to finish a model someone else has started, too many mistakes that are difficult to correct. The instructions aren't that clear in places and if you have no modeling experience it is easy to go wrong. I particularly liked how the trailing edges of the wings were glued on top of the ribs. It would have been quicker for me to build the wings from fresh than it is taking me to put them right. I think I can make it look something like, but it will be by no means perfect.
I can see the attraction of these weekly kits, but they are very expensive, this one cost close to £400 19 years ago. I can also see why many are started and never finished because the construction order dictated by the order in which that parts are supplied doesn't really work, the only way is to collect all the issues over a 2 year period and then start. And finally, never try to finish a model someone else has started, too many mistakes that are difficult to correct. The instructions aren't that clear in places and if you have no modeling experience it is easy to go wrong. I particularly liked how the trailing edges of the wings were glued on top of the ribs. It would have been quicker for me to build the wings from fresh than it is taking me to put them right. I think I can make it look something like, but it will be by no means perfect.
Thanks: Eric, Klipkopwildlife, Quorneng, THE BLACKBIRD
Please Log in or Create an account to join the conversation.
- jon.in.swansea
-

- Offline
- Elite Member
-

Less
More
- Posts: 766
- Thank you received: 1192
23 Oct 2023 16:03 #4
by jon.in.swansea
Replied by jon.in.swansea on topic Help with film covering
Welcome to the group from Jon up in Glasgow. This is the first time anyone mentioned using brass for frame. Good discussion thus far and I hope you will enjoy the continuing conversation. Note: we occasionally sound grumpy but take that with a grain of salt.....
Thanks: Alan
Please Log in or Create an account to join the conversation.
- Alan
- Topic Author
- Offline
- New Member
-
Less
More
- Posts: 13
- Thank you received: 38
23 Oct 2023 17:36 #5
by Alan
Replied by Alan on topic Help with film covering
No worries Jon, I have perfected the grumpy old man act over the years. Yes it is a strange approach using brass rods and cast metal parts and whilst it may work for a static medal, it makes for quite a heavy model which would never fly
Please Log in or Create an account to join the conversation.
- Quorneng
-

- Offline
- Forum Master
-

Less
More
- Posts: 9436
- Thank you received: 19043
23 Oct 2023 19:36 #6
by Quorneng
Replied by Quorneng on topic Help with film covering
After a bit of Ebay research it appears a complete Hachette Red Baron is quite rare. Lots of individual magazine copies for sale with the part included but no complaete sets.
It does make a highly detailed model hence the brass rod to emulate the full size welded steel tube used to make the fuselage of the full size. Quite innovative for the time when wood was the normal material.
Being a bit 'old school' I would consider using dope and a very light cotton fabric or heavy weight Model Span tissue rather than an iron on film. Possibly a bit more effort but it would be more representative of the full size covering.
I have a bit of a soft spot for the Triplane.
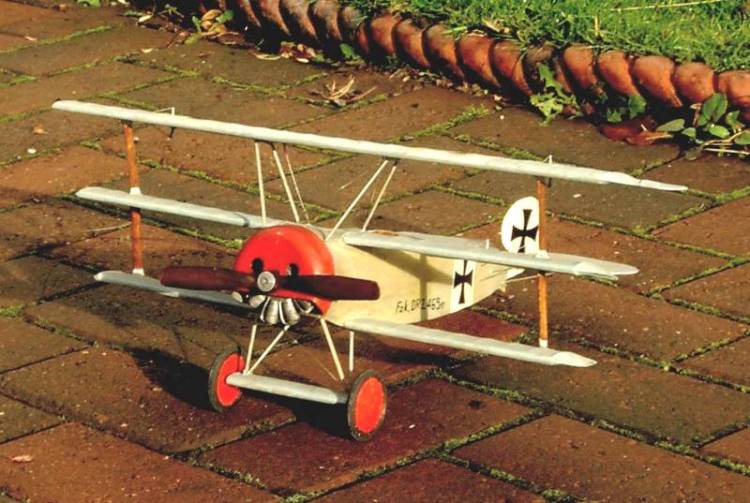
Much smaller, only 16" span. .
Do keep going with the pictures as you progress.
It does make a highly detailed model hence the brass rod to emulate the full size welded steel tube used to make the fuselage of the full size. Quite innovative for the time when wood was the normal material.
Being a bit 'old school' I would consider using dope and a very light cotton fabric or heavy weight Model Span tissue rather than an iron on film. Possibly a bit more effort but it would be more representative of the full size covering.
I have a bit of a soft spot for the Triplane.
Much smaller, only 16" span. .
Do keep going with the pictures as you progress.
Thanks: Eric
Please Log in or Create an account to join the conversation.
- Alan
- Topic Author
- Offline
- New Member
-
Less
More
- Posts: 13
- Thank you received: 38
23 Oct 2023 19:56 #7
by Alan
Replied by Alan on topic Help with film covering
All three wings were already built to a reasonable standard, but unfortunately they misunderstood how the trailing edge was to be fitted and simply glued it to the top of the ribs. I have had to remove the capping from the top of all the ribs and extend the bottom capping. I have therefore bought two copies of the issues that had the wood needed for this, there was also 2 copies of issue 64 and no issue 65, and the spinner was also missing so I have bought these two issues as well. As you say, there are lots of copies still available and I picked these up for £1.50 each. Apart from that, the fuselage was started but something went wrong with their measurements and the it was all out of square with the box sections at various angles. It had also suffered some damage in storage. I have managed to deconstruct the ailerons, tailplane, elevators and rudder and rebuilt them, but again, quite a bit of damage which I have had to repair. This does mean that the airframe has to be covered as it is not pretty with the misplaced parts and repaired damage. I think it will look OK covered and I will post more photos as I go.
Thanks: Eric, Klipkopwildlife, Flytilbroke, Quorneng
Please Log in or Create an account to join the conversation.
- Alan
- Topic Author
- Offline
- New Member
-
Less
More
- Posts: 13
- Thank you received: 38
31 Oct 2023 13:57 #8
by Alan
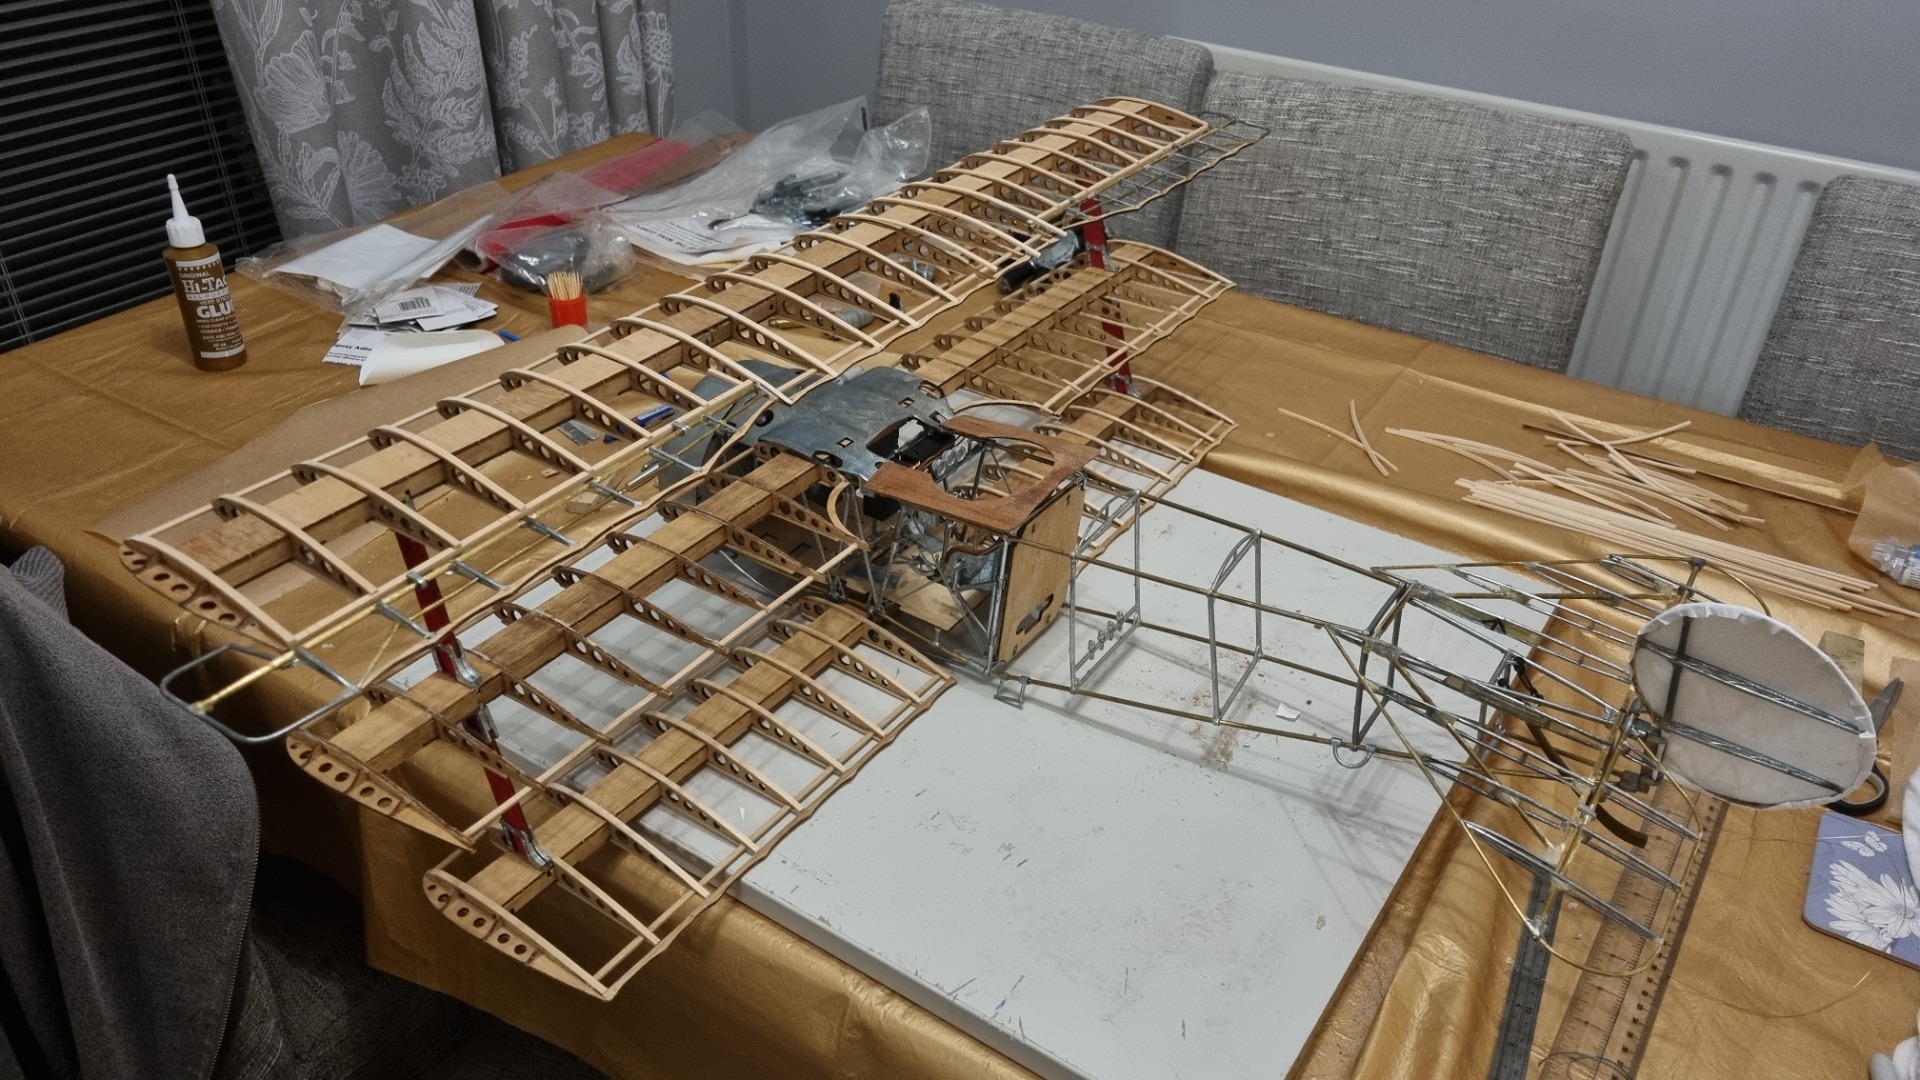
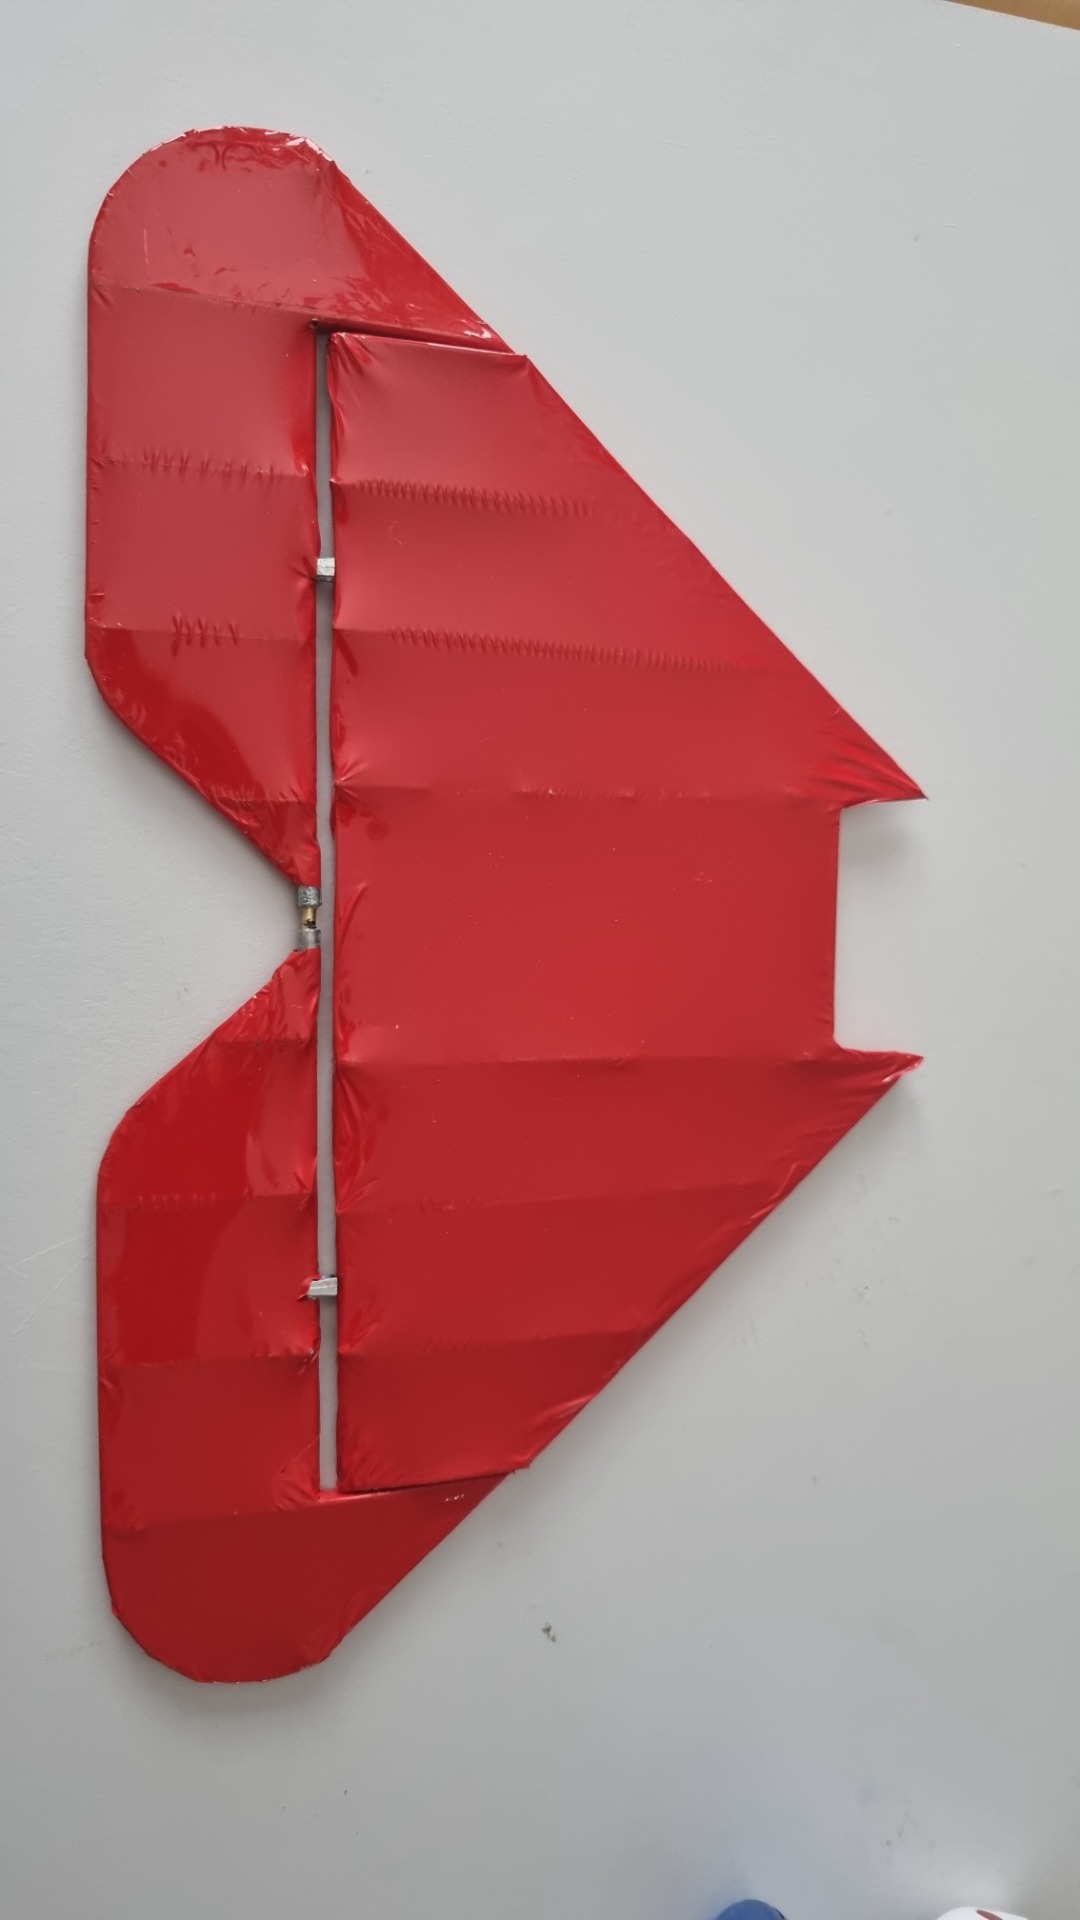
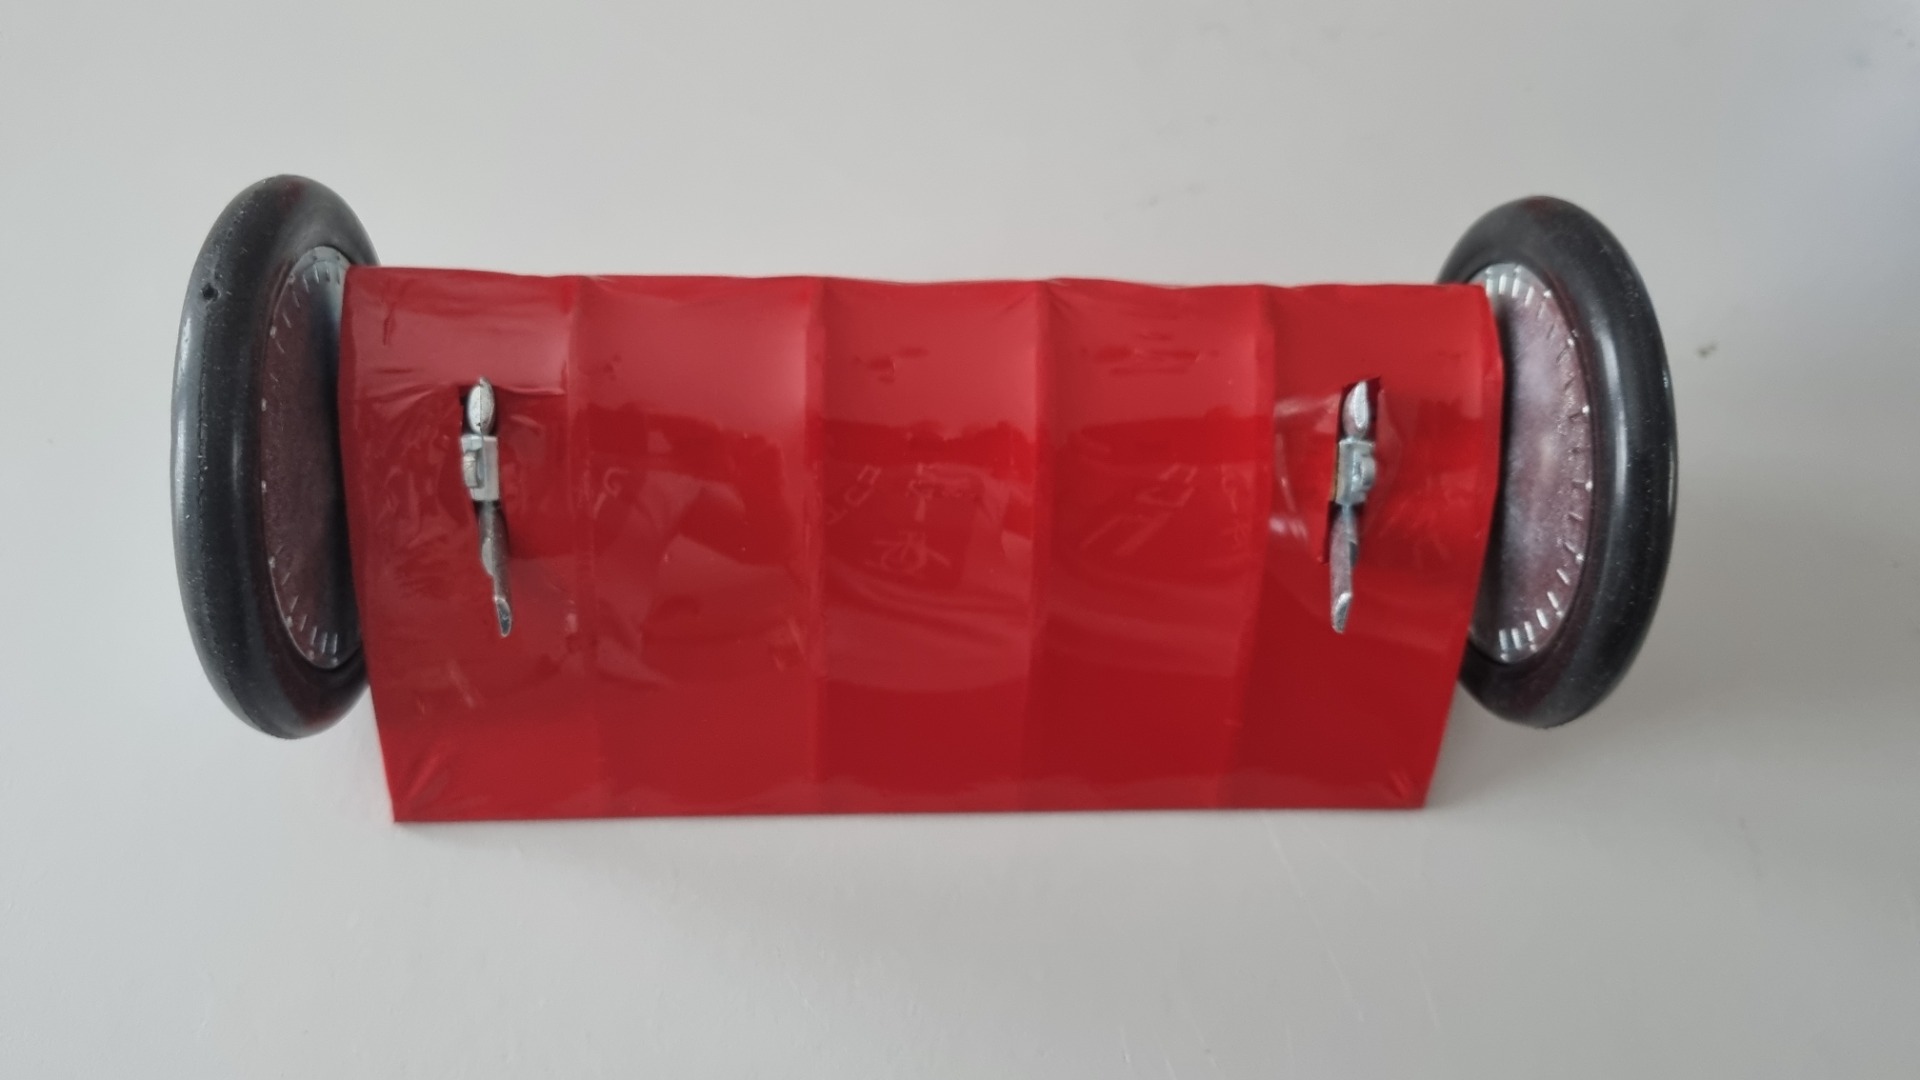
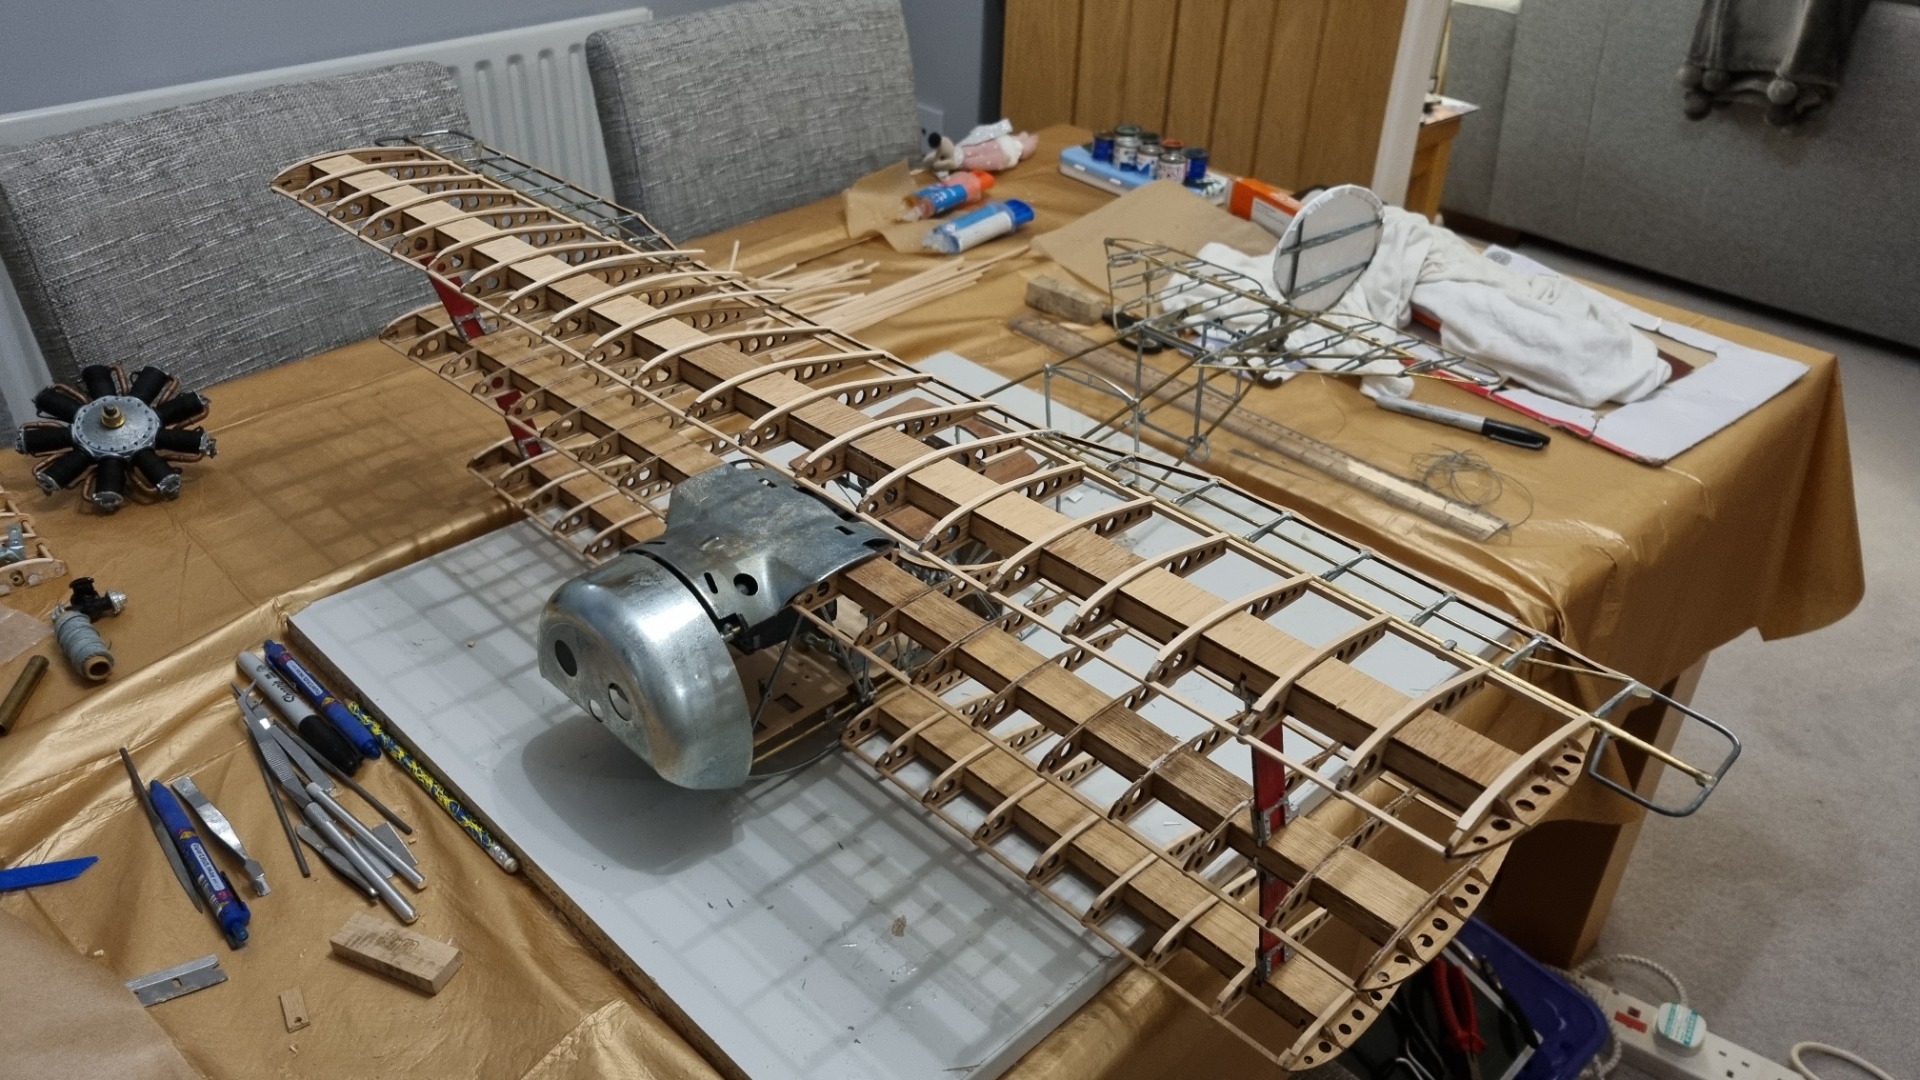 Well the build is progressing and it is mostly completed and ready for covering. Never having used iron-on film before it is a big learning curve so it's not the neatest job but could be worse.
Replied by Alan on topic Help with film covering
Thanks: Eric, Klipkopwildlife, THE BLACKBIRD
Please Log in or Create an account to join the conversation.
- Eric
-
- Offline
- Moderator
-
Less
More
- Posts: 13726
- Thank you received: 14467
31 Oct 2023 17:48 - 31 Oct 2023 17:53 #9
by Eric
if you are calm and collected when all about you are going berserk - you've missed something important!
Replied by Eric on topic Help with film covering
Start on the underside.
The trick is to tack one long edge down first, then gently pull the film tight, to remove any wrinkles, then tack the other edge down.
THEN you can tack one side down, and tease out any remaining wrinkles, tacking that down while you hold it taut with your third or fourth hand!
When all the edges are fixed, tack on the upperside (where you have wrapped the edges round and over.
When the film is firmly attached all the way around - THEN shrink the middle, careful not to heat up the edges again, or get it too hot, or you'll get an instant hole!
THEN you can do the same again, with the top side, doing it this way round means that the wrapped edge is underneath, more or less out of sight.
Radius's are tricky! You have to get a straight edge fixed, somehow, then tack the very edge around the curved surface - but do NOT tack it underneath yet.
When you have the film under control, cut slits in it right up to the curved edge, on the scrap side, then starting at the trailing edge, tack one of the 'triangles' down on the other side, trim almost all the surplus off, then do the next so it just overlaps, and tack that, - - work all the way around the curve.
It takes patience, determination, and practice!

If the film colour gets noticeably darker as you are doing it, you are on the verge of melting a hole. Either you are keeping the iron on the area too long, or it is too hot - which really amounts to the same thing!
The trick is to tack one long edge down first, then gently pull the film tight, to remove any wrinkles, then tack the other edge down.
THEN you can tack one side down, and tease out any remaining wrinkles, tacking that down while you hold it taut with your third or fourth hand!
When all the edges are fixed, tack on the upperside (where you have wrapped the edges round and over.
When the film is firmly attached all the way around - THEN shrink the middle, careful not to heat up the edges again, or get it too hot, or you'll get an instant hole!
THEN you can do the same again, with the top side, doing it this way round means that the wrapped edge is underneath, more or less out of sight.
Radius's are tricky! You have to get a straight edge fixed, somehow, then tack the very edge around the curved surface - but do NOT tack it underneath yet.
When you have the film under control, cut slits in it right up to the curved edge, on the scrap side, then starting at the trailing edge, tack one of the 'triangles' down on the other side, trim almost all the surplus off, then do the next so it just overlaps, and tack that, - - work all the way around the curve.
It takes patience, determination, and practice!
If the film colour gets noticeably darker as you are doing it, you are on the verge of melting a hole. Either you are keeping the iron on the area too long, or it is too hot - which really amounts to the same thing!
if you are calm and collected when all about you are going berserk - you've missed something important!
Last edit: 31 Oct 2023 17:53 by Eric. Reason: typo and added a comment
Thanks: Klipkopwildlife, Alan
Please Log in or Create an account to join the conversation.
- Quorneng
-
- Offline
- Forum Master
-
Less
More
- Posts: 9436
- Thank you received: 19043
31 Oct 2023 21:28 - 31 Oct 2023 21:32 #10
by Quorneng
Replied by Quorneng on topic Help with film covering
Alan
That is a truly detailed model.
You mentioned that you had to reposition the trailing edge pieces as they had been glued to the top surface of the ribs. On the original the trailing edge was actually a wire which sagged under the tension of the shrinking dope giving the characteristic scalloped effect.
Just a point of detail but the trailing edge of the aileron lined up with the trailing edge of the centre section.
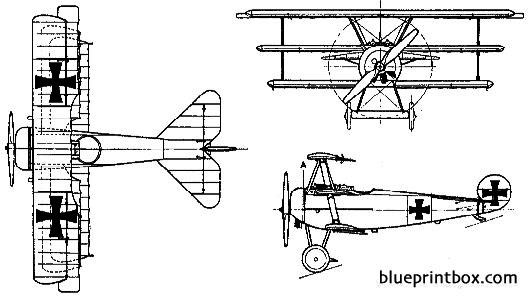
In the photo it looks like you lined it up with the centre section rear spar.
This is a period (1917) photo of the Triplane prototype before Fokker extended the middle wing a bit and added broad interplane struts to counter wing flutter.
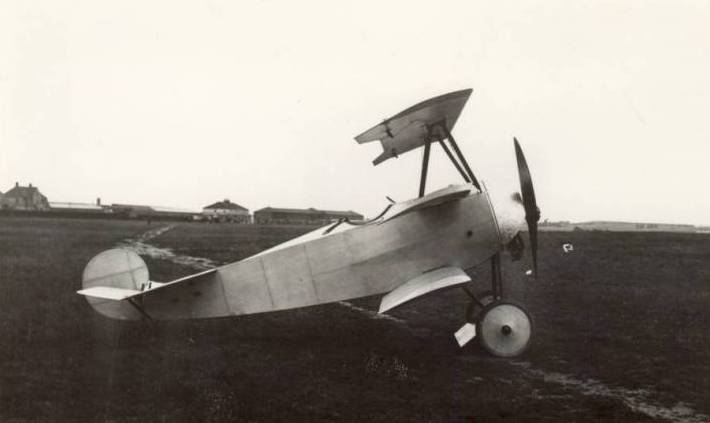
It also shows how translucent the plain doped fabric was before the coloured dope was added.
I do hope your efforts with the iron on film come out OK..
That is a truly detailed model.
You mentioned that you had to reposition the trailing edge pieces as they had been glued to the top surface of the ribs. On the original the trailing edge was actually a wire which sagged under the tension of the shrinking dope giving the characteristic scalloped effect.
Just a point of detail but the trailing edge of the aileron lined up with the trailing edge of the centre section.
In the photo it looks like you lined it up with the centre section rear spar.
This is a period (1917) photo of the Triplane prototype before Fokker extended the middle wing a bit and added broad interplane struts to counter wing flutter.
It also shows how translucent the plain doped fabric was before the coloured dope was added.
I do hope your efforts with the iron on film come out OK..
Last edit: 31 Oct 2023 21:32 by Quorneng.
Thanks: Eric, Klipkopwildlife, Alan
Please Log in or Create an account to join the conversation.
- Klipkopwildlife
-

- Offline
- Administrator
-

- I'm supposed to be retired!
04 Nov 2023 12:02 #11
by Klipkopwildlife
Do it now, you may never get another chance
Replied by Klipkopwildlife on topic Help with film covering
Surely Balsaloc might work, painted on the wire parts then use an iron to put the old film on?
Do it now, you may never get another chance
Please Log in or Create an account to join the conversation.
- Alan
- Topic Author
- Offline
- New Member
-
Less
More
- Posts: 13
- Thank you received: 38
04 Nov 2023 15:43 #12
by Alan
Replied by Alan on topic Help with film covering
I have tried using Hi-Tack PVA but the results were terrible. I have covered the airframe using the red film and it works fine, I will see if someone can let me have a couple of 6" squares of white film, it will be far easier than trying to make the supplied film work.
Thanks: Klipkopwildlife
Please Log in or Create an account to join the conversation.
- Eric
-
- Offline
- Moderator
-
Less
More
- Posts: 13726
- Thank you received: 14467
04 Nov 2023 16:37 - 04 Nov 2023 16:38 #13
by Eric
if you are calm and collected when all about you are going berserk - you've missed something important!
Replied by Eric on topic Help with film covering
PM me your snail-mail, and I'll send you some!
DO NOT put it on here for all the world to see!
DO NOT put it on here for all the world to see!
if you are calm and collected when all about you are going berserk - you've missed something important!
Last edit: 04 Nov 2023 16:38 by Eric.
Thanks: Klipkopwildlife
Please Log in or Create an account to join the conversation.
- Alan
- Topic Author
- Offline
- New Member
-
Less
More
- Posts: 13
- Thank you received: 38
04 Nov 2023 16:39 #14
by Alan
Replied by Alan on topic Help with film covering
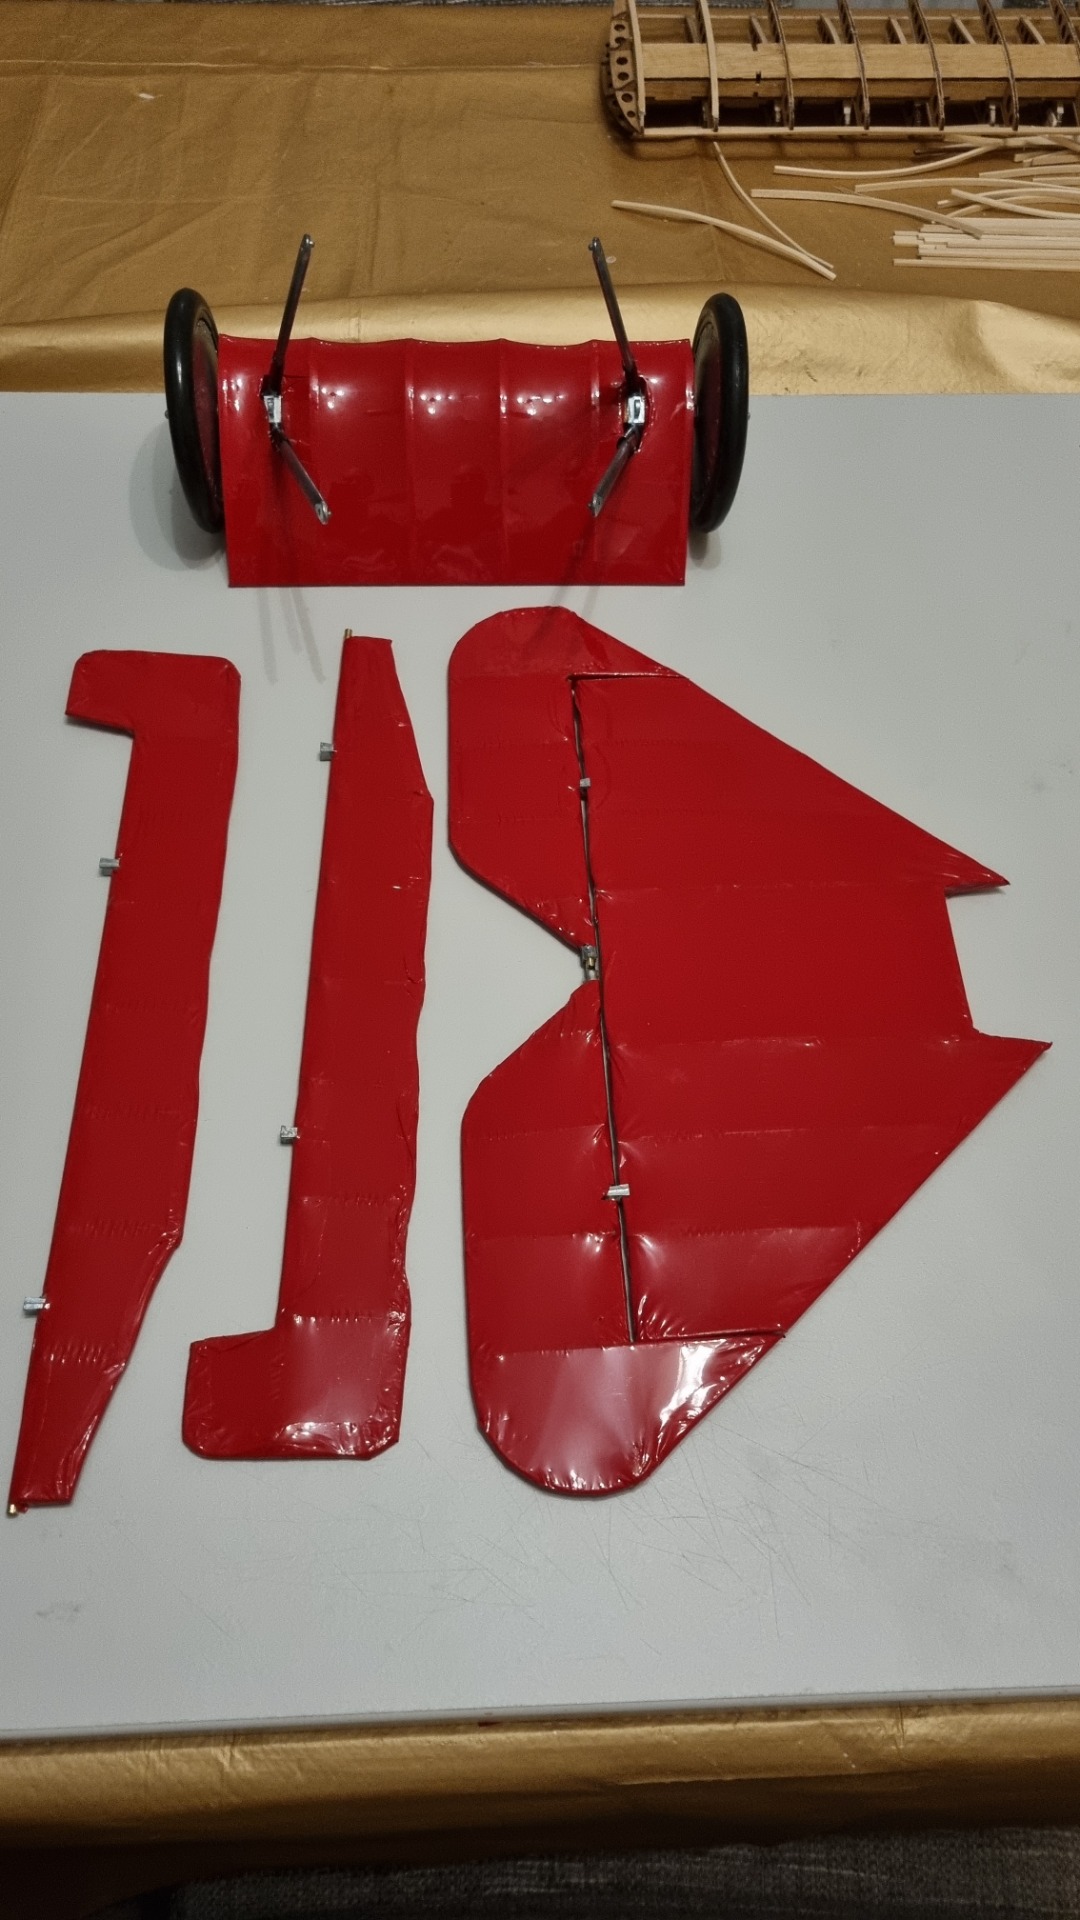
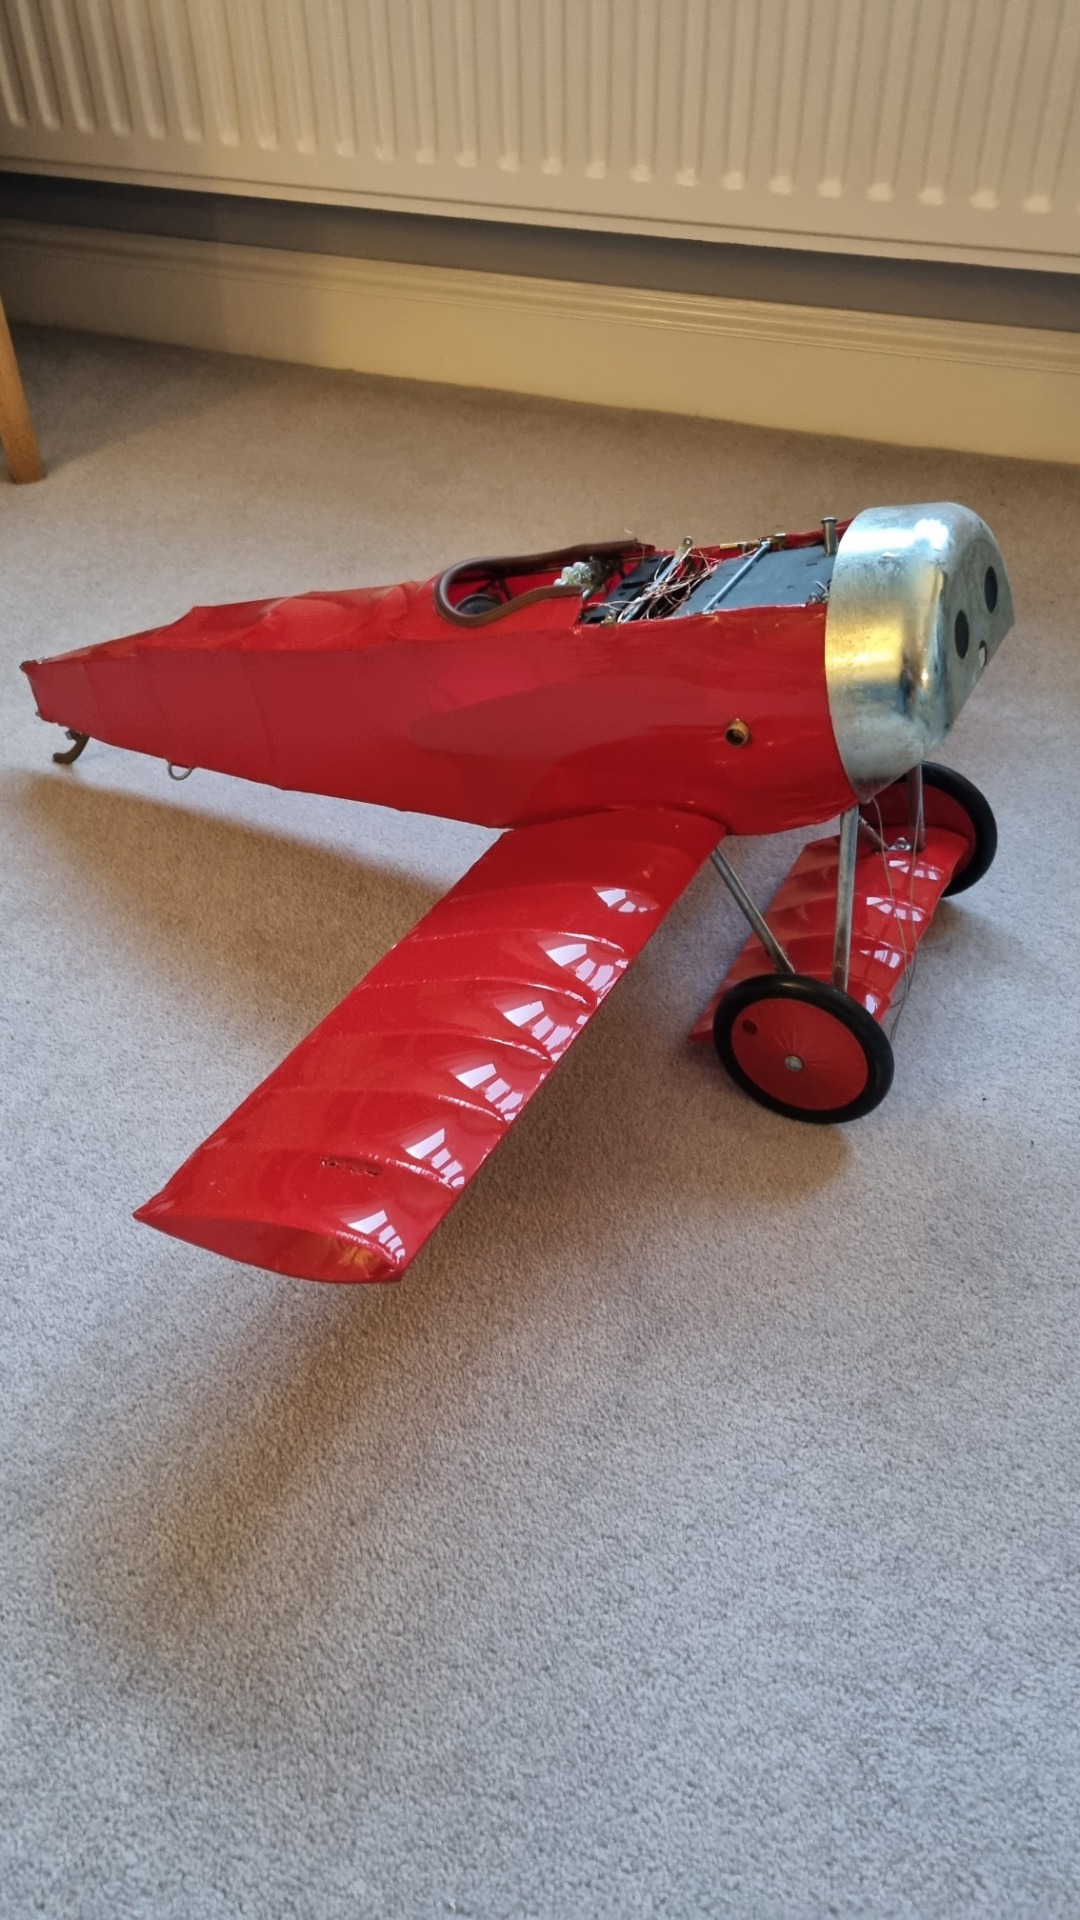
Made some good progress this week. Covering is going well, probably not up to the standard of modellers on here but I am generally quite pleased with it

Thanks: Klipkopwildlife
Please Log in or Create an account to join the conversation.
- Quorneng
-
- Offline
- Forum Master
-
Less
More
- Posts: 9436
- Thank you received: 19043
04 Nov 2023 20:12 #15
by Quorneng
Replied by Quorneng on topic Help with film covering
That looks very nice and neat.
Probably a bit too glossy for scale but spectacular nonetheless.
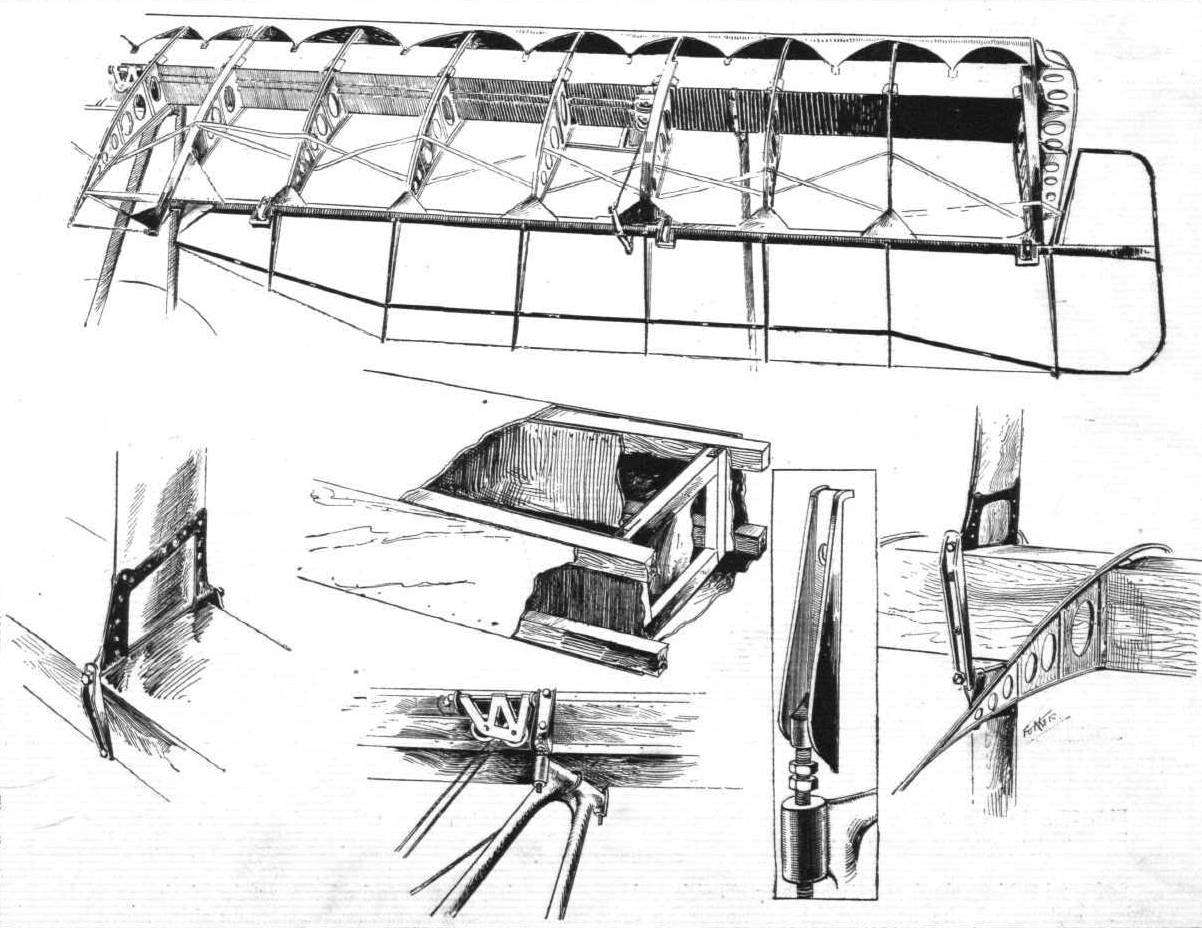
The depression of the film between the ribs, particularly over the initial third gives a significant change to the wing section. You can see why Fokker used a rather unusual shaped ply leading edge skin fixed to the top of the spar in an effort to maintain the wing section when the dope covering shrunk.
Keep going.
ps Is that the Oberursel rotary that will go in it?
Probably a bit too glossy for scale but spectacular nonetheless.
The depression of the film between the ribs, particularly over the initial third gives a significant change to the wing section. You can see why Fokker used a rather unusual shaped ply leading edge skin fixed to the top of the spar in an effort to maintain the wing section when the dope covering shrunk.
Keep going.
ps Is that the Oberursel rotary that will go in it?
Thanks: Klipkopwildlife, Alan
Please Log in or Create an account to join the conversation.
Time to create page: 1.009 seconds