
- Thank you received: 0
Radio Queen
- Grumpy42
- User
-

Less
More
08 Feb 2013 15:24 #16
by Grumpy42
Welcome to the club Klippy - just keep a general idea of how many you have - In my experience once you reach a "critical mass" plans start to bread on there own!! - ask ME how I know. :lol: :lol: :lol:
On another matter I build one side over the other the same way you do but I interpose a sheet of wax paper (we call it lunch wrap paper down here) between the two sides - I also prefer to use the aliphatic glue and the wax paper makes it easy to separate them - no knife needed - they pull apart with a little peeling type motion. Its easy to separate the sides when they are dry - remove the wax paper - then put them together again with clamps and sand then identical.
Replied by Grumpy42 on topic Radio Queen
Klipkopwildlife wrote:
I'm guilty of collecting plans of stuff that I'd like to be able to fly!Grumpy42 wrote: Interesting and very tidy build Klippy - BUT - what about the P38?? Any start yet??
Welcome to the club Klippy - just keep a general idea of how many you have - In my experience once you reach a "critical mass" plans start to bread on there own!! - ask ME how I know. :lol: :lol: :lol:
On another matter I build one side over the other the same way you do but I interpose a sheet of wax paper (we call it lunch wrap paper down here) between the two sides - I also prefer to use the aliphatic glue and the wax paper makes it easy to separate them - no knife needed - they pull apart with a little peeling type motion. Its easy to separate the sides when they are dry - remove the wax paper - then put them together again with clamps and sand then identical.
Please Log in or Create an account to join the conversation.
- Klipkopwildlife
-
 Topic Author
- Offline
- Administrator
-

- I'm supposed to be retired!
08 Feb 2013 23:31 #17
by Klipkopwildlife
Do it now, you may never get another chance
Replied by Klipkopwildlife on topic Radio Queen
Thanks Mick, this is the former for the engine plate.
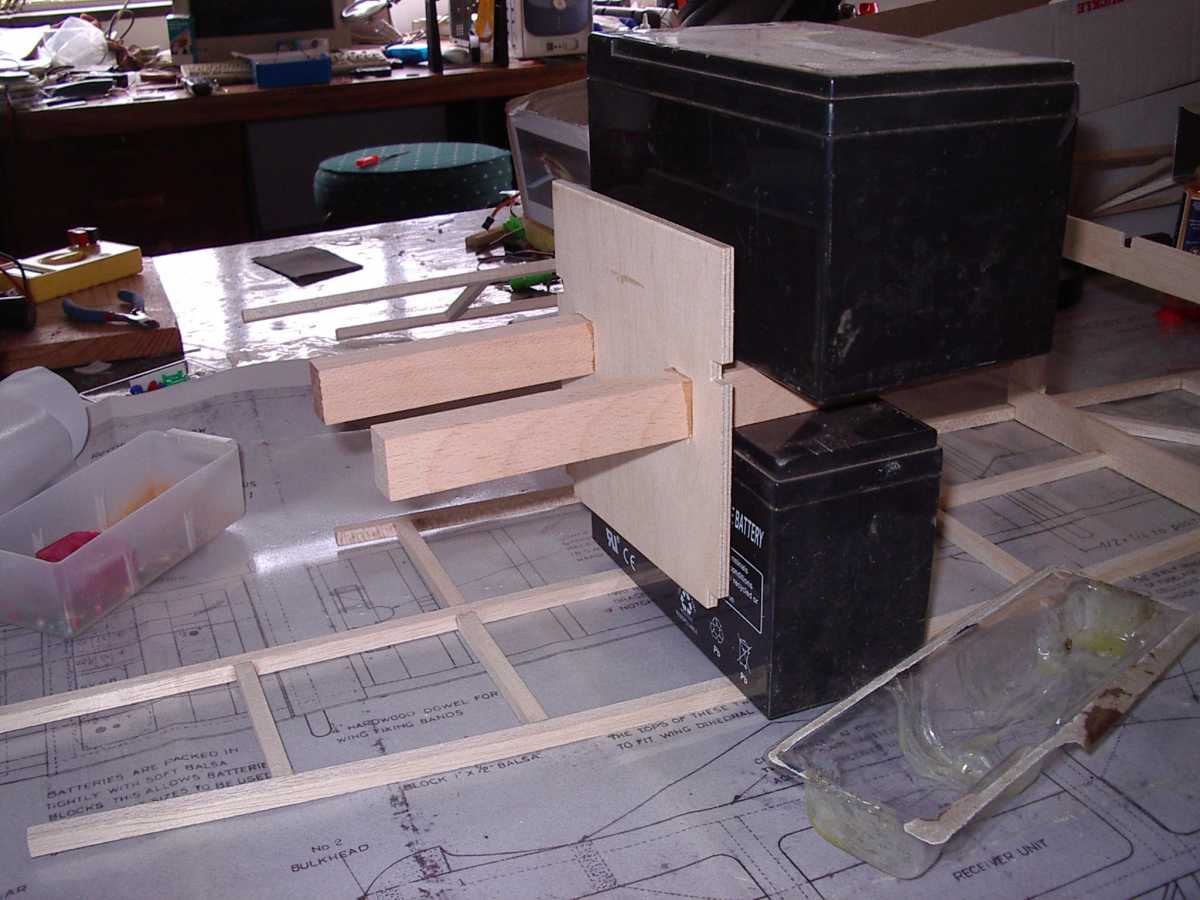
And fitting it!
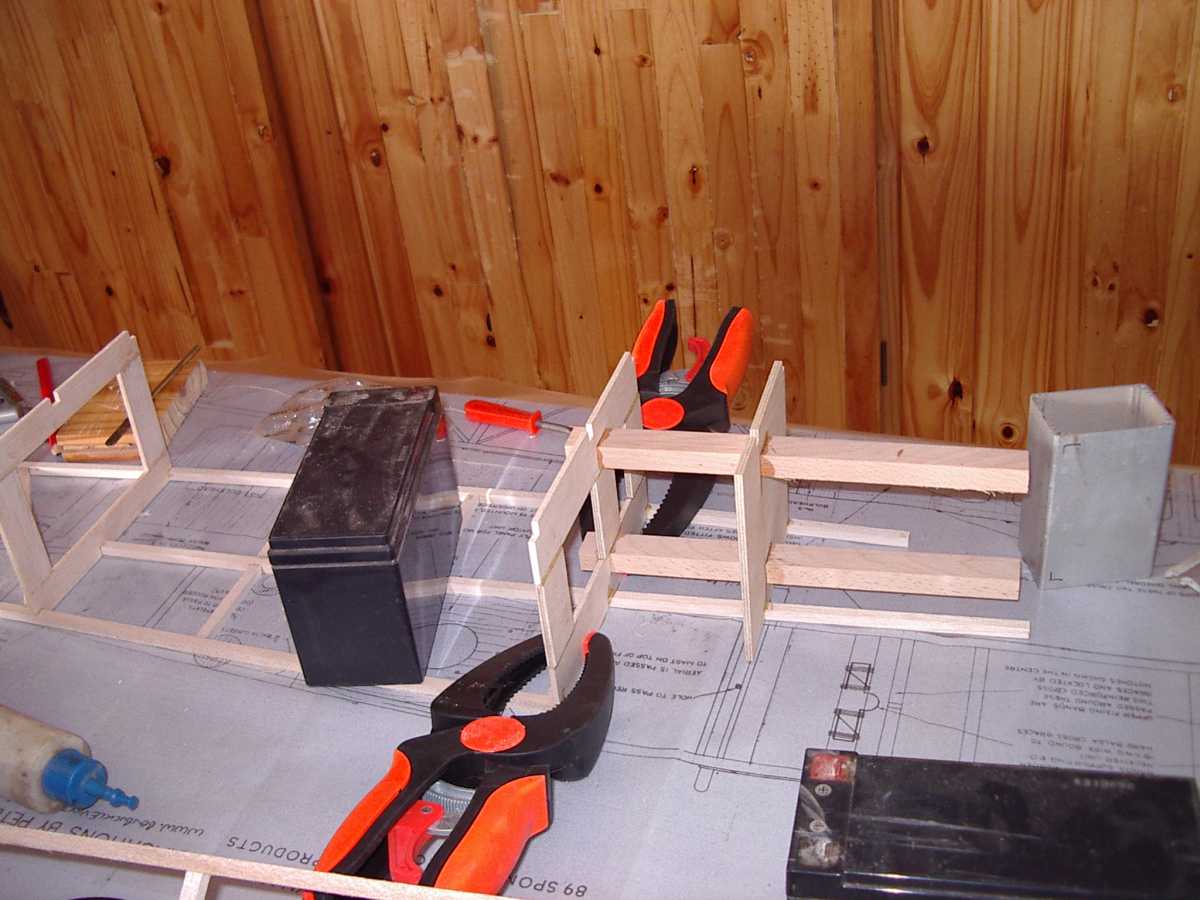
And fitting it!
Do it now, you may never get another chance
Thanks: Eric, Quorneng, Sarah-Jane Smith
Please Log in or Create an account to join the conversation.
- Eric
-

- Offline
- Moderator
-

Less
More
- Posts: 13726
- Thank you received: 14467
08 Feb 2013 23:57 #18
by Eric
if you are calm and collected when all about you are going berserk - you've missed something important!
Replied by Eric on topic Radio Queen
Because it's a 'beginners' build I keep realising that I'm using words and techniques that are not referenced elsewhere in the site,
Yes, it's easy to forget that words and ideas that you think are commonplace - in fact leave other readers wondering what the heck you are on about!
Yes, it's easy to forget that words and ideas that you think are commonplace - in fact leave other readers wondering what the heck you are on about!
if you are calm and collected when all about you are going berserk - you've missed something important!
Please Log in or Create an account to join the conversation.
- The Beard
-

- Offline
- Forum Master
-

Less
More
- Posts: 6913
- Thank you received: 2167
09 Feb 2013 01:32 #19
by The Beard
Replied by The Beard on topic Radio Queen
As you build yours I am able to follow your build comparing how mine was done.
Please Log in or Create an account to join the conversation.
- Klipkopwildlife
-
Topic Author
- Offline
- Administrator
-
- I'm supposed to be retired!
09 Feb 2013 12:37 #20
by Klipkopwildlife
Do it now, you may never get another chance
Replied by Klipkopwildlife on topic Radio Queen
Starting to come together now.
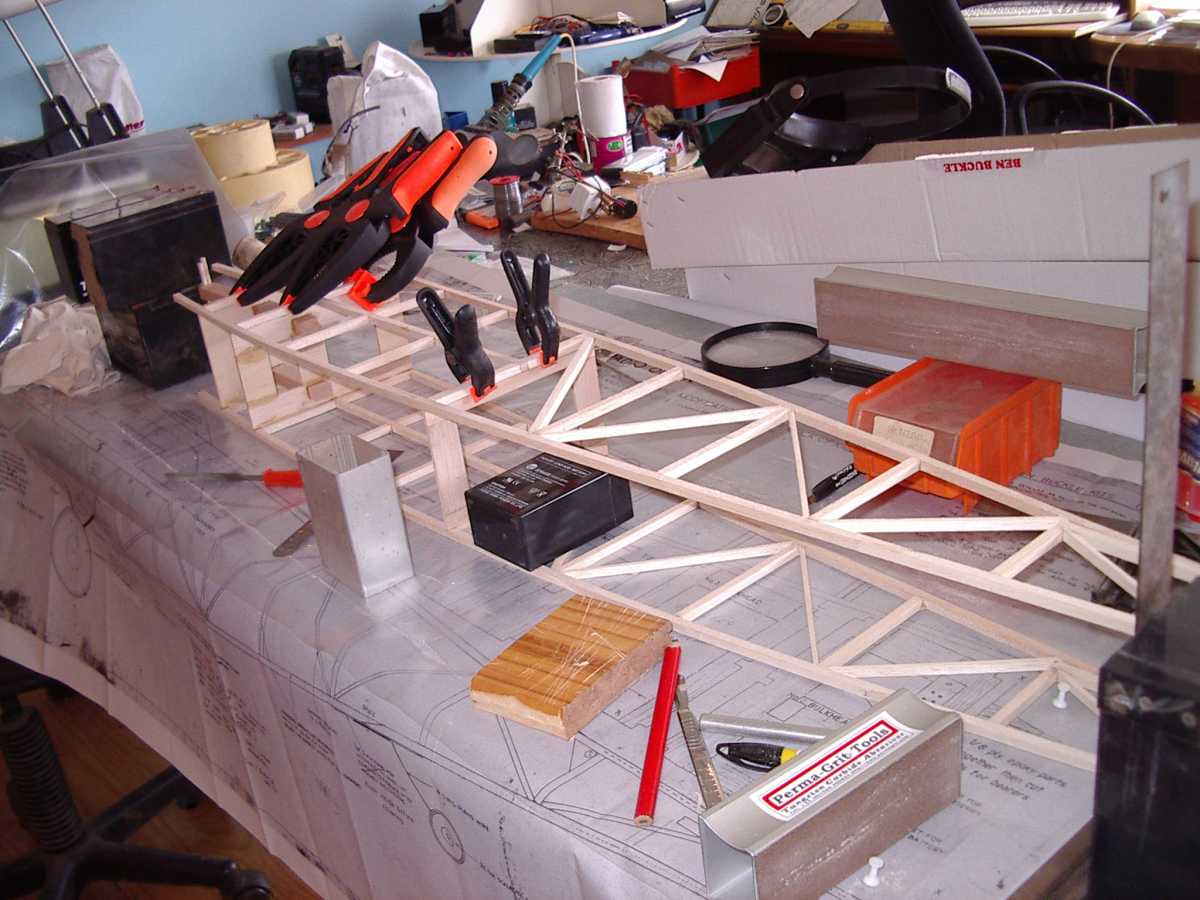
The hardest part of the fuselage is the slight bend/taper down to the tail, this is where your wood selection was so important.
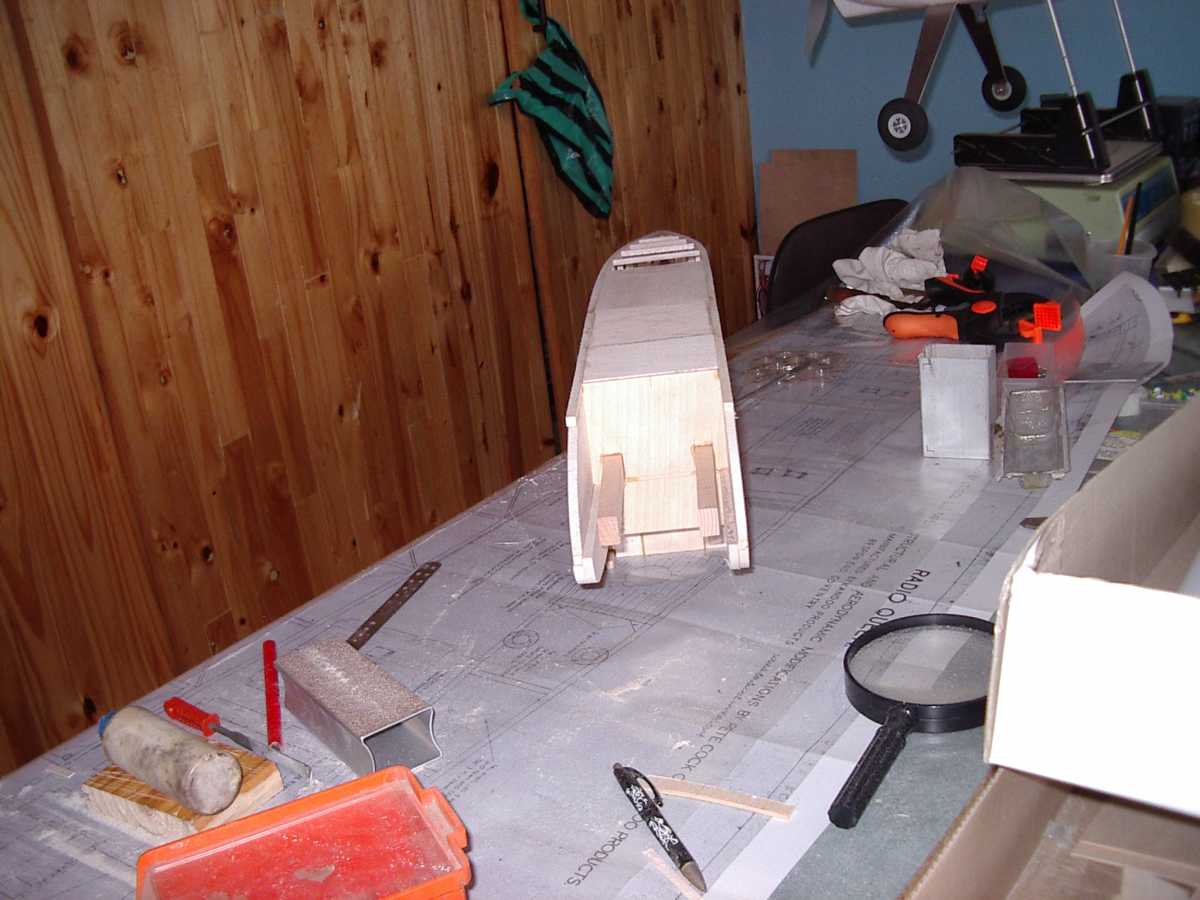
The hardest part of the fuselage is the slight bend/taper down to the tail, this is where your wood selection was so important.
Do it now, you may never get another chance
Thanks: Eric, The Beard, Sarah-Jane Smith
Please Log in or Create an account to join the conversation.
- THE BLACKBIRD
-

- Offline
- Forum Master
-
Less
More
- Posts: 6368
- Thank you received: 10842
09 Feb 2013 14:50 - 09 Feb 2013 15:04 #21
by THE BLACKBIRD
Replied by THE BLACKBIRD on topic Radio Queen
Looking good Tony very neat and tidy building, i see the bottom sheeting fits inside the longerons,
Last edit: 09 Feb 2013 15:04 by .
Please Log in or Create an account to join the conversation.
- Ex-Member
- User
-
Less
More
- Thank you received: 0
09 Feb 2013 15:50 #22
by Ex-Member
Replied by Ex-Member on topic Radio Queen
very nicely built sir.
It is flying together.
there is a lot of work in these old timers fuselages compared to modern designs.
It is flying together.
there is a lot of work in these old timers fuselages compared to modern designs.
Please Log in or Create an account to join the conversation.
- Grumpy42
- User
-
Less
More
- Thank you received: 0
09 Feb 2013 17:50 #23
by Grumpy42
Replied by Grumpy42 on topic Radio Queen
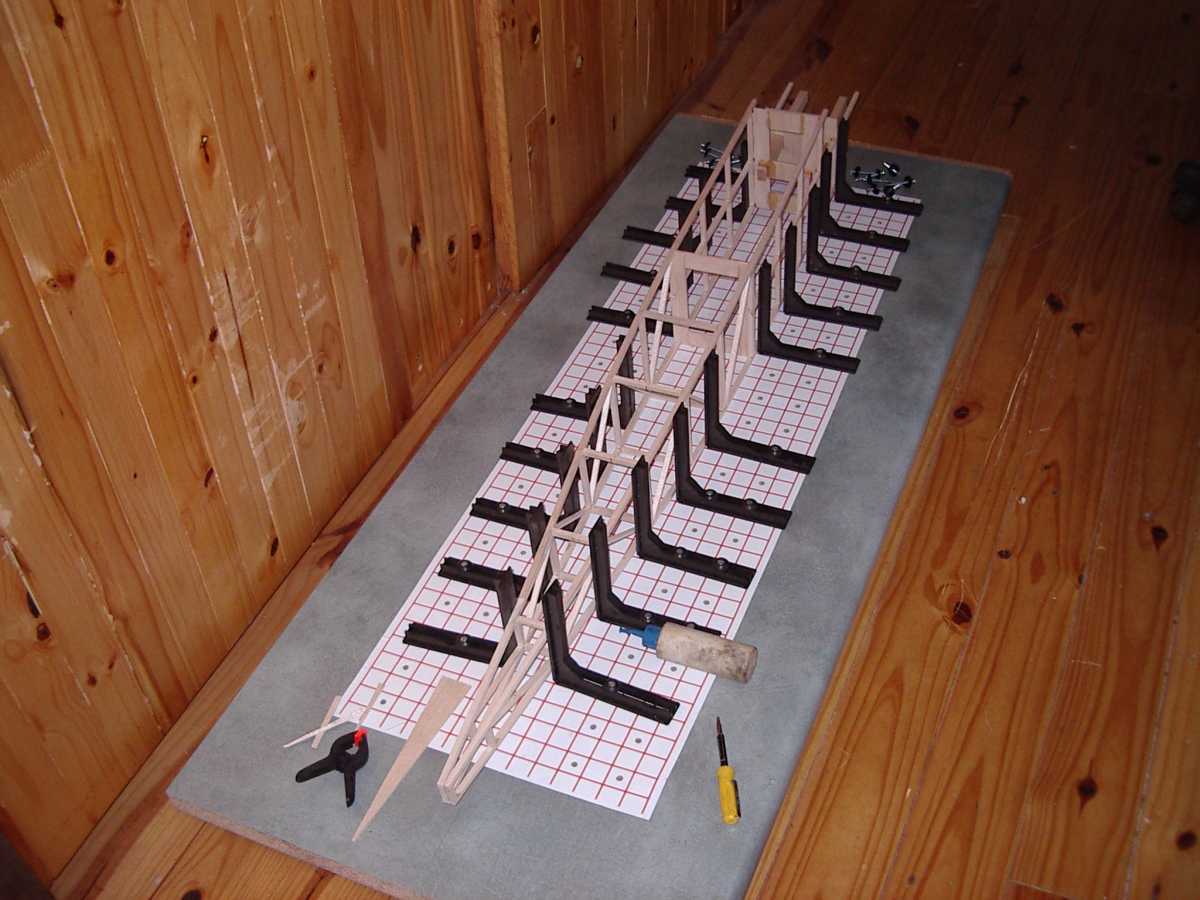
Klippy - when I build a fuselage that needs the two sides pulling together I always make some sort of jig to hold the thing symetrical to a centre line - that eleminates the possibility of a banana fuselage - very easy to end up with when building vintage type fuselages.
Please Log in or Create an account to join the conversation.
- Klipkopwildlife
-
Topic Author
- Offline
- Administrator
-
- I'm supposed to be retired!
09 Feb 2013 21:15 - 09 Feb 2013 21:17 #24
by Klipkopwildlife
Do it now, you may never get another chance
Replied by Klipkopwildlife on topic Radio Queen
Ah, you mean like this! 
:evil:
It can be done without a jig, just keep the fuselage nicely over then plan.
:evil:
It can be done without a jig, just keep the fuselage nicely over then plan.
Do it now, you may never get another chance
Last edit: 09 Feb 2013 21:17 by Klipkopwildlife.
Thanks: , The Beard, Dean M, THE BLACKBIRD, Sarah-Jane Smith
Please Log in or Create an account to join the conversation.
- Klipkopwildlife
-
Topic Author
- Offline
- Administrator
-
- I'm supposed to be retired!
09 Feb 2013 21:19 - 09 Feb 2013 21:19 #25
by Klipkopwildlife
Do it now, you may never get another chance
Replied by Klipkopwildlife on topic Radio Queen
No it's not Tony, all this stuff I'm posting is already 'in the can' I'm hoping to restart before I run out of pics! :ohmy:Tony B. AKA Blooper wrote: It is flying together.
there is a lot of work in these old timers fuselages compared to modern designs.
Do it now, you may never get another chance
Last edit: 09 Feb 2013 21:19 by Klipkopwildlife.
Thanks: Ex-Member, THE BLACKBIRD
Please Log in or Create an account to join the conversation.
- Sarah-Jane Smith
-

- Offline
- Forum Veteran
-

- Gone
Less
More
- Posts: 2510
- Thank you received: 2182
10 Feb 2013 01:35 #26
by Sarah-Jane Smith
I wish I was a glow worm, a glow worm's never glum.
Cos how can you be grumpy when the sun shines out your bum?!
Replied by Sarah-Jane Smith on topic Radio Queen
have seen pins and clips used but never this " jig"! where can you get one of them from? take it you adjust it on the board?
I wish I was a glow worm, a glow worm's never glum.
Cos how can you be grumpy when the sun shines out your bum?!
Please Log in or Create an account to join the conversation.
- Eric
-
- Offline
- Moderator
-
Less
More
- Posts: 13726
- Thank you received: 14467
10 Feb 2013 02:04 #27
by Eric
if you are calm and collected when all about you are going berserk - you've missed something important!
Replied by Eric on topic Radio Queen
Make your own, a shelf plank and some shelf brackets, the brackets are fastened to the board by butterfly nuts, so they can be positioned. Draw a centreline along the board, and parallel lines at whatever distance you prefer.
It almost takes longer to describe than it does to do.
The only thing you have to watch is that the shelf brackets are 90', and not 85! Some make them so the shelf leans in to the wall slightly, so things don't fall off.
It almost takes longer to describe than it does to do.
The only thing you have to watch is that the shelf brackets are 90', and not 85! Some make them so the shelf leans in to the wall slightly, so things don't fall off.
if you are calm and collected when all about you are going berserk - you've missed something important!
Thanks: Sarah-Jane Smith
Please Log in or Create an account to join the conversation.
- Klipkopwildlife
-
Topic Author
- Offline
- Administrator
-
- I'm supposed to be retired!
10 Feb 2013 21:44 #28
by Klipkopwildlife
Do it now, you may never get another chance
Replied by Klipkopwildlife on topic Radio Queen
The one I'm showing is from SLEC, you have to buy some MDF and assemble it yourself, but, the stick on basesheet stretches like a bugger so you have to be careful!
Do it now, you may never get another chance
Thanks: Sarah-Jane Smith
Please Log in or Create an account to join the conversation.
- Grumpy42
- User
-
Less
More
- Thank you received: 0
11 Feb 2013 12:46 #29
by Grumpy42
Replied by Grumpy42 on topic Radio Queen
Yes Klippy - we don't have SLEC down here and I made my own as Eric suggests - some MDF and a few shelf Brackets but having seen the SLEC thing before on the forum I went out and bought some stick on stuff for the base sheet - I think the stuff I bought is used to cover school books or something. It was a bloody nightmare - stretched and distorted all to hell and gone. So I tore it all off, marked out the board myself with a set square and then used motor trim strips for the lines. Then gave the whole thing a coat of clear two part epoxy. No more problems.
Please Log in or Create an account to join the conversation.
- Klipkopwildlife
-
Topic Author
- Offline
- Administrator
-
- I'm supposed to be retired!
11 Feb 2013 14:54 #30
by Klipkopwildlife
Do it now, you may never get another chance
Replied by Klipkopwildlife on topic Radio Queen
Yes, the sheeting sits inside the longerons. 
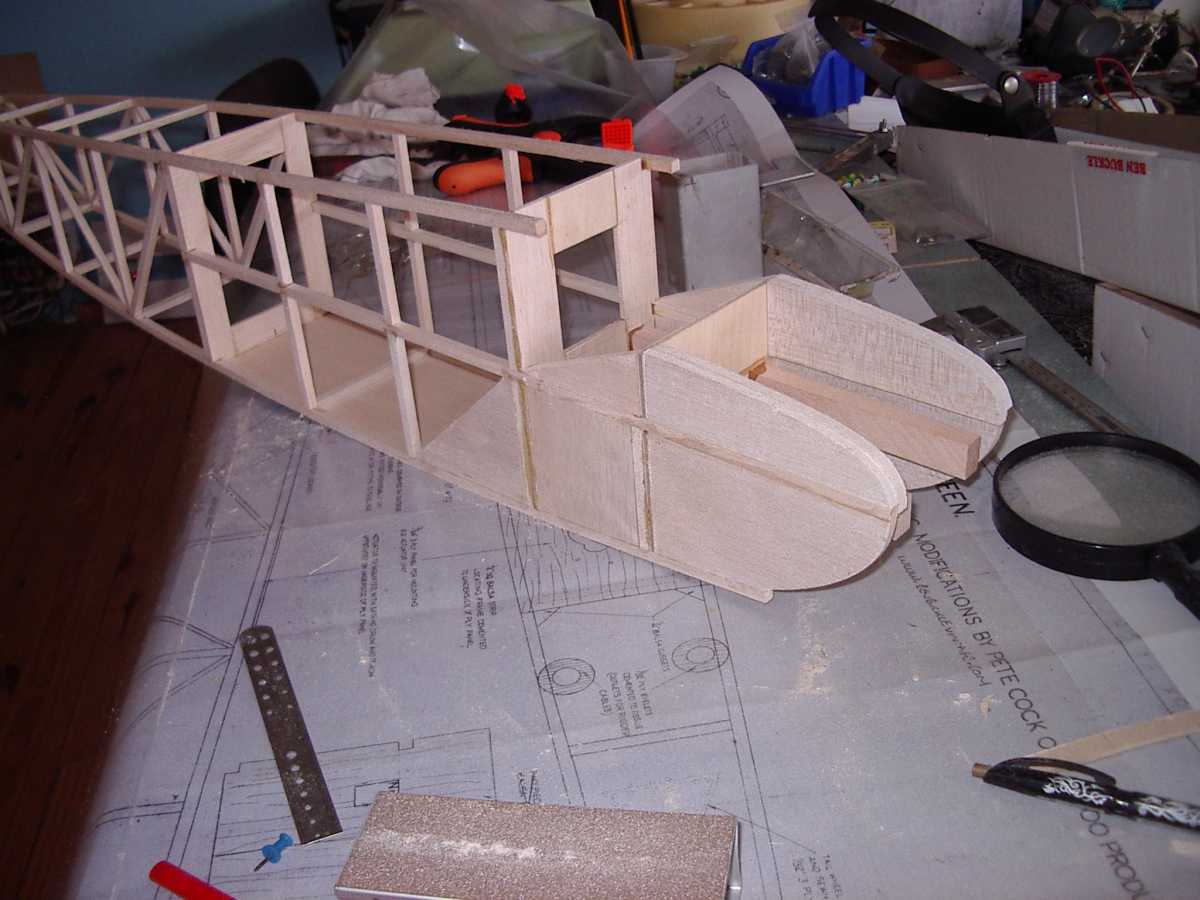
Which means that it will be a bugger to sand with all the different hardnesses.
I've checked the photo dating, I work less than an hour, 5 nights a week, dates range from 02/02/2011 to 03/05/2011.!
Which means that it will be a bugger to sand with all the different hardnesses.
I've checked the photo dating, I work less than an hour, 5 nights a week, dates range from 02/02/2011 to 03/05/2011.!
Do it now, you may never get another chance
Thanks: THE BLACKBIRD, Sarah-Jane Smith
Please Log in or Create an account to join the conversation.
Time to create page: 0.872 seconds