
freeCAD and fuselage creation
- Klipkopwildlife
-

- Offline
- Administrator
-

- I'm supposed to be retired!
Do it now, you may never get another chance
Please Log in or Create an account to join the conversation.
- jon.in.swansea
-
 Topic Author
- Offline
- Elite Member
-

- Posts: 766
- Thank you received: 1192
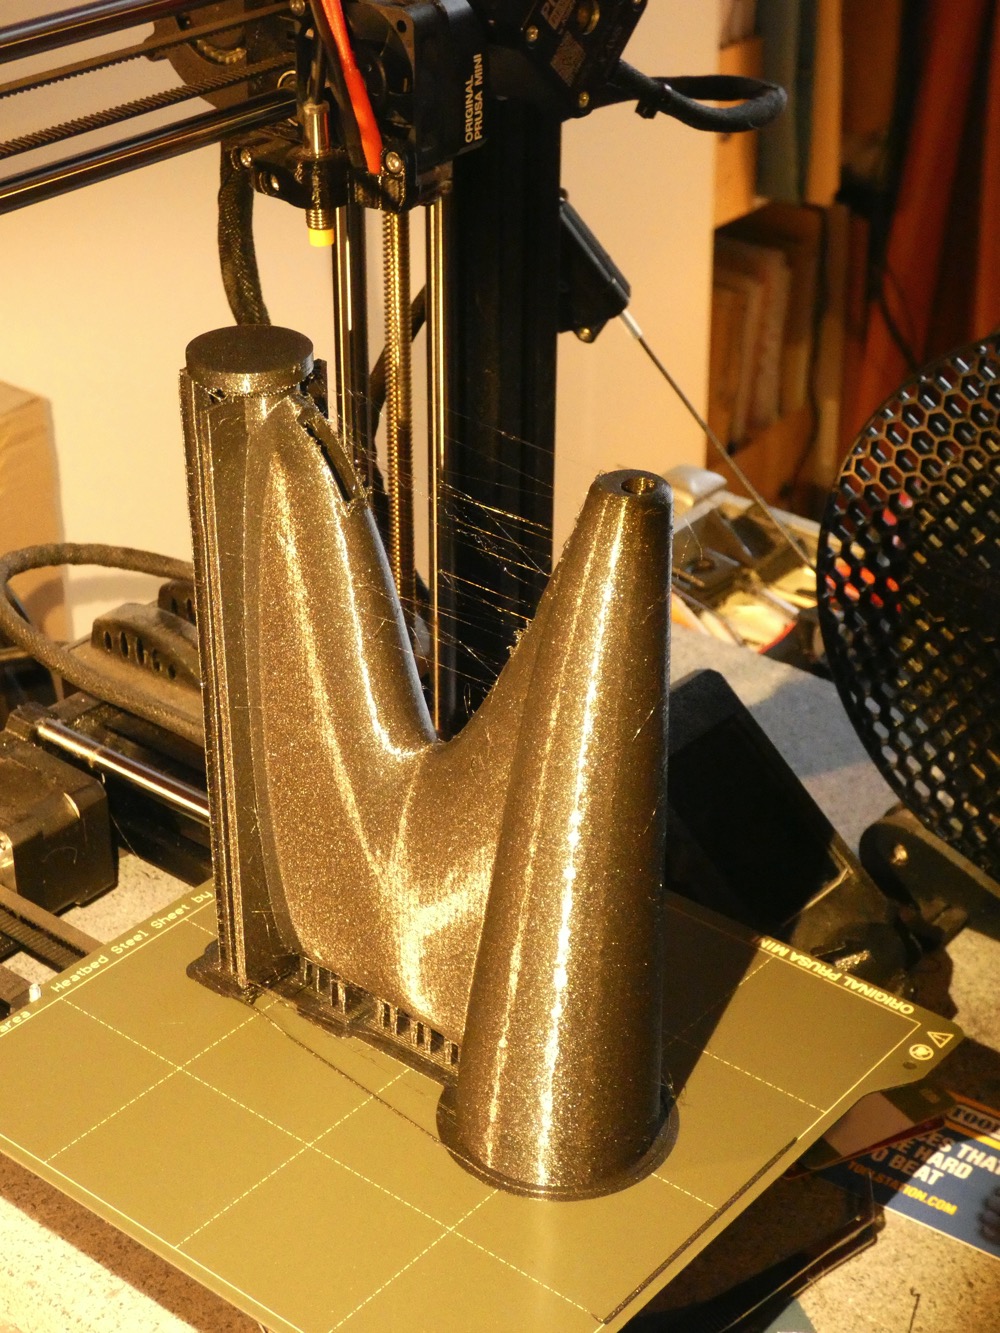
I decided to revise the design with a sculpted pylon, tighter prop clearance and also try 3mm shell, 15% infil and ONE printed perimeter. Below is the beastie being printed....

It tidied up to 75g after removing the supports!And here is it complete. It might not look out of place in a SyFy movie set.
And here it is glued to the front tube-nose and with the knitting needle boom glued in place.It is sized for a 160mm wing chord, up to a 200mm prop, an 8mm boom, 51mm diameter fuselage and room for a 1500mAhr battery.
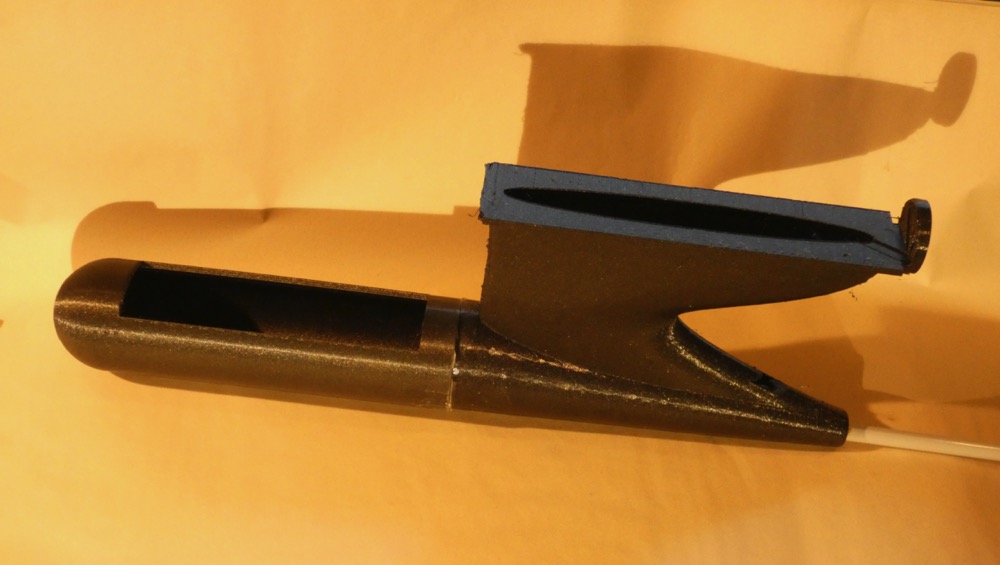
I can imagine that a lesser or greater wing chord would just require scaling one of the axis.
I also did a test design of the front portion of the fuselage with a 42mm diameter which will nicely work with my 850mAhr battery and could even host the 1500mAhr with a minor bit of protrusion. With the lesser diameter I might consider going to a 4mm thick shell to increase the gluing area and help resist knocks in the field and the aft section could also be slimmed down a bit for additional weight savings.
I 'hope' it might fly nicely. It was certainly fun to ramp up my freeCAD skills to cope with creating the beastie. And it will provide an opportunity to see how strong this combination of printing attributes is. -Jon
Please Log in or Create an account to join the conversation.
- Quorneng
-

- Offline
- Forum Master
-

- Posts: 9436
- Thank you received: 19043
That is impressive indeed.
What glue did you use? I have found super glue works well on PLA to the extent it just brakes away the plastic.
As I found the joint between the pylon and battery is where it will break. Not that surprising if you think about it is it is a sudden change in cross section.
Please Log in or Create an account to join the conversation.
- jon.in.swansea
-
Topic Author
- Offline
- Elite Member
-
- Posts: 766
- Thank you received: 1192
I am also relying on the boom extending forward along the base of the fuselage into the forward section about 25mm. After putting it together I can image extending the boom further forward as the interior radius would allow the battery to ride above the boom. In my earlier 'Franken pod' prints I also ran the boom the full length of the fuselage into a pocket in the nose with intermittent printed selves included in the fuselage. The extra length of boom is only ~5g and that pod took some seriously hard whacks.
I tried an experiment on a section of printed fuselage that had broken off. I did a heat-weld with an old soldering iron set to ~220C and a bit of left over filament feeding it in much as one would do a welding rod.
I also have tried printing rectangular patches - say 30x50mm but only 0.4mm thick and then epoxying them over an emerging crack.
Please Log in or Create an account to join the conversation.
- Klipkopwildlife
-
- Offline
- Administrator
-
- I'm supposed to be retired!
I know you have a glue gun, have you tried that?
Do it now, you may never get another chance
Please Log in or Create an account to join the conversation.
- jon.in.swansea
-
Topic Author
- Offline
- Elite Member
-
- Posts: 766
- Thank you received: 1192
UHU POR is my go-to for foam when I am not using a glue gun. I think I also did a test of UHU POR on some small PLA printed parts. I needed to really rough up the surfaces to get much adhesion. I think my view at the time was that it was moderately good on PLA. The thing is one might treat UHU as a pure contact cement where there is little or no chance of re-alignment vs allowing some 'slide time' and clamping it.
Did I write down notes about these various combinations? Must go and have a look. -Jon
Please Log in or Create an account to join the conversation.
- jon.in.swansea
-
Topic Author
- Offline
- Elite Member
-
- Posts: 766
- Thank you received: 1192
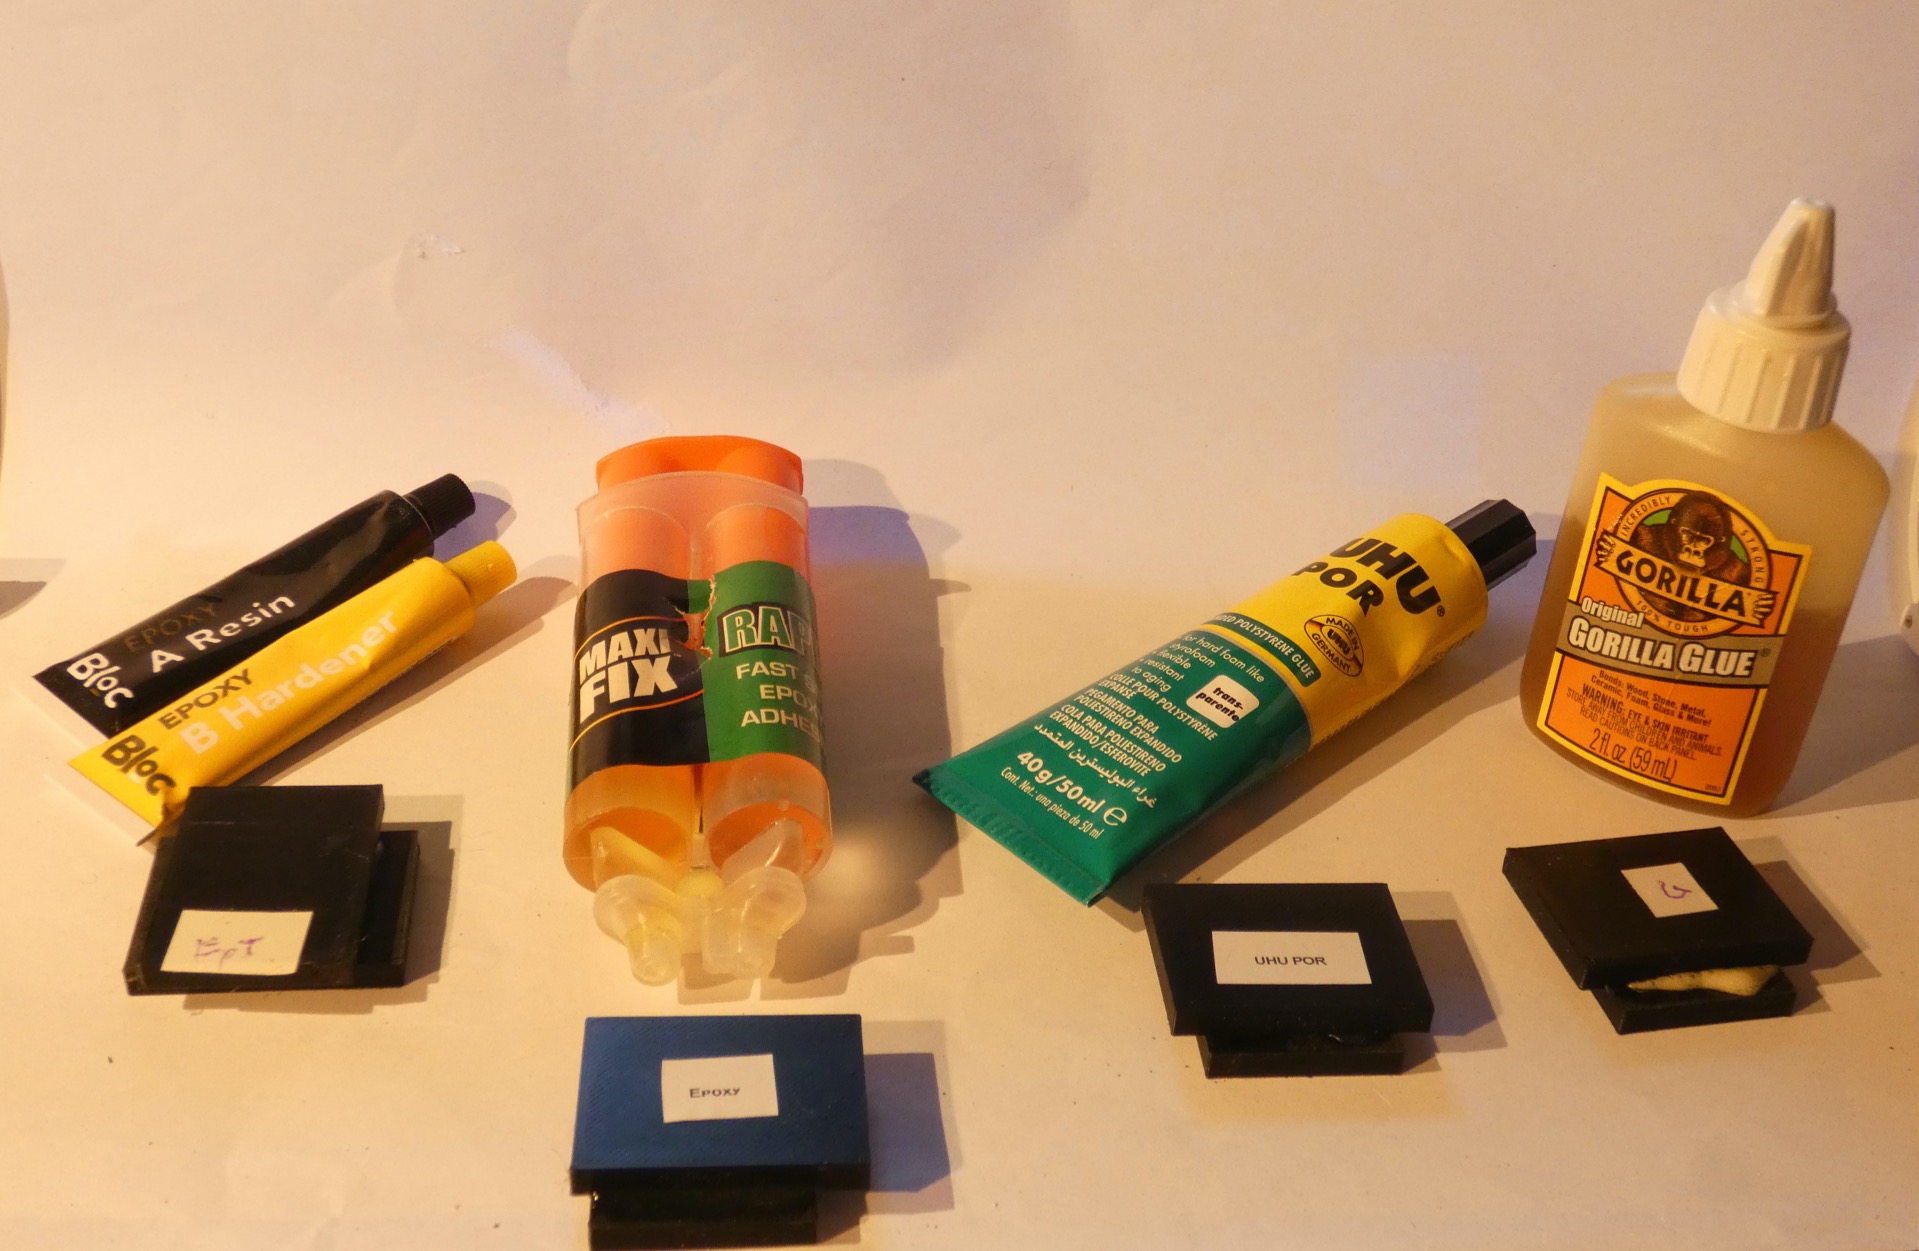
In the image below are the test blocks left to right....
a) a no-name resin manually mixed. It tends to run a bit during the initial few minutes.
b) resin in a plunger style and then mixed. It tends to run a bit.
c) UHU POR - applied one side, pulled apart and reseated prior to clamping. Does not run.
d) Gorilla Glue - applied one side, misted and then clamped. It expands so serious clamping needed.
e) not shown 'ultraloc super glue gel' - applied one side, seems to have set within a half hour but left it for a day. As a gel it seemed good for filling gaps and not running away.
Results of trying to pull apart with fingers....
a) a no-name resin - unable to separate via fingers
b) resin in a plunger style - unable to separate via fingers
c) UHU POR - unable to separate via fingers
d) Gorilla Glue - could separate with some effort (see photo below) no damage to PLA, separation seems to be within the glue layer itself.
e) ultraloc super glue gel' - unable to separate via fingers
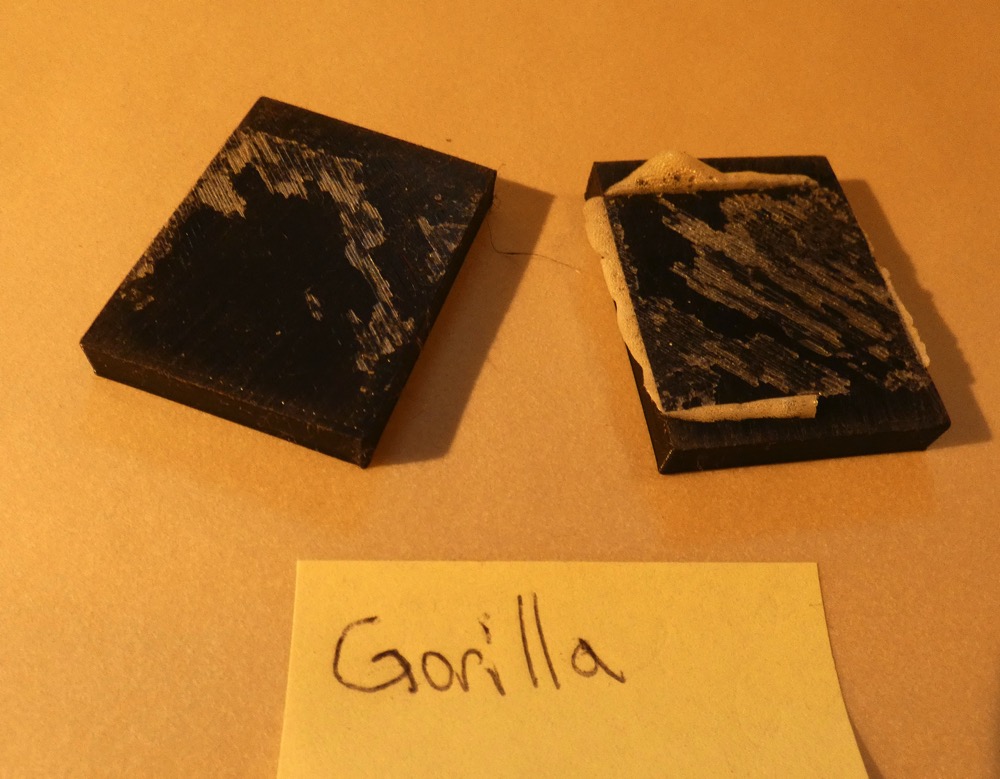
With a considerable contact area and rigid block I could not detect a difference in the blocks I could not pull apart.
I had not considered UHU POR for use with PLA. It smells less than the resin. I have quite a bit of it.
I had considered Gorilla to be quite strong - but at least of this set of tests it seems a bit less robust even if I had to grit my teeth to get it to break.
Probably need to make up a test with a smaller contact area as well as a thinner PLA print to confirm if the pattern works in less rigid situations. -Jon
Please Log in or Create an account to join the conversation.
- Quorneng
-
- Offline
- Forum Master
-
- Posts: 9436
- Thank you received: 19043
Interesting results.
I suspect the problem with Gorilla glue is due to the fact it foams. This would indicate regardless of how well it 'keys' into the surface the glue itself is not a solid but even with clamping it is still a small bubble foam.
With super glue, or POR as a contact adhesive, you don't actually want the surface to be rough but smooth and flat. These glues adhere at virtually a molecular level rather than mechanically like Gorilla glue so the less glue there is in the joint the stronger it is. This does require the two surfaces to be in intimate physical contact over as large an area as possible. This does suggests the best joints between printed structures occur when the two faces to be joined were formed by the print bed itself.
Please Log in or Create an account to join the conversation.
- Klipkopwildlife
-
- Offline
- Administrator
-
- I'm supposed to be retired!
Do it now, you may never get another chance
Please Log in or Create an account to join the conversation.
- paul d
-
- Offline
- Forum Veteran
-

- Posts: 2074
- Thank you received: 2292
The gorilla foamy stuff needs a rough surface to bond well as it's purely mechanical.
We need to remember all this adhesives where developed for specific applications, to my mind epoxy is the nearest to a universal glue.
balsa is best.
Please Log in or Create an account to join the conversation.
- Klipkopwildlife
-
- Offline
- Administrator
-
- I'm supposed to be retired!
Do it now, you may never get another chance
Please Log in or Create an account to join the conversation.
- paul d
-
- Offline
- Forum Veteran
-
- Posts: 2074
- Thank you received: 2292
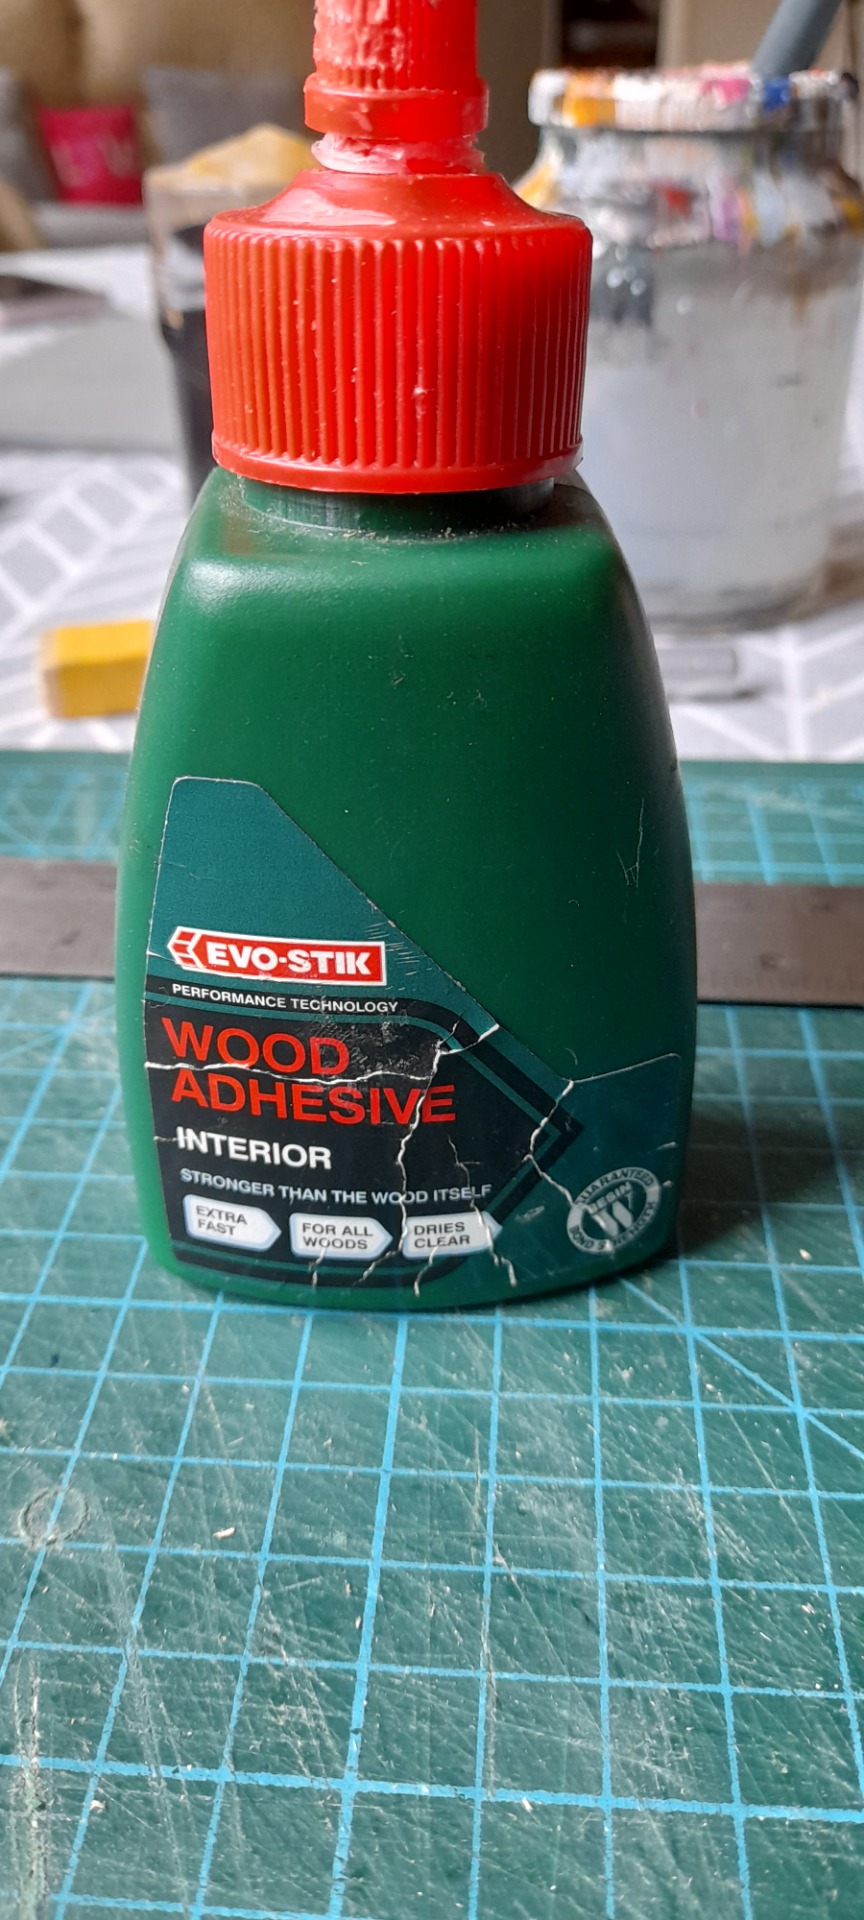
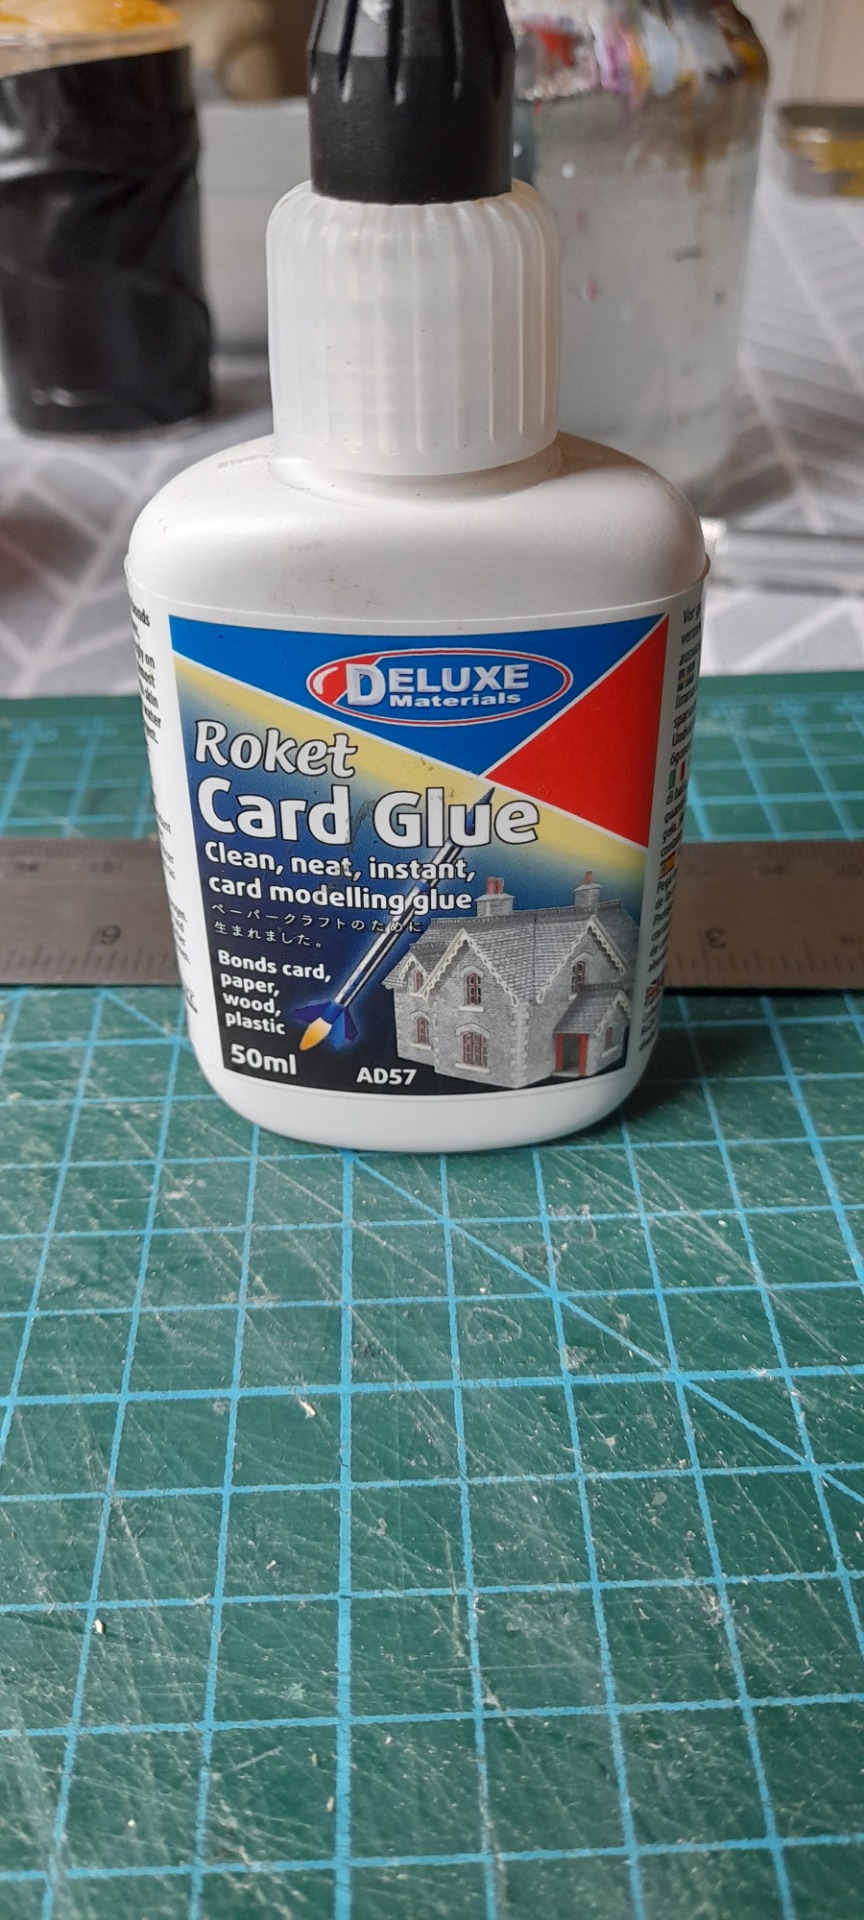
And there's not much this won't bond, Great for glazing as it drys clear:
balsa is best.
Please Log in or Create an account to join the conversation.
- jon.in.swansea
-
Topic Author
- Offline
- Elite Member
-
- Posts: 766
- Thank you received: 1192
I though that it would be good to add a round opening mid-rib to run wiring through. And I thought the wee bamboo skewers might be great to help align the ribs if I ended up using UHU POR in a contact cement mode - near the leading and trailing edges.
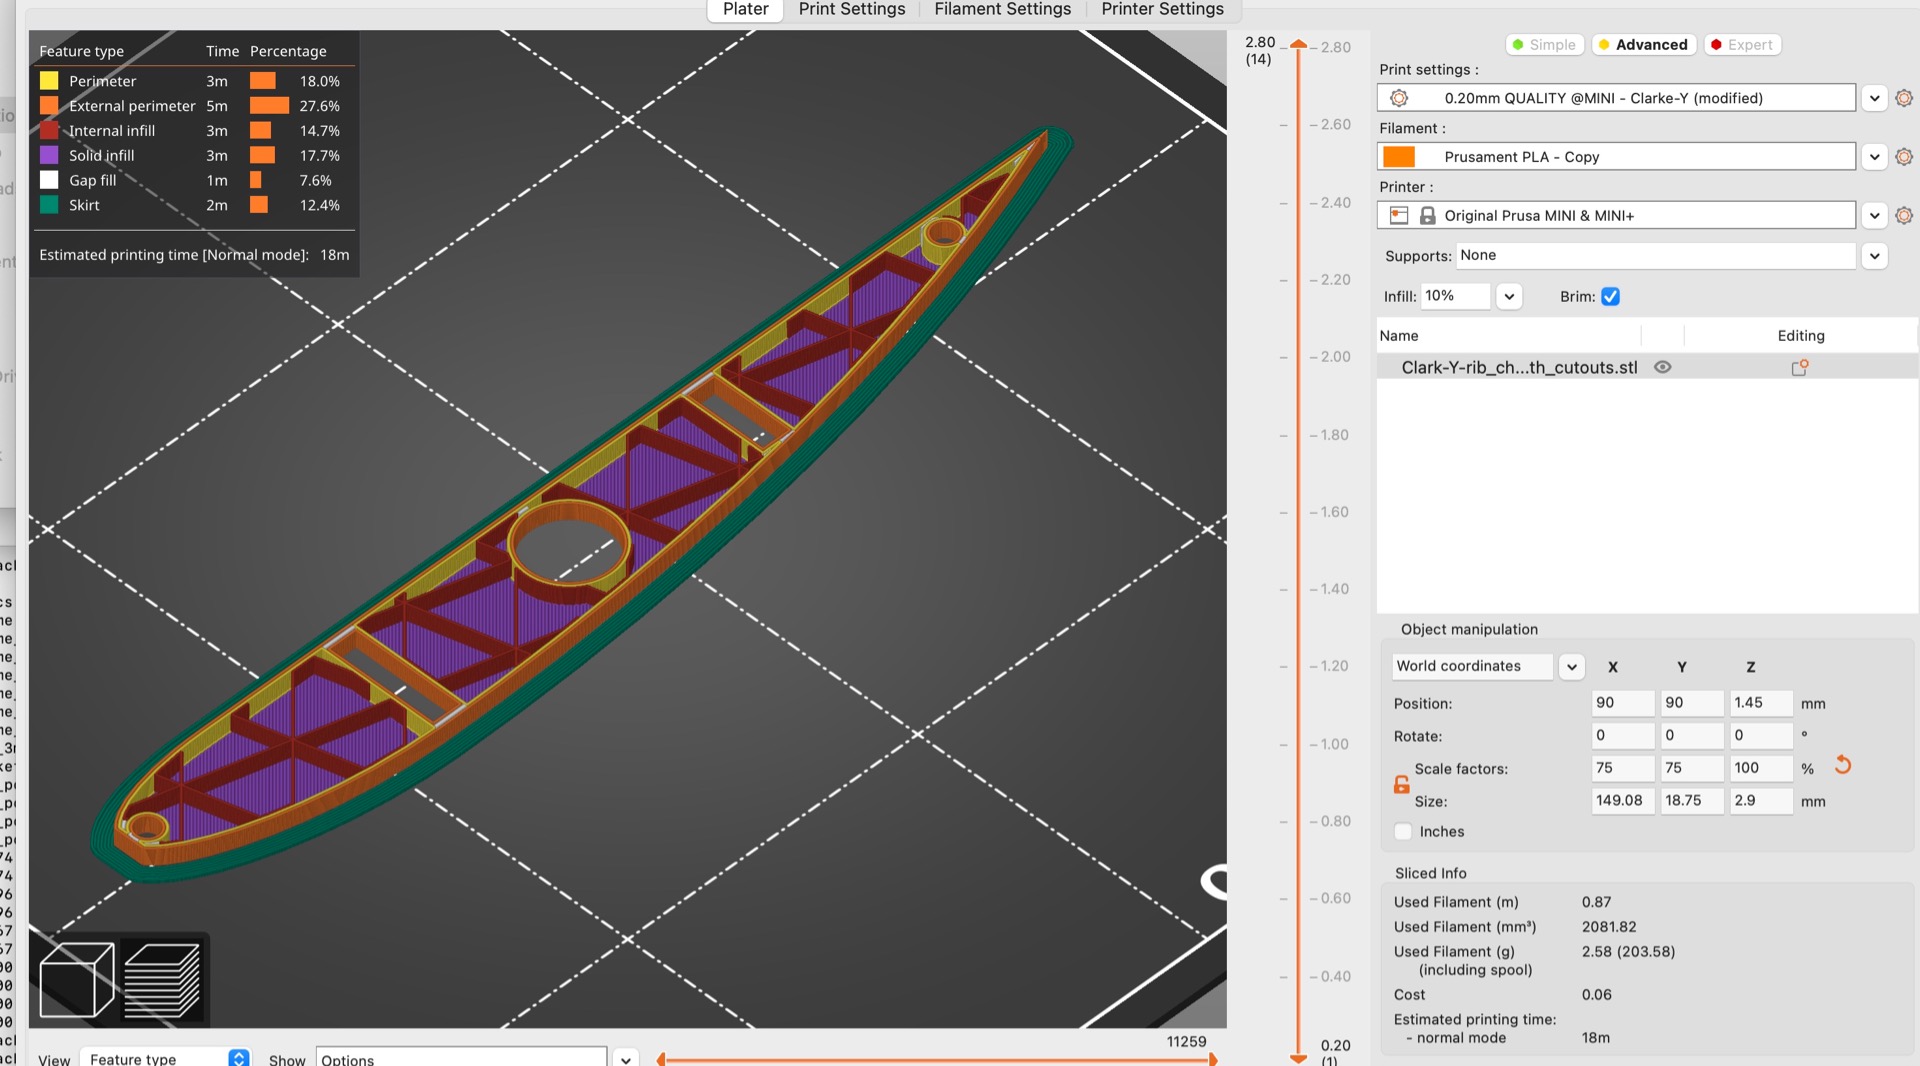
The dihedral brace would run at the point of maximum thickness and then a smaller one 1/3 from the trailing edge in case it was needed. 14x3x200mm and 10x3x200mm at (hopefully) 4-5g each.
For the rib I settled on two perimeters, one layer on the base and an open top like in Simon's photos. I ended up deciding a 10% triangular fill tied the shell and cutouts nicely. I printed with a 3mm skirt to ensure the ends did not pull up during printing and then set up a gang of six to be printed, half flipped (see below). With a chord of 150mm they come in just a bit over 2g each.
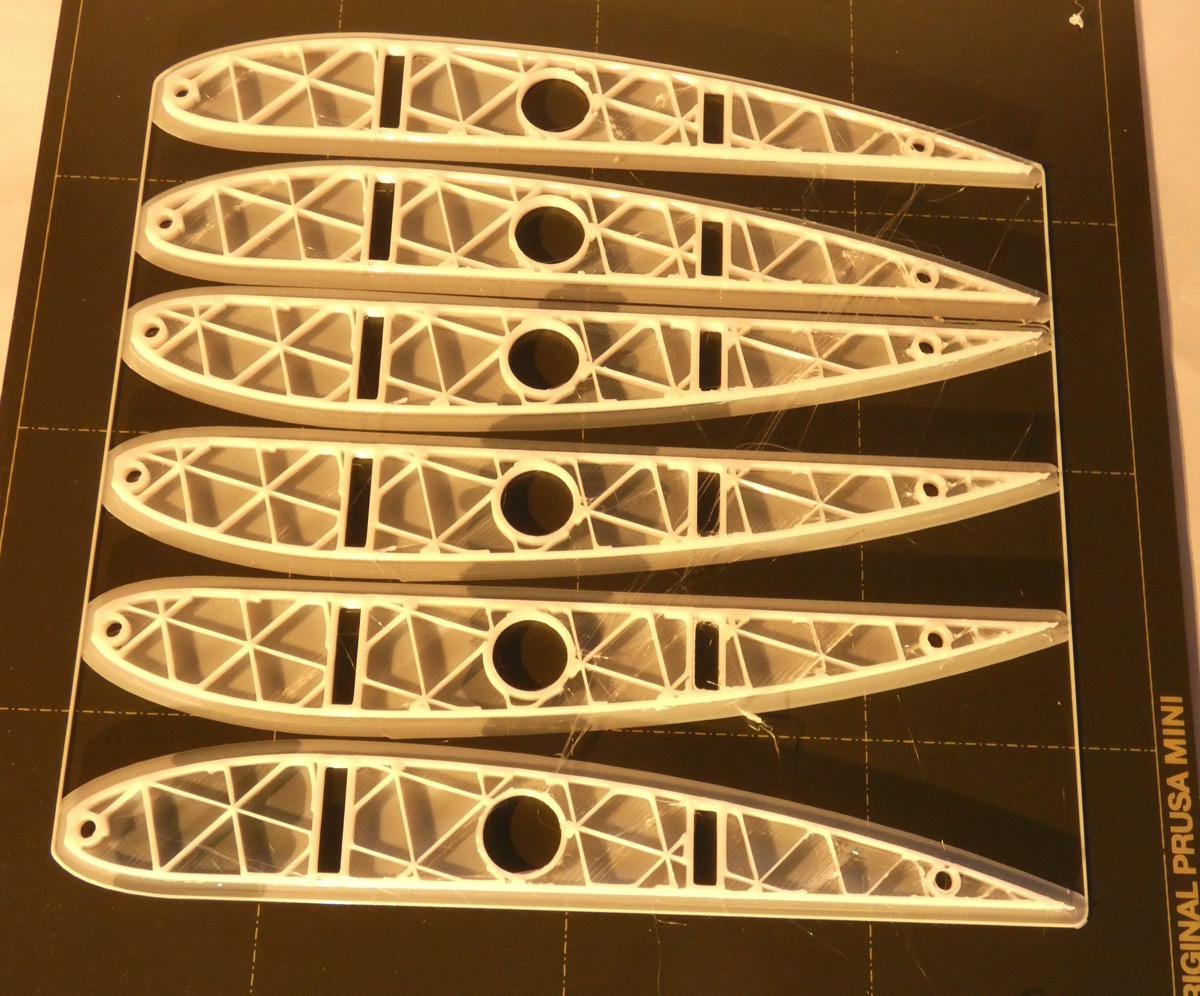

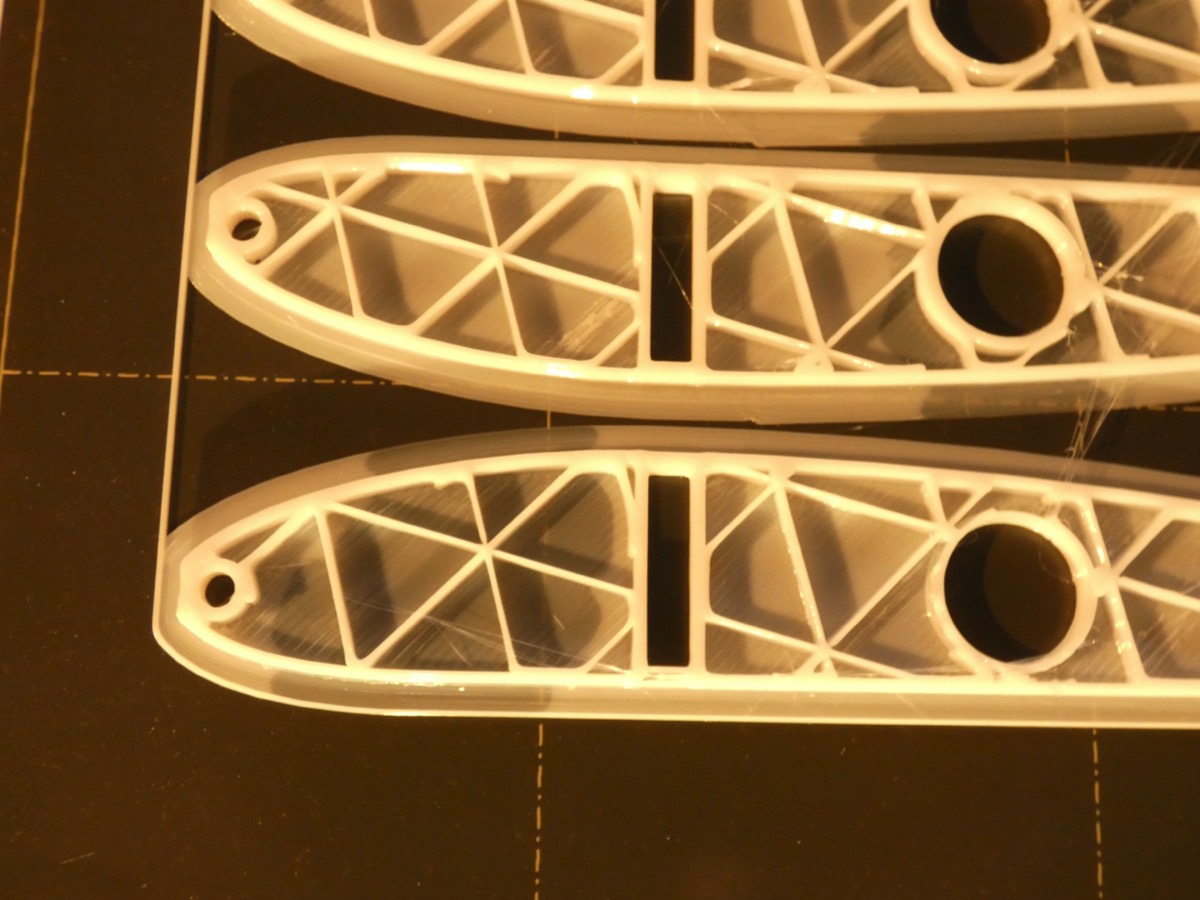
Here is the freeCAD file (you need to unzip it) and the STL - nominally sized for 200mm chord as in the original....
Please log in or register to see it.
Please log in or register to see it.
I am doing test glues of foam to PLA with UHU POR with each of the three previously mentioned methods, super-glue-gel (that didn't stick very well at all), Gorilla and epoxy. We shall see.... -Jon
Please Log in or Create an account to join the conversation.
- Quorneng
-
- Offline
- Forum Master
-
- Posts: 9436
- Thank you received: 19043
Just out of interest I compared your stl with the Big Dragon one using identical print and infill parameters.
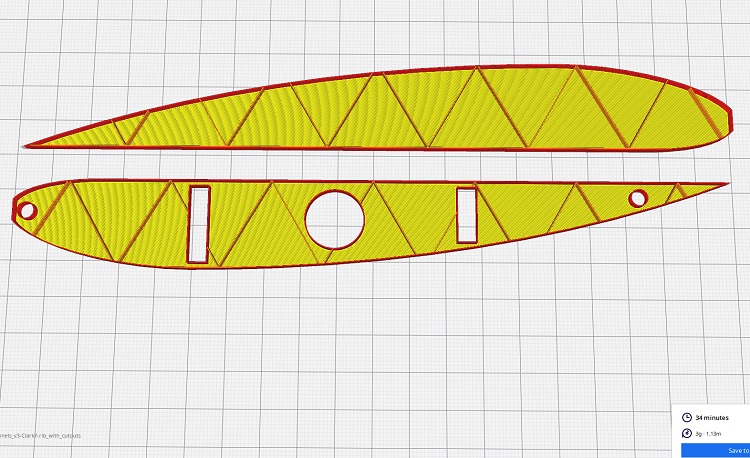
With no need for the provision of spars within the rib the Big Dragon one is 'simpler' but to my surprise it comes out very slightly heavier as according to CURA it uses a touch bit more filament. 0.58m compared to 0.55m for your design.
According to my estimate the weight of the 28 ribs in the Big Dragon wing is a not insignificant 41 g (although I never actually weighed them all together) given the total wing weight is only 141g,
I must investigate some 'hole designs' in the rib to see if I can shave off some weight in case I build it another wing. Indeed I might actually have to quite soon as the original now has some significant 'scars' in its all important skin.
Please Log in or Create an account to join the conversation.
- Quorneng
-
- Offline
- Forum Master
-
- Posts: 9436
- Thank you received: 19043
So I printed out 3 test ribs
The 'as used' rib
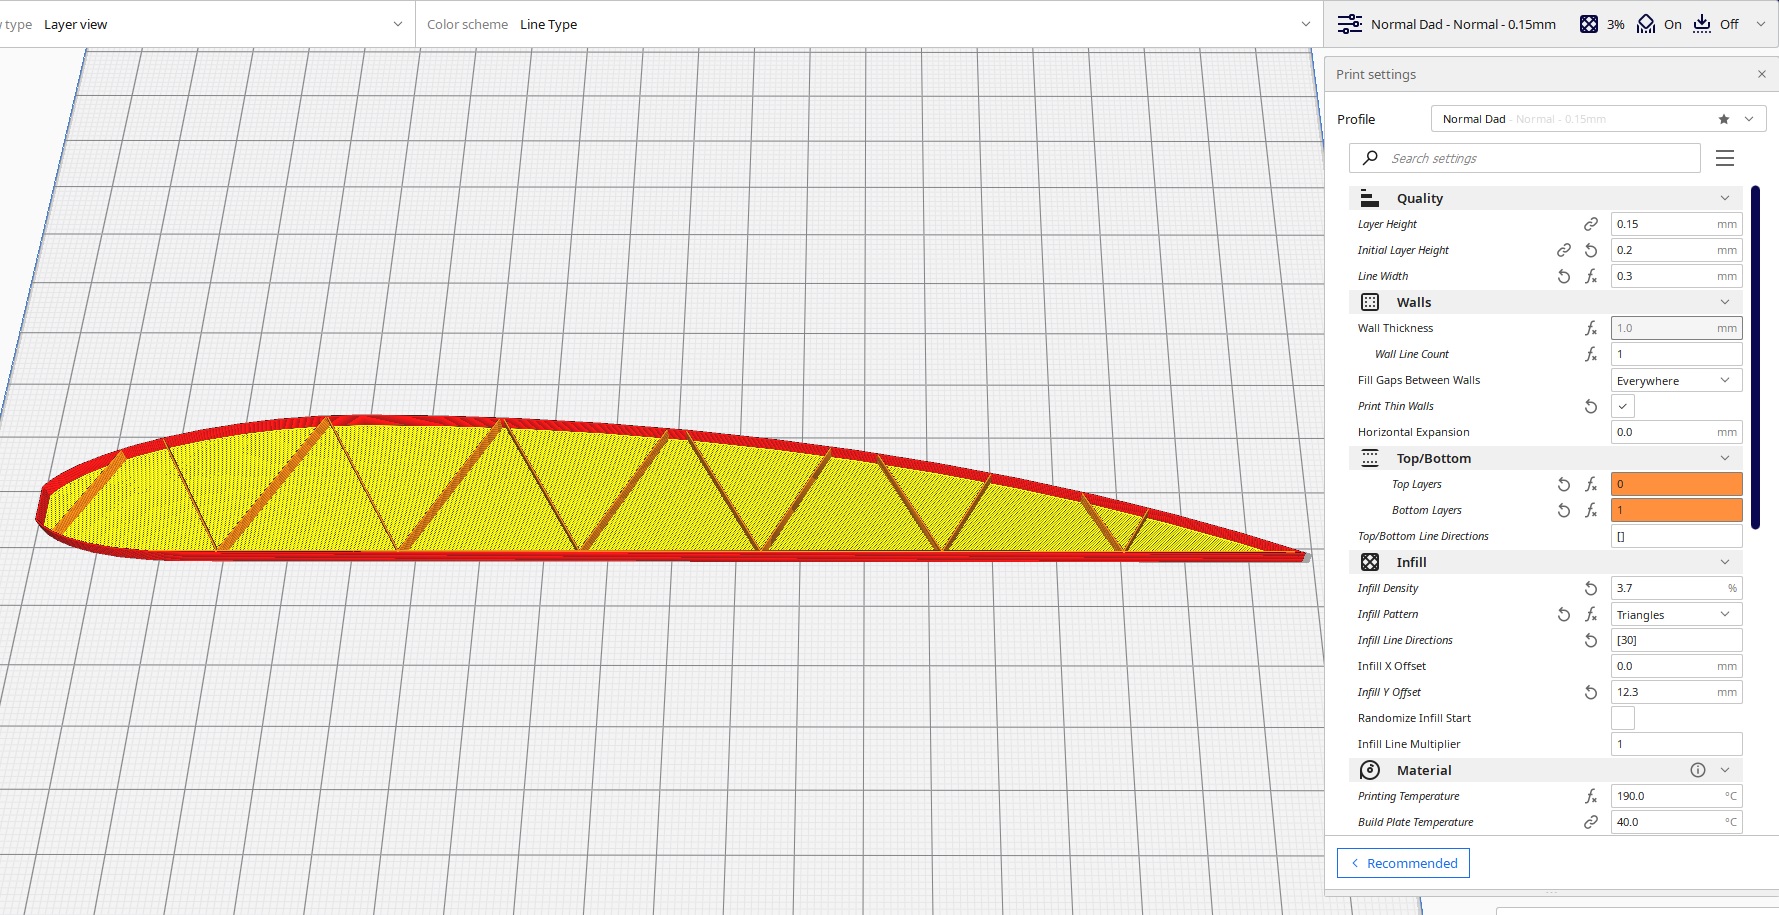
According to my 'drug dealer' scales it weighs 1.569g
The first rib with holes.
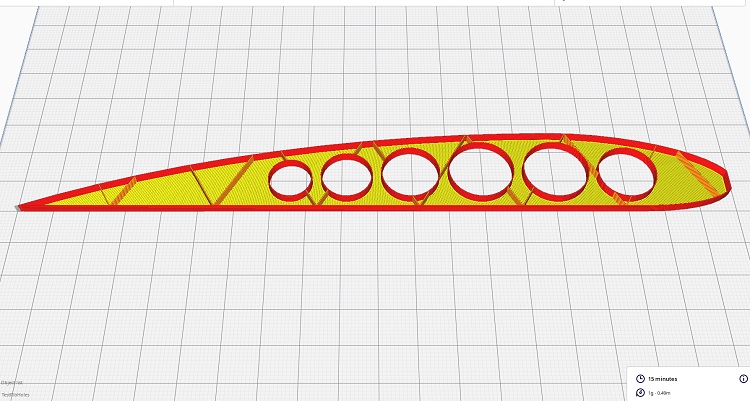
It weighs 1.466g
A rib with big holes.

It weighs 1.239g
Adding more smaller holes does not actually save weight as the material saved by the 'hole' matches the material of the flange around it.
It appears this design could save just over 21% or 9g over the 28 ribs. Doesn't seem that much but it is about the weight of its two aileron servos!
Please Log in or Create an account to join the conversation.