
Fokker V25
- Klipkopwildlife
-

- Offline
- Administrator
-

- I'm supposed to be retired!
Do it now, you may never get another chance
Please Log in or Create an account to join the conversation.
- jon.in.swansea
-

- Offline
- Elite Member
-

- Posts: 757
- Thank you received: 1164
Please Log in or Create an account to join the conversation.
- Quorneng
-
 Topic Author
- Offline
- Forum Master
-

- Posts: 10058
- Thank you received: 19043
Easy enough for the top straight sided panels but it took several goes for the side ones that taper to flat and have to fit round the top surface of the wing.

Just as well each only weighs 1g!
These are all for the left side when viewed from the front. Fortunately the right side is a mirror image so should fit.
Attachments:
Please Log in or Create an account to join the conversation.
- Quorneng
-
Topic Author
- Offline
- Forum Master
-
- Posts: 10058
- Thank you received: 19043
Nice prop but the trailing edge at one tip was damaged and the centre hole was just to big for the prop adapter!

With some careful measurement I deduced it needed a 0.3mm thick bush so I printed one with a single 3mm wall in PLA! It is just visible in the picture.
The tip damage was "built up" with glue more for balance than aerodynamics.
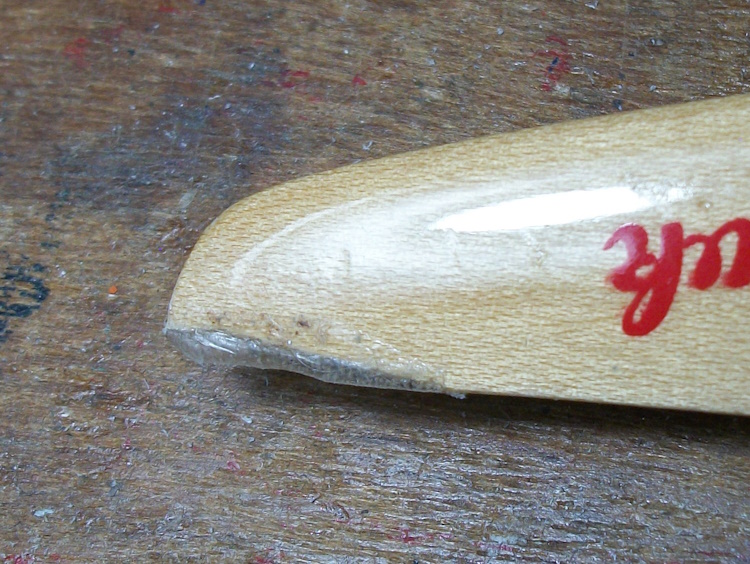
A test run has confirmed it is nicely balanced and blows a lot of air!
It weighs 13.3g whereas the nylon 12x6E prop weighs 23.4g which adds nearly 50% to the weight of the motor!
Attachments:
Please Log in or Create an account to join the conversation.
- Quorneng
-
Topic Author
- Offline
- Forum Master
-
- Posts: 10058
- Thank you received: 19043


Note I built a dummy wing centre section to ensure it all fitted neatly.
The dummy wing also tested the proposed construction of the full wing using PLA printed wing ribs with a 3mm XPS sheet skin.

The scale wing section (it even has a slight under camber!) is a pretty thick 25.7mm at the root so I doubt it will need any more than a single Depron shear web between the ribs.

Nearly ready to start putting in the electrics but I have to determine if I can get away with the elevator and rudder micro servos right at the tail. It makes for a very neat installation but they would be an awful long way back and the nose with the motor in it is very short!
Attachments:
Please Log in or Create an account to join the conversation.
- Quorneng
-
Topic Author
- Offline
- Forum Master
-
- Posts: 10058
- Thank you received: 19043

They use my preferred method of an triangle fill on a single bottom skin and are all scaled from a master root rib using the "scale" feature in CURA. This way they all have an identical and accurate section with no cutting out.
The 13 ribs weigh 11g.
The Depron tail feathers are done as well.

Slowly getting there!
Attachments:
Please Log in or Create an account to join the conversation.
- Quorneng
-
Topic Author
- Offline
- Forum Master
-
- Posts: 10058
- Thank you received: 19043
The tail plane braced with balsa struts.

The printed horns lengths are set to give adequate travel.
The rudder and elevator connected to the servos and their leads run forward.

I shall have to "borrow" a gyro Rx from another plane. I fear the V25 will need it, at least for the maiden.
Now to get on with the wing.
Attachments:
Please Log in or Create an account to join the conversation.
- Quorneng
-
Topic Author
- Offline
- Forum Master
-
- Posts: 10058
- Thank you received: 19043

Built in the same way as the "test" centre section with printed ribs
The top and bottom 3mm polystyrene foam top and bottom skins added.

It weighs 20g,
The wig tip and aileron may be printed in LW-PLA.
Attachments:
Please Log in or Create an account to join the conversation.
- Quorneng
-
Topic Author
- Offline
- Forum Master
-
- Posts: 10058
- Thank you received: 19043
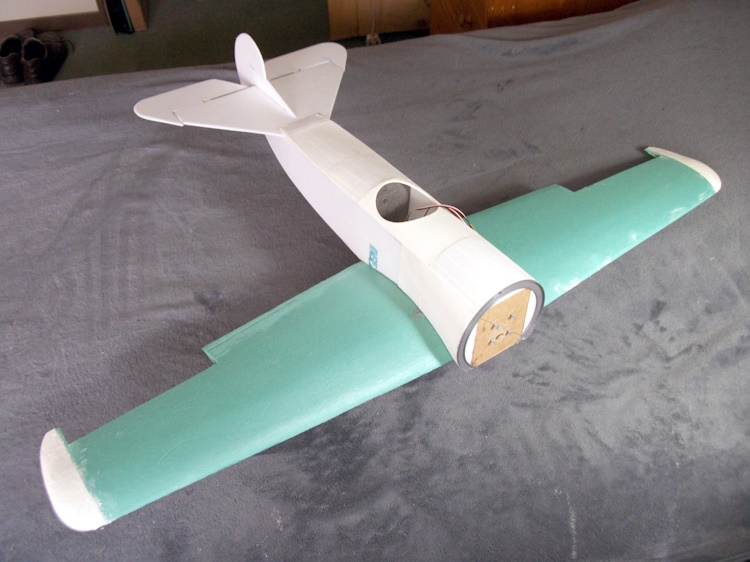
The wing tips are LW-PLA.
I to allow access any form of repair/adjustment the wing will be held on by 3 plastic M4 bolts fitting into printed retaining fixtures but so much easier just to glue the wing on!
Attachments:
Please Log in or Create an account to join the conversation.
- Eric
-

- Offline
- Moderator
-

- Posts: 15406
- Thank you received: 14306
if you are calm and collected when all about you are going berserk - you've missed something important!
Please Log in or Create an account to join the conversation.
- Magpie
-

- Offline
- Elite Member
-
- Posts: 587
- Thank you received: 1047
Please Log in or Create an account to join the conversation.
- Quorneng
-
Topic Author
- Offline
- Forum Master
-
- Posts: 10058
- Thank you received: 19043

Next are the bolt sockets to go in the wing.
Exactly how to get them in the right place to match the "nuts" n the fuselage I have yet to work out!
Attachments:
Please Log in or Create an account to join the conversation.
- Eric
-
- Offline
- Moderator
-
- Posts: 15406
- Thank you received: 14306
if you are calm and collected when all about you are going berserk - you've missed something important!
Please Log in or Create an account to join the conversation.
- Quorneng
-
Topic Author
- Offline
- Forum Master
-
- Posts: 10058
- Thank you received: 19043

So by screwing it in to the "nut" I was able to mark the hole positions exactly as Eric suggested.
However designing, printing and fitting the bolt "sockets" so they could be securely glued into what is basically an empty wing was a long winded process with 3 different designs before the result was moderately successful and even then I fear they would pull out under under much negative "g".
The socket holes on the wing underside the size of the bolt heads.
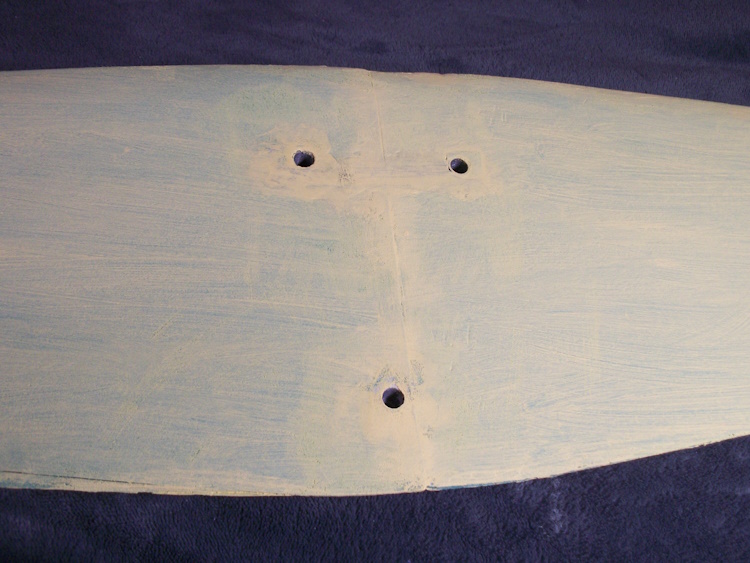
The 4mm holes on the wing top side.
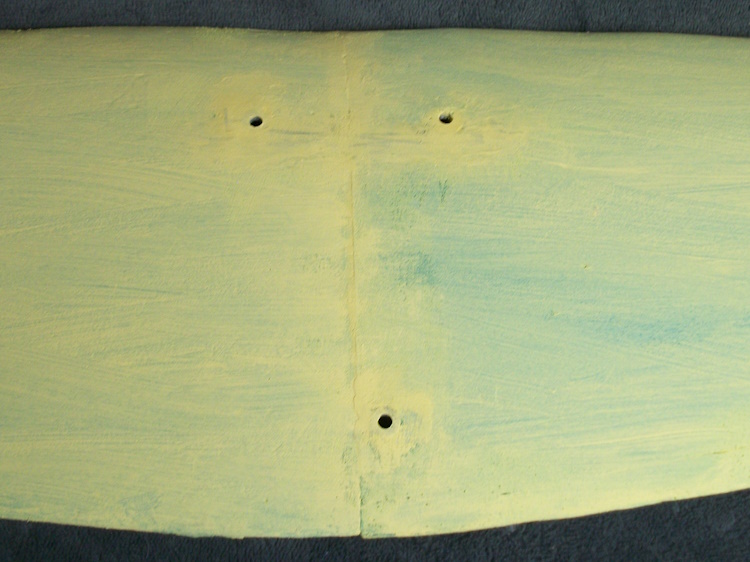
I have begun painting using my "RAC" colour scheme (yellow/black) that I have used on several planes. The high contrast stands out well.

True scale colours (lozenge printed fabric) were particularly drab!
Attachments:
Please Log in or Create an account to join the conversation.
- Eric
-
- Offline
- Moderator
-
- Posts: 15406
- Thank you received: 14306

if you are calm and collected when all about you are going berserk - you've missed something important!
Please Log in or Create an account to join the conversation.