
- Posts: 314
- Thank you received: 690
×
Here's one for the serious builders. Show us your ideas
PA-18 Super Cub for the BMFA R/C Scale Indoor Nats
- Septic
-
 Topic Author
- Offline
- Elite Member
-

Less
More
06 Sep 2016 15:00 #106
by Septic
tap - tap.......rivet
Replied by Septic on topic PA-18 Super Cub for the BMFA R/C Scale Indoor Nats
Hi Martyn, I did initially start with small blocks, but apart from the odd ding it isn't as bad as all that and was slowing the process down. This is tiny and the wood really thin so the load is very light. But I take your point and this was why Andy suggested and additional "sacrificial" layer, applied without glue.
Rudder next
Cheers
Danny
Rudder next
Cheers
Danny
tap - tap.......rivet
Thanks: martynk
Please Log in or Create an account to join the conversation.
- martynk
-

- Offline
- Elite Member
-
06 Sep 2016 15:22 #107
by martynk
--
Martyn
mad-aeromodeller.blogspot.co.uk/
Replied by martynk on topic PA-18 Super Cub for the BMFA R/C Scale Indoor Nats
Danny,
Try painting the outer lamination with a drop of water to moisten it. I have found that wood will swell and the dings may disappear voluntarily. They *know* when they are not wanted
Try painting the outer lamination with a drop of water to moisten it. I have found that wood will swell and the dings may disappear voluntarily. They *know* when they are not wanted
--
Martyn
mad-aeromodeller.blogspot.co.uk/
Thanks: Septic
Please Log in or Create an account to join the conversation.
- Septic
-
Topic Author
- Offline
- Elite Member
-
Less
More
- Posts: 314
- Thank you received: 690
06 Sep 2016 17:19 #108
by Septic
tap - tap.......rivet
Replied by Septic on topic PA-18 Super Cub for the BMFA R/C Scale Indoor Nats
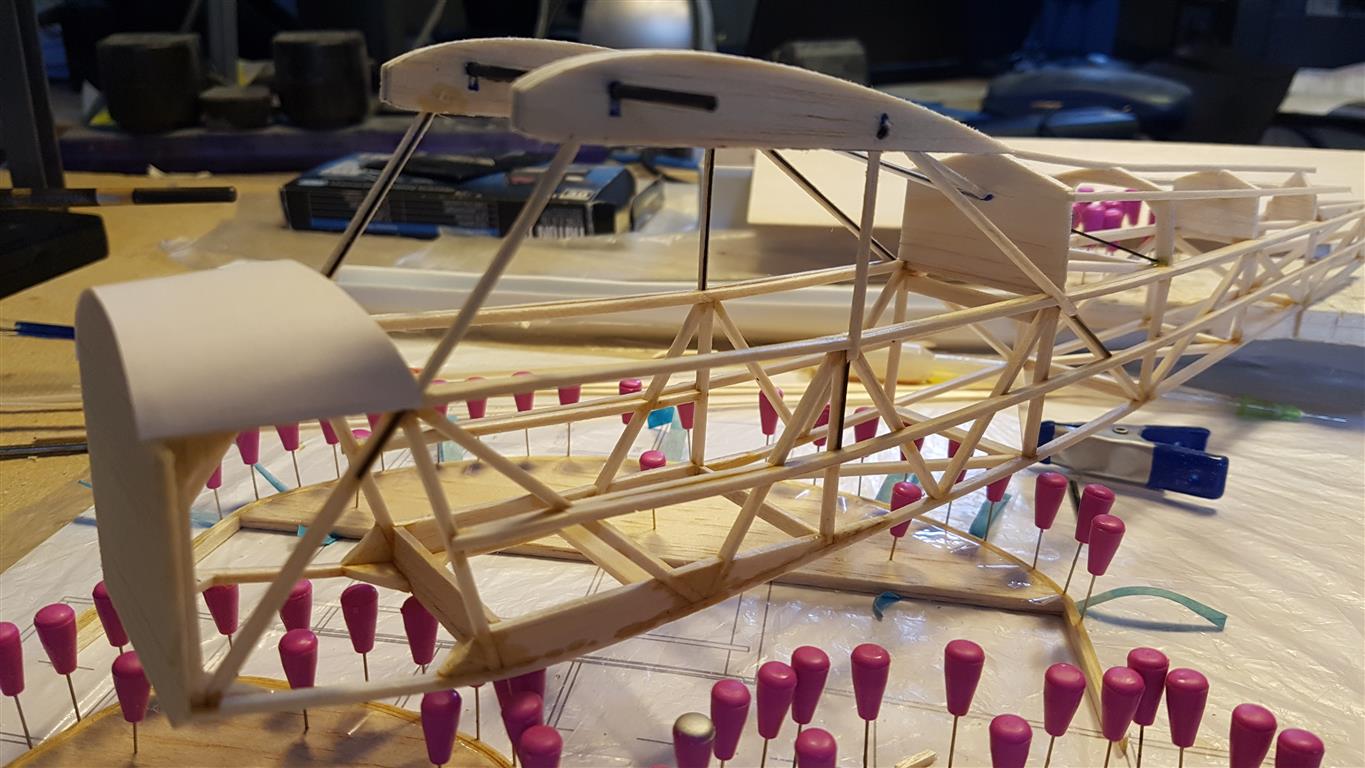
A little more done while waiting for the blessed tail bits to dry. Only drawback with soaking parts, they take a while to dry out.
Anyway the rudder is also complete, and I have added the combing over the dash.
Hopefully more later
Anyway the rudder is also complete, and I have added the combing over the dash.
Hopefully more later
tap - tap.......rivet
Thanks: Klipkopwildlife, Quorneng
Please Log in or Create an account to join the conversation.
- Septic
-
Topic Author
- Offline
- Elite Member
-
Less
More
- Posts: 314
- Thank you received: 690
06 Sep 2016 17:20 #109
by Septic
tap - tap.......rivet
Replied by Septic on topic PA-18 Super Cub for the BMFA R/C Scale Indoor Nats
And yes i forgot to add sellotape to the former, that will be fun trying to get it apart later......
tap - tap.......rivet
Please Log in or Create an account to join the conversation.
- Septic
-
Topic Author
- Offline
- Elite Member
-
Less
More
- Posts: 314
- Thank you received: 690
07 Sep 2016 17:24 #110
by Septic
tap - tap.......rivet
Replied by Septic on topic PA-18 Super Cub for the BMFA R/C Scale Indoor Nats
A little more time invested in the Cub, all the tail surfaces are made, and the tailplane and rudder are sanded. Just have to give the parts plenty of time to dry. Super-Phatic sands well but only when it is FULLY dry!

Soon be time for the wings, I am really looking forward to that bit as I am building the wings using a new technique to me with split ribs, what could possibly go wrong
Soon be time for the wings, I am really looking forward to that bit as I am building the wings using a new technique to me with split ribs, what could possibly go wrong
tap - tap.......rivet
Thanks: Klipkopwildlife, Quorneng
Please Log in or Create an account to join the conversation.
- Septic
-
Topic Author
- Offline
- Elite Member
-
Less
More
- Posts: 314
- Thank you received: 690
27 Sep 2016 17:17 #111
by Septic
tap - tap.......rivet
Replied by Septic on topic PA-18 Super Cub for the BMFA R/C Scale Indoor Nats
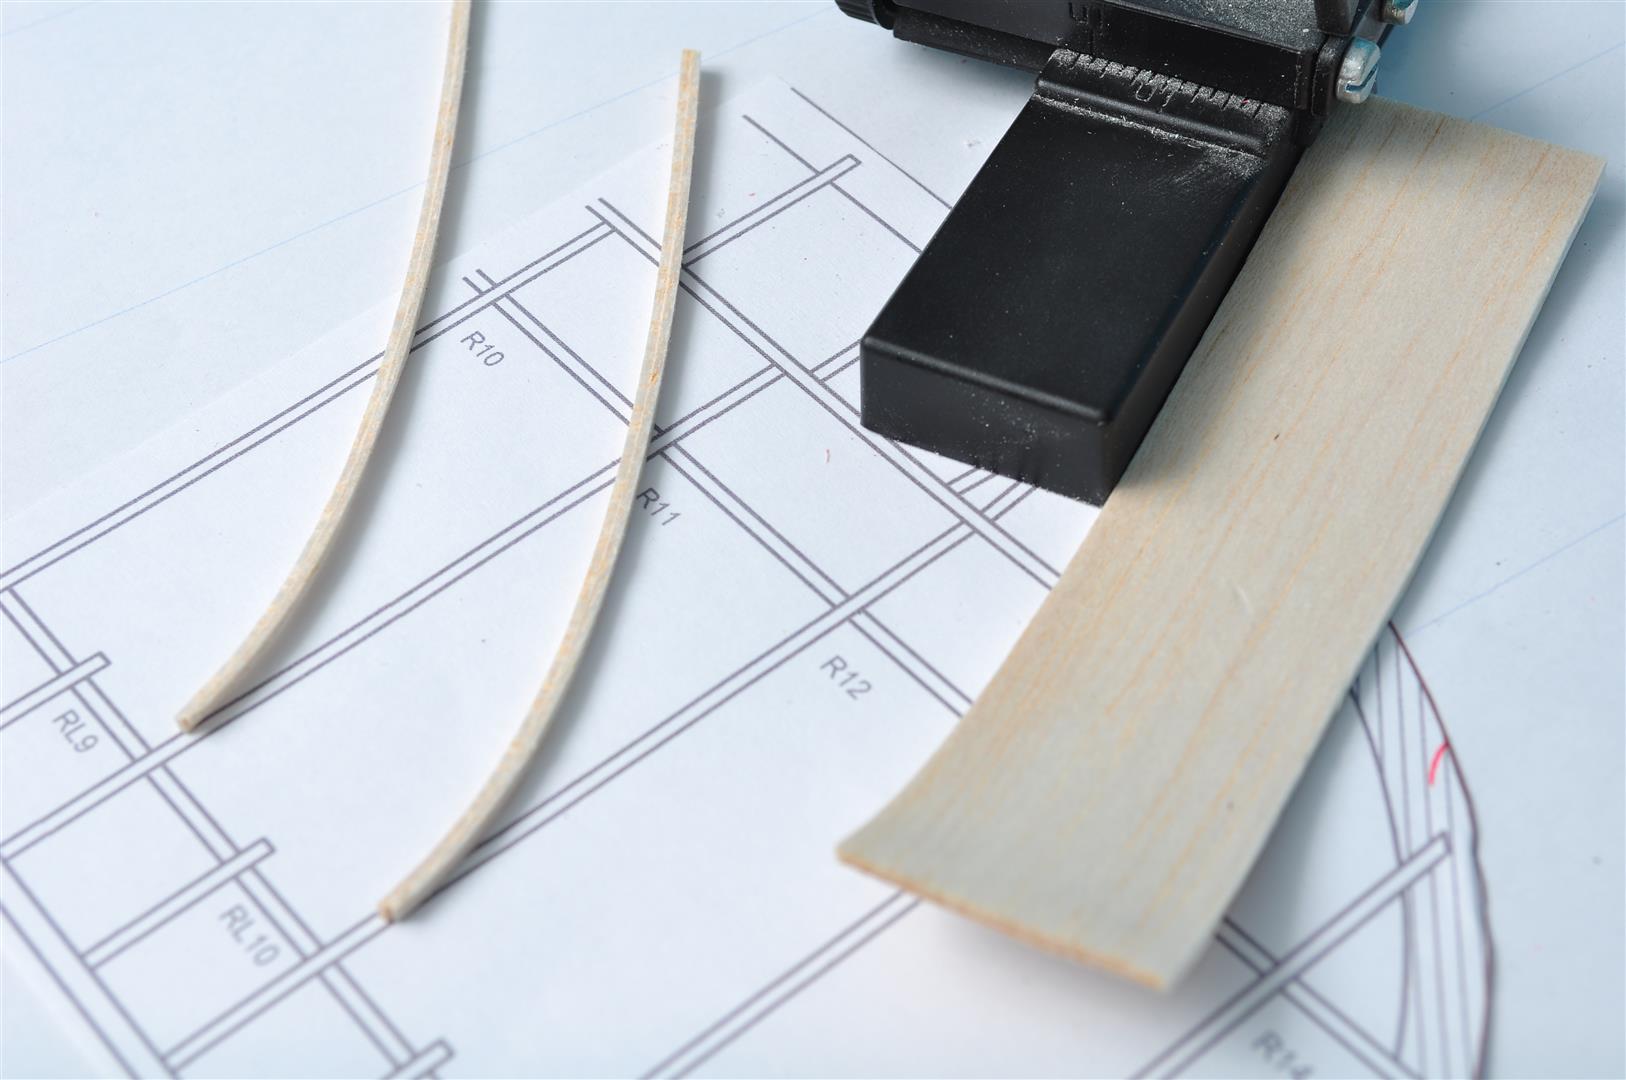
Started on the wings today, new technique to me, but then again most of this modelling lark is new to me 


Cheers
Danny
Cheers
Danny
tap - tap.......rivet
Thanks: Klipkopwildlife, Quorneng, martynk
Please Log in or Create an account to join the conversation.
- martynk
-
- Offline
- Elite Member
-
27 Sep 2016 17:25 #112
by martynk
--
Martyn
mad-aeromodeller.blogspot.co.uk/
Replied by martynk on topic PA-18 Super Cub for the BMFA R/C Scale Indoor Nats
Hi Danny
Some stupid questions.
1. Is the top photo a carved and sanded block template?
2. What is happening on the second photo?
3. the 3rd photo looks like you are stripping ribs on the inside edge of the curve - I don't think that is possible
4. I understand the 4th photo. Whatever you did worked and it looks very neat. Cracking plan as well
Sorry about that. I need to know as I may be doing something similar soon
Some stupid questions.
1. Is the top photo a carved and sanded block template?
2. What is happening on the second photo?
3. the 3rd photo looks like you are stripping ribs on the inside edge of the curve - I don't think that is possible
4. I understand the 4th photo. Whatever you did worked and it looks very neat. Cracking plan as well
Sorry about that. I need to know as I may be doing something similar soon
--
Martyn
mad-aeromodeller.blogspot.co.uk/
Thanks: Septic
Please Log in or Create an account to join the conversation.
- Septic
-
Topic Author
- Offline
- Elite Member
-
Less
More
- Posts: 314
- Thank you received: 690
27 Sep 2016 17:34 - 27 Sep 2016 17:37 #113
by Septic
tap - tap.......rivet
Replied by Septic on topic PA-18 Super Cub for the BMFA R/C Scale Indoor Nats
Hi Martin, there is no such thing as a stupid question my friend  glad somebody is curious
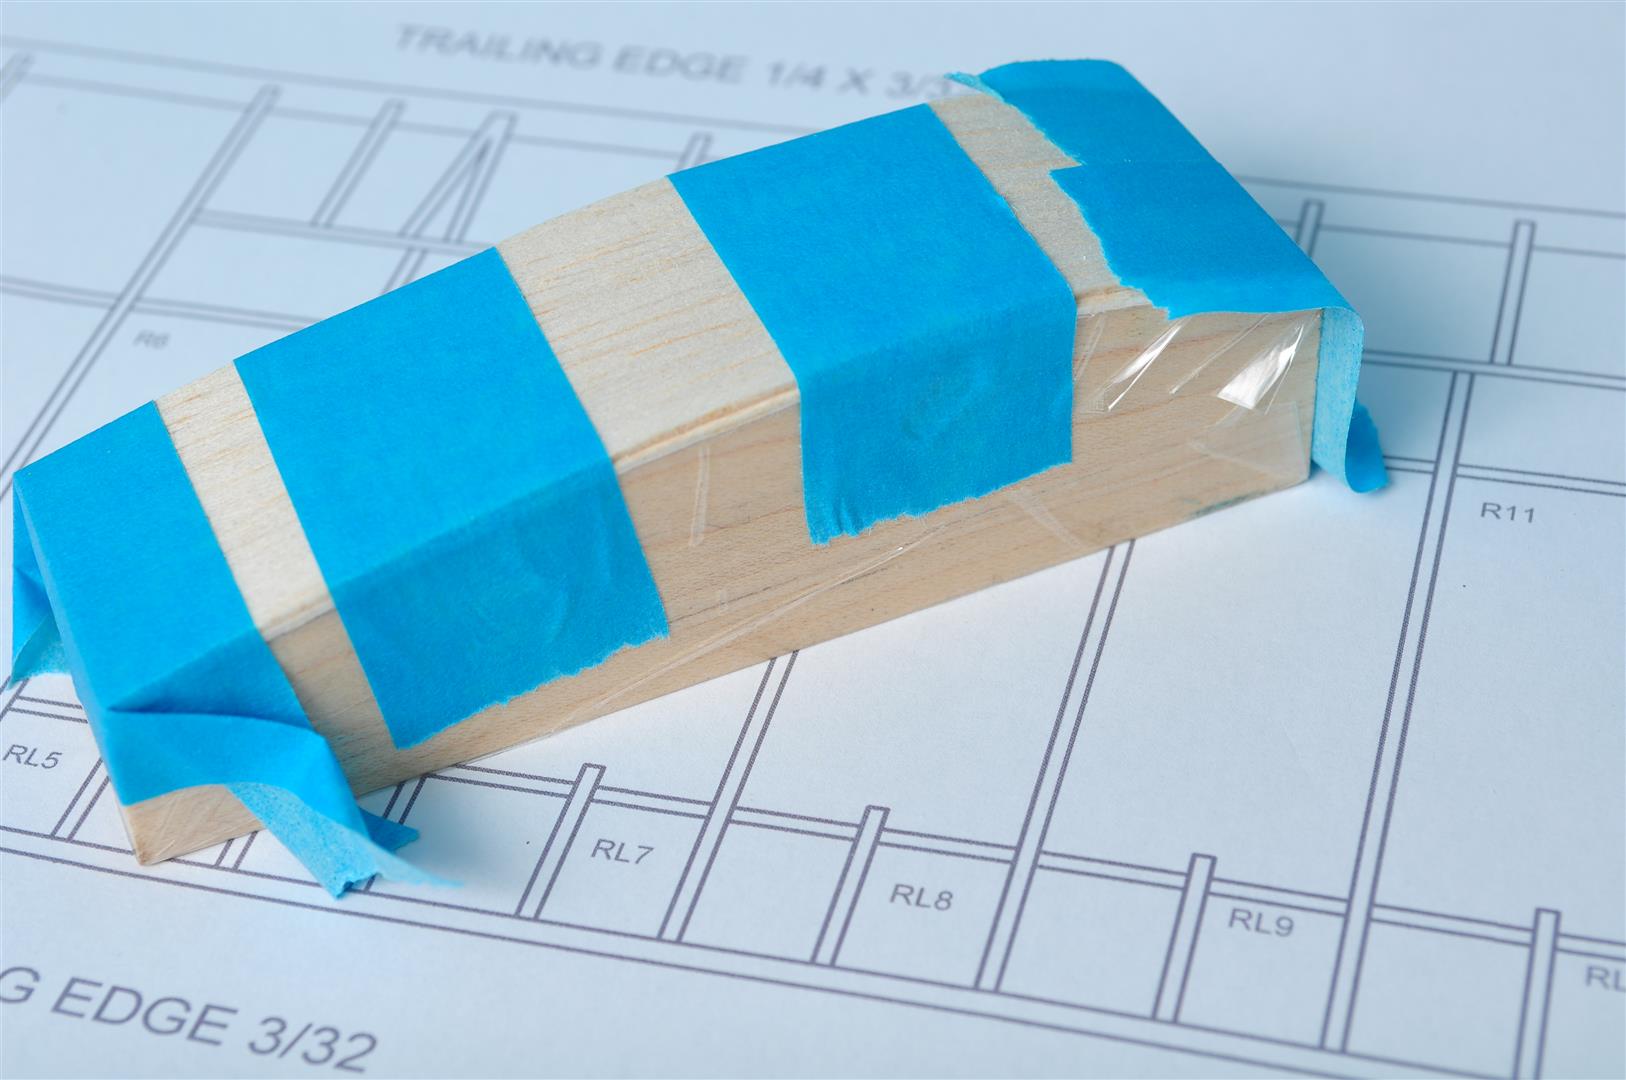
the block is maple, though it could be any wood, its just I have some maple kicking about. It simply has the rib upper profile on one surface and the lower rib profile on the opposite surface. It was then bandsawed and drum sanded. As it happens the curve on the lower rib leading edge is not significant and can be sanded into straight 1/16th dtrips, so they wont get formed.
The second photo shows the block wrapped in clear parcel tape. Then has two laminations of watered pva taped to it. Once dry these form a nice curved sheet.
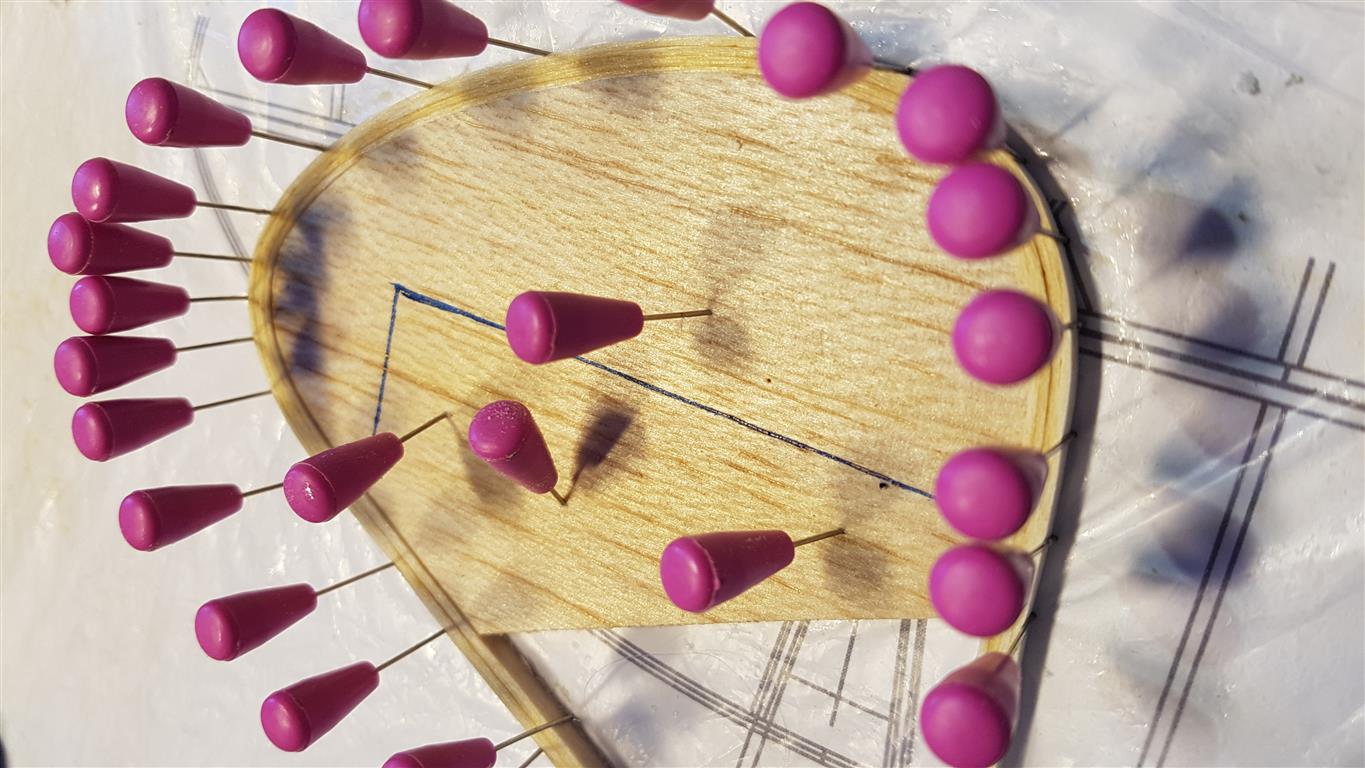
The third picture shows I am stripping the curved sheet into 1/16th wide strips, the ones already cut have toppled over onto their side, does that make sense?
As you say the 4th is fairly obvious
Cheers
Danny
glad somebody is curious the block is maple, though it could be any wood, its just I have some maple kicking about. It simply has the rib upper profile on one surface and the lower rib profile on the opposite surface. It was then bandsawed and drum sanded. As it happens the curve on the lower rib leading edge is not significant and can be sanded into straight 1/16th dtrips, so they wont get formed.
The second photo shows the block wrapped in clear parcel tape. Then has two laminations of watered pva taped to it. Once dry these form a nice curved sheet.
The third picture shows I am stripping the curved sheet into 1/16th wide strips, the ones already cut have toppled over onto their side, does that make sense?
As you say the 4th is fairly obvious
Cheers
Danny
tap - tap.......rivet
Last edit: 27 Sep 2016 17:37 by Septic.
Please Log in or Create an account to join the conversation.
- Ex-Member
- Visitor
-

27 Sep 2016 17:38 #114
by Ex-Member
Replied by Ex-Member on topic PA-18 Super Cub for the BMFA R/C Scale Indoor Nats
Simple when you know how.
as usual another master class from the second main man.
as usual another master class from the second main man.
Please Log in or Create an account to join the conversation.
- Septic
-
Topic Author
- Offline
- Elite Member
-
Less
More
- Posts: 314
- Thank you received: 690
27 Sep 2016 19:37 #115
by Septic
tap - tap.......rivet
Replied by Septic on topic PA-18 Super Cub for the BMFA R/C Scale Indoor Nats
Thanks Tony
The wing has actually gone together quite well, not sure what is going on at the tips yet, but that will sort itself out I am sure.
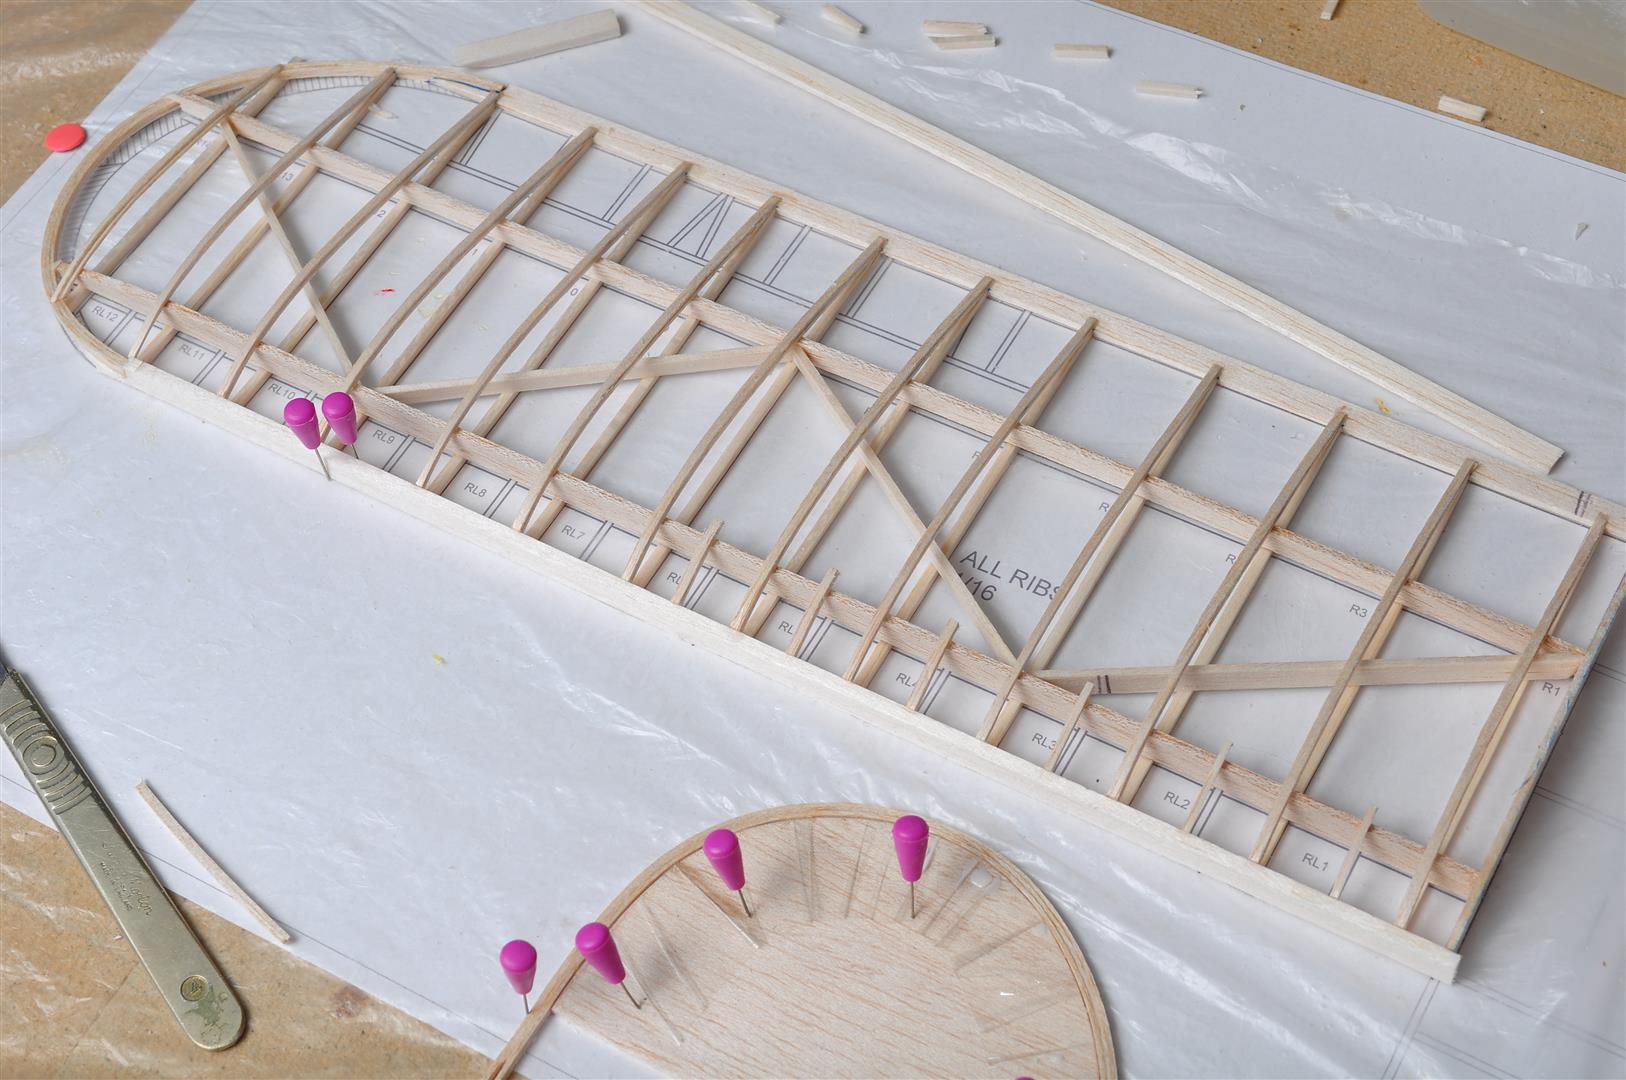
The leading edge of the full size cub wing is sheeted in alloy, I am going to use paper. Sounds like it could be fun
The wing has actually gone together quite well, not sure what is going on at the tips yet, but that will sort itself out I am sure.
The leading edge of the full size cub wing is sheeted in alloy, I am going to use paper. Sounds like it could be fun
tap - tap.......rivet
Thanks: Klipkopwildlife, Quorneng, martynk
Please Log in or Create an account to join the conversation.
- Eric
-

- Offline
- Moderator
-

Less
More
- Posts: 15406
- Thank you received: 14306
27 Sep 2016 20:02 #116
by Eric
if you are calm and collected when all about you are going berserk - you've missed something important!
Replied by Eric on topic PA-18 Super Cub for the BMFA R/C Scale Indoor Nats
How do you tape watered pva? 
Did you mean balsa soaked in diluted pva?
Did you mean balsa soaked in diluted pva?
if you are calm and collected when all about you are going berserk - you've missed something important!
Please Log in or Create an account to join the conversation.
- Septic
-
Topic Author
- Offline
- Elite Member
-
Less
More
- Posts: 314
- Thank you received: 690
27 Sep 2016 21:05 #117
by Septic
tap - tap.......rivet
Replied by Septic on topic PA-18 Super Cub for the BMFA R/C Scale Indoor Nats
Yes balsa wetted with watered pva. Actually Evo stik resin w.
Cheers
Danny
Cheers
Danny
tap - tap.......rivet
Please Log in or Create an account to join the conversation.
- martynk
-
- Offline
- Elite Member
-
28 Sep 2016 11:01 - 28 Sep 2016 11:02 #118
by martynk
One of the problems I found using paper is that when you apply tissue and dope it has a very different colour density and finish as the (cartridge) paper I used was less absorbent to dope. It will be interesting to see how you get on.
Good luck
--
Martyn
mad-aeromodeller.blogspot.co.uk/
Replied by martynk on topic PA-18 Super Cub for the BMFA R/C Scale Indoor Nats
Septic wrote:
The leading edge of the full size cub wing is sheeted in alloy, I am going to use paper. Sounds like it could be fun
One of the problems I found using paper is that when you apply tissue and dope it has a very different colour density and finish as the (cartridge) paper I used was less absorbent to dope. It will be interesting to see how you get on.
Good luck
--
Martyn
mad-aeromodeller.blogspot.co.uk/
Last edit: 28 Sep 2016 11:02 by martynk.
Please Log in or Create an account to join the conversation.
- Septic
-
Topic Author
- Offline
- Elite Member
-
Less
More
- Posts: 314
- Thank you received: 690
28 Sep 2016 11:08 #119
by Septic
tap - tap.......rivet
Replied by Septic on topic PA-18 Super Cub for the BMFA R/C Scale Indoor Nats
Hi Martyn, yes it will be interesting, I am using yellow Esaki, and I will spray Cub yellow over that. Are you referring to just the raw tissue not masking the white of the cartridge paper?? Did you spray over the top?
I was toying with printing the reg etc onto the tissue but I will make stencils, as I am comfortable with that route.
Cheers
Danny
I was toying with printing the reg etc onto the tissue but I will make stencils, as I am comfortable with that route.
Cheers
Danny
tap - tap.......rivet
Please Log in or Create an account to join the conversation.
- martynk
-
- Offline
- Elite Member
-
28 Sep 2016 11:08 #120
by martynk
Thanks Danny
Photo 1&2 - That surprised me slightly. When I was building indoor duration models, the ribs were sliced using a template in a traditional panner from very light 1/64 balsa, not sliced from a warped piece of sheet. Your requirement is different and your ribs are supported by the main spar so will be prevented from straightening
The 3rd photo - I can see that now - at first glance the sheet looked like it was on its side as I was expecting the slices to be cut from a template. Your method makes it look very easy..
Brilliant
--
Martyn
mad-aeromodeller.blogspot.co.uk/
Replied by martynk on topic PA-18 Super Cub for the BMFA R/C Scale Indoor Nats
Septic wrote: Hi Martin, there is no such thing as a stupid question my friend
the block is maple, though it could be any wood, its just I have some maple kicking about. It simply has the rib upper profile on one surface and the lower rib profile on the opposite surface. It was then bandsawed and drum sanded. As it happens the curve on the lower rib leading edge is not significant and can be sanded into straight 1/16th dtrips, so they wont get formed.
The second photo shows the block wrapped in clear parcel tape. Then has two laminations of watered pva taped to it. Once dry these form a nice curved sheet.
The third picture shows I am stripping the curved sheet into 1/16th wide strips, the ones already cut have toppled over onto their side, does that make sense?
As you say the 4th is fairly obvious
Cheers
Danny
Thanks Danny
Photo 1&2 - That surprised me slightly. When I was building indoor duration models, the ribs were sliced using a template in a traditional panner from very light 1/64 balsa, not sliced from a warped piece of sheet. Your requirement is different and your ribs are supported by the main spar so will be prevented from straightening
The 3rd photo - I can see that now - at first glance the sheet looked like it was on its side as I was expecting the slices to be cut from a template. Your method makes it look very easy..
Brilliant
--
Martyn
mad-aeromodeller.blogspot.co.uk/
Thanks: Septic
Please Log in or Create an account to join the conversation.
Time to create page: 0.354 seconds