
- Thank you received: 0
Here's one for the serious builders. Show us your ideas
SAMS Models Lacey M-10
- Ex-Member
- Topic Author
- User
-

Less
More
01 Feb 2017 09:41 - 01 Feb 2017 09:43 #31
by Ex-Member
Replied by Ex-Member on topic SAMS Models Lacey M-10
Brass Modelling Knives - I first bought one in the early 1960s, I stamped my initials on it in the metal work class at school and used it for the next 10 or so years. I foolishly loaned it to another modeller in the mid-70s; it is yet to be returned!!!!!  (I learned about lending tools from that!)
I still have a second brass handle that I bought in the late 60s, but those in the above pics are relatively new, less than 10 years old in fact. Flitehook have been selling them for the past few years and still had some on their stand when I last visited it at the FF Nats last year.
Back to the Lacey. Progress is still slow, but I've tidied the canopy frame and spliced it onto the fuselage, CAD'ed some noseblock formers and cylinder heads, transferred them onto balsa, cut them out, fixed some to the fuselage and worked on others (which were 1/8" too small....!). All should become clear in the below photos:


(I learned about lending tools from that!)I still have a second brass handle that I bought in the late 60s, but those in the above pics are relatively new, less than 10 years old in fact. Flitehook have been selling them for the past few years and still had some on their stand when I last visited it at the FF Nats last year.
Back to the Lacey. Progress is still slow, but I've tidied the canopy frame and spliced it onto the fuselage, CAD'ed some noseblock formers and cylinder heads, transferred them onto balsa, cut them out, fixed some to the fuselage and worked on others (which were 1/8" too small....!). All should become clear in the below photos:
Last edit: 01 Feb 2017 09:43 by Ex-Member.
Please Log in or Create an account to join the conversation.
- one tenor
-

- Offline
- Forum Veteran
-

- johnpcalex@gmail.com
03 Feb 2017 22:33 #32
by one tenor
Anything will fly given enough power
Replied by one tenor on topic SAMS Models Lacey M-10
The Train Shop uk also stock them
Anything will fly given enough power
Please Log in or Create an account to join the conversation.
- Ex-Member
- Topic Author
- User
-
Less
More
- Thank you received: 0
05 Feb 2017 09:01 - 05 Feb 2017 09:02 #33
by Ex-Member
Replied by Ex-Member on topic SAMS Models Lacey M-10
I've been progressing this one slowly but steadily over the past few days, but there's been little worth posting....then suddenly, it all comes together.
Odd jobs have included:
Webbing the wing CS for mounting hooks (to be fitted later):

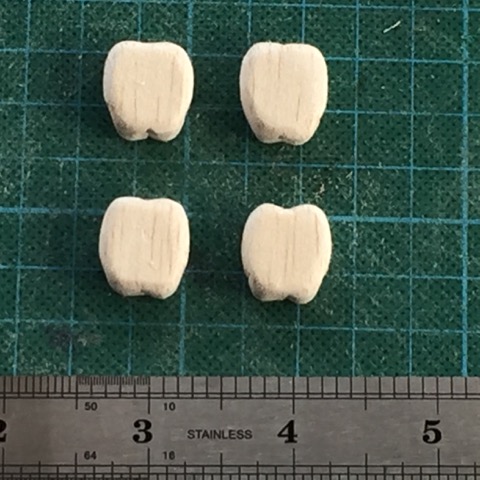
Making up and sanding cylinder head covers:

Splitting the fuselage sides and adding formers (jigs have been removed for this shot)
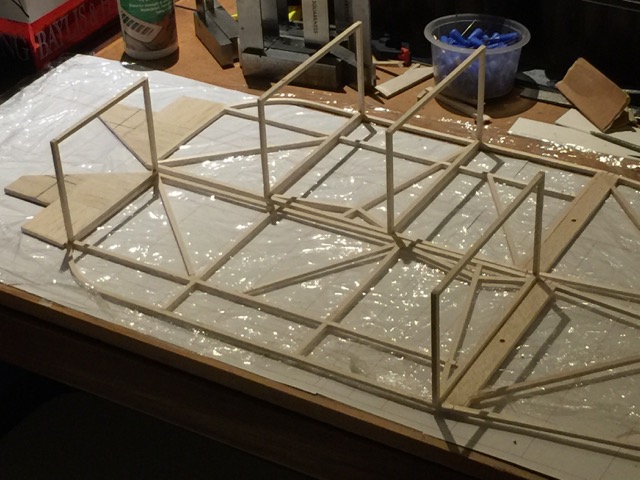
and finally, joining the fuselage sides:


Not sure yet where I'm going next, but I need to make some ailerons, cut a couple of wing tips, think about cockpit detail, add spacers to the rear fus, bend up and fit an undercarriage and make up the engine cowl......
Odd jobs have included:
Webbing the wing CS for mounting hooks (to be fitted later):
Making up and sanding cylinder head covers:
Splitting the fuselage sides and adding formers (jigs have been removed for this shot)
and finally, joining the fuselage sides:
Not sure yet where I'm going next, but I need to make some ailerons, cut a couple of wing tips, think about cockpit detail, add spacers to the rear fus, bend up and fit an undercarriage and make up the engine cowl......
Last edit: 05 Feb 2017 09:02 by Ex-Member.
Please Log in or Create an account to join the conversation.
- Ex-Member
- User
-
Less
More
- Thank you received: 0
05 Feb 2017 09:47 #34
by Ex-Member
Replied by Ex-Member on topic SAMS Models Lacey M-10
Looking real good now Andy.
still an ugly duckling though.
Tony B
still an ugly duckling though.
Tony B
Please Log in or Create an account to join the conversation.
- Eric
-

- Offline
- Moderator
-

Less
More
- Posts: 13726
- Thank you received: 14467
05 Feb 2017 17:57 #35
by Eric
if you are calm and collected when all about you are going berserk - you've missed something important!
Replied by Eric on topic SAMS Models Lacey M-10
Don't forget - Tony, Ugly Ducklings grow up into beautiful swans! 
if you are calm and collected when all about you are going berserk - you've missed something important!
Please Log in or Create an account to join the conversation.
- Squirrelnet
- Offline
- Elite Member
-

Less
More
- Posts: 754
- Thank you received: 2067
05 Feb 2017 18:07 #36
by Squirrelnet
Replied by Squirrelnet on topic SAMS Models Lacey M-10
Build is looking good Andy. I'm interested to see what you cover it with - Esaki Tissue, Mylar , Tissue over Mylar ?
Please Log in or Create an account to join the conversation.
- Ex-Member
- Topic Author
- User
-
Less
More
- Thank you received: 0
05 Feb 2017 20:03 #37
by Ex-Member
Thanks for the kind words, Chris.
The model is a prototype for a kit, so the finish will be pretty basic. It'll be covered with Esaki tissue, stuck with Deluxe Materials tissue paste and finished with EzeDope. It'll be a tissue finish only to start with, no paint.
After I've checked out the flying qualities, I may add some paint as at the moment, I'm intending to enter it into the BMFA Scale Free Flight Nats in the Open Rubber Class.
Replied by Ex-Member on topic SAMS Models Lacey M-10
Squirrelnet wrote: Build is looking good Andy. I'm interested to see what you cover it with - Esaki Tissue, Mylar , Tissue over Mylar ?
Thanks for the kind words, Chris.
The model is a prototype for a kit, so the finish will be pretty basic. It'll be covered with Esaki tissue, stuck with Deluxe Materials tissue paste and finished with EzeDope. It'll be a tissue finish only to start with, no paint.
After I've checked out the flying qualities, I may add some paint as at the moment, I'm intending to enter it into the BMFA Scale Free Flight Nats in the Open Rubber Class.
Please Log in or Create an account to join the conversation.
- Ex-Member
- Topic Author
- User
-
Less
More
- Thank you received: 0
11 Feb 2017 15:57 #38
by Ex-Member
Replied by Ex-Member on topic SAMS Models Lacey M-10
I've cut some rubber band hooks for the internal wing fixing:

and fixed 'em to the fuselage, with doublers either side:

Which, with it's spacers fitted, now looks like this:

Following a meeting with planekrazy (Kev Wallace, proprietor of SAMS Models), I've increased the width of the elevator and rudder LE and the tailplane and fin TE to allow hinging, if required, for trimming FF models and controlling the RC version. The weight increase is minimal compared to the utility of the mod.


and fixed 'em to the fuselage, with doublers either side:
Which, with it's spacers fitted, now looks like this:
Following a meeting with planekrazy (Kev Wallace, proprietor of SAMS Models), I've increased the width of the elevator and rudder LE and the tailplane and fin TE to allow hinging, if required, for trimming FF models and controlling the RC version. The weight increase is minimal compared to the utility of the mod.
Please Log in or Create an account to join the conversation.
- Squirrelnet
- Offline
- Elite Member
-
Less
More
- Posts: 754
- Thank you received: 2067
11 Feb 2017 17:03 #39
by Squirrelnet
Replied by Squirrelnet on topic SAMS Models Lacey M-10
The Lacey is really coming together. Internal rubber band wing fixing sounds very neat, presumably there are hooks on the underside of the wing ?
Thanks: Ex-Member
Please Log in or Create an account to join the conversation.
- Ex-Member
- Topic Author
- User
-
Less
More
- Thank you received: 0
11 Feb 2017 17:17 #40
by Ex-Member
Thanks Chris.
The plan for the wing underside is:

There'll be a hatch underneath the fuselage for access. The system worked well on a 40" Twin Lacey I built a few years ago and also on Kev Wallace's 60" version. My only concern was would there be enough room to get my fingers in to manipulate the bands, and that appears to have been answered in the affirmative!
Replied by Ex-Member on topic SAMS Models Lacey M-10
Squirrelnet wrote: The Lacey is really coming together. Internal rubber band wing fixing sounds very neat, presumably there are hooks on the underside of the wing ?
Thanks Chris.
The plan for the wing underside is:
There'll be a hatch underneath the fuselage for access. The system worked well on a 40" Twin Lacey I built a few years ago and also on Kev Wallace's 60" version. My only concern was would there be enough room to get my fingers in to manipulate the bands, and that appears to have been answered in the affirmative!
Please Log in or Create an account to join the conversation.
- Squirrelnet
- Offline
- Elite Member
-
Less
More
- Posts: 754
- Thank you received: 2067
11 Feb 2017 17:26 #41
by Squirrelnet
Replied by Squirrelnet on topic SAMS Models Lacey M-10
Very neat system. I notice the hooks are tucked up into wing so on a hard arrival which twists the wing the don't dig into the fuselage
Thanks: Ex-Member
Please Log in or Create an account to join the conversation.
- Ex-Member
- Topic Author
- User
-
Less
More
- Thank you received: 0
29 Mar 2017 15:01 #42
by Ex-Member
Replied by Ex-Member on topic SAMS Models Lacey M-10
I'm now back to working on this one, it needs to be ready for test flights by 9th April and ready for competition by 23rd April. On the current plan, it's do-able!
Soooooo, I've sanded the cowling cheek pieces to rough shape:
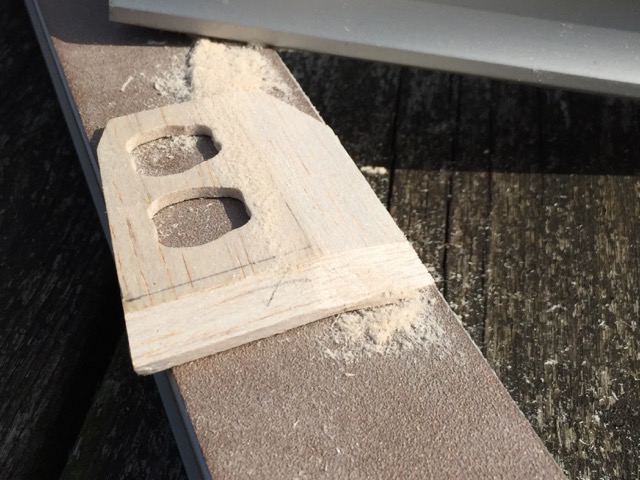
and fitted them to the fuselage:

Planed the ailerons to cross section while still on the stock wood:

then, pared them off with the modelling knife:

added doublers to the wing tip ribs to stop them pulling in when covered and doped:

and added sheeting to the top and bottom of the nose:

Soooooo, I've sanded the cowling cheek pieces to rough shape:
and fitted them to the fuselage:
Planed the ailerons to cross section while still on the stock wood:
then, pared them off with the modelling knife:
added doublers to the wing tip ribs to stop them pulling in when covered and doped:
and added sheeting to the top and bottom of the nose:
Please Log in or Create an account to join the conversation.
- Ex-Member
- Topic Author
- User
-
Less
More
- Thank you received: 0
02 Apr 2017 20:23 - 02 Apr 2017 20:25 #43
by Ex-Member
Replied by Ex-Member on topic SAMS Models Lacey M-10
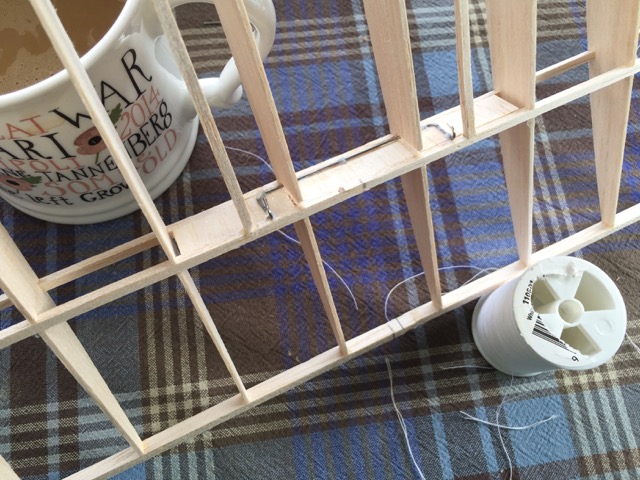
Work over the last few days has been a bit spasmodic, but in summary, I've made up and sewn in the wing fixing hooks:
added more sheeting to the underside of the nose:

tidied up the sheeting around the nose and made up a nose block:
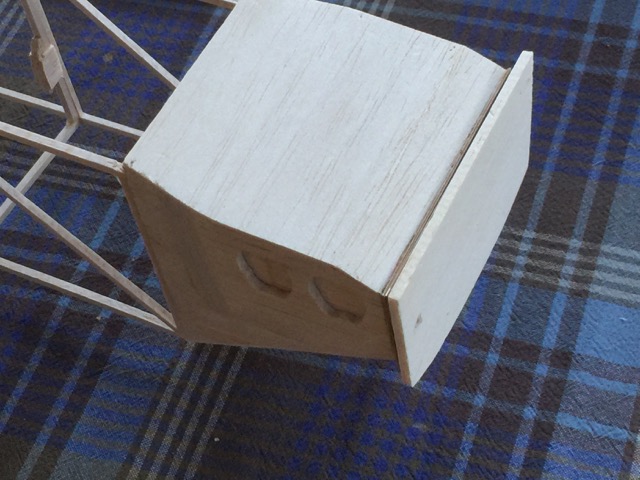
added a 'plug' to the back of the nose block:
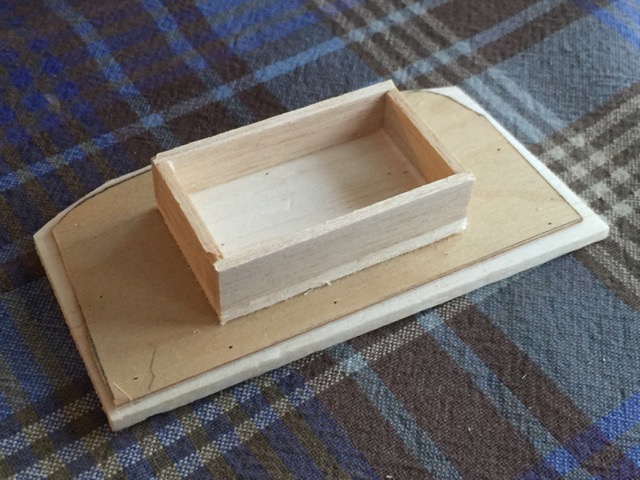
and bent up the UC main wire:


added more sheeting to the underside of the nose:
tidied up the sheeting around the nose and made up a nose block:
added a 'plug' to the back of the nose block:
and bent up the UC main wire:
Last edit: 02 Apr 2017 20:25 by Ex-Member.
Please Log in or Create an account to join the conversation.
- Ex-Member
- User
-
Less
More
- Thank you received: 0
02 Apr 2017 20:32 #44
by Ex-Member
Replied by Ex-Member on topic SAMS Models Lacey M-10
You have been busy Andy.
lovely build as per usual.
can't wait to see the finished model.
Tony (in awe) B
lovely build as per usual.
can't wait to see the finished model.
Tony (in awe) B
Please Log in or Create an account to join the conversation.
- Ex-Member
- Topic Author
- User
-
Less
More
- Thank you received: 0
04 Apr 2017 16:56 #45
by Ex-Member
Replied by Ex-Member on topic SAMS Models Lacey M-10
Fitted the main UC and started sanding yesterday, finished the sanding today and decided on a mock-up:


....and then the grand covering extravaganza began!

....and then the grand covering extravaganza began!
Please Log in or Create an account to join the conversation.
Time to create page: 1.160 seconds