
- Posts: 15406
- Thank you received: 14306
Prusa Mk 4
- Eric
-

- Offline
- Moderator
-

Less
More
11 Feb 2024 07:41 #16
by Eric
if you are calm and collected when all about you are going berserk - you've missed something important!
Replied by Eric on topic Prusa Mk 4
That has sexual connotations, though!
 although that is/was the Latin for the metal - symbol Pb - atomic number 82, as our long-lost founder Phil would have insisted.
if you are calm and collected when all about you are going berserk - you've missed something important!
Thanks: Klipkopwildlife
Please Log in or Create an account to join the conversation.
- Klipkopwildlife
-
 Topic Author
- Offline
- Administrator
-

- I'm supposed to be retired!
11 Feb 2024 10:37 #17
by Klipkopwildlife
Do it now, you may never get another chance
Replied by Klipkopwildlife on topic Prusa Mk 4
These are the Extruder parts
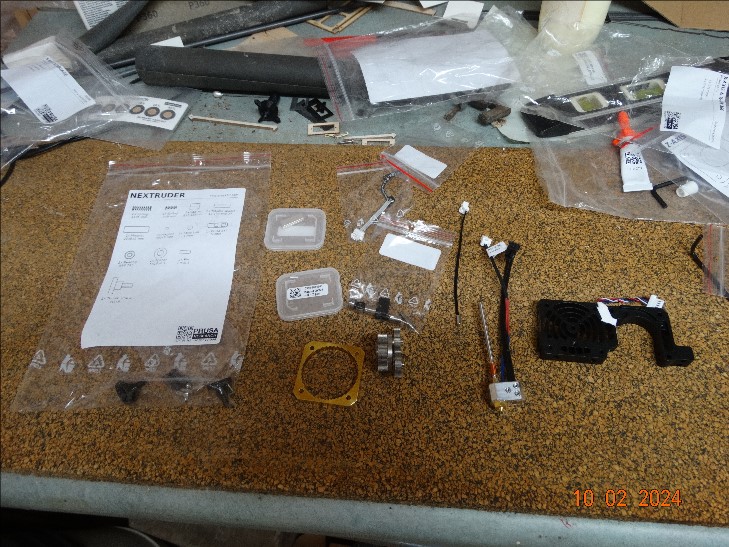
No PTFE tubing here, that filament tube is very long
The drive system is some kind of epicyclic gear box.
Some kind of lever
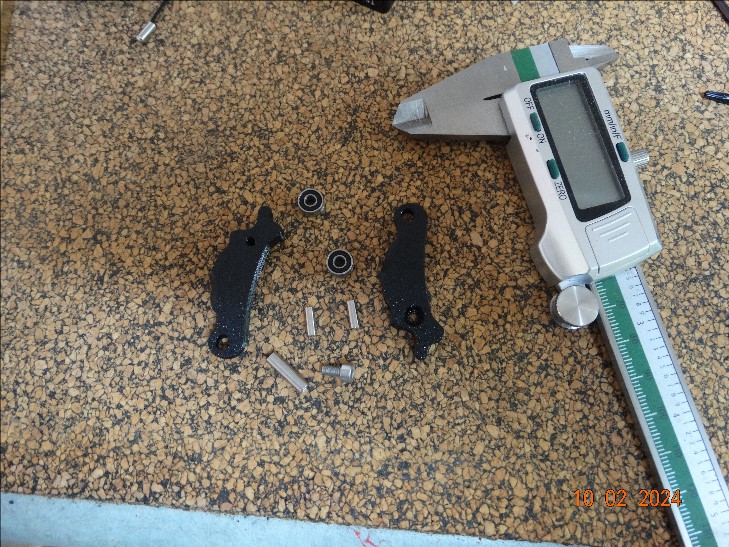
Rollers

From the grooves in the bearings I would guess a pinch system for the filament

No PTFE tubing here, that filament tube is very long
The drive system is some kind of epicyclic gear box.
Some kind of lever
Rollers
From the grooves in the bearings I would guess a pinch system for the filament
Do it now, you may never get another chance
Attachments:
Thanks: Quorneng
Please Log in or Create an account to join the conversation.
- Klipkopwildlife
-
Topic Author
- Offline
- Administrator
-
- I'm supposed to be retired!
11 Feb 2024 10:43 #18
by Klipkopwildlife
Do it now, you may never get another chance
Replied by Klipkopwildlife on topic Prusa Mk 4
No the Extruder drive

The round object below the grease tube is the guide for the sun and planet gears, I tried to assemble the gear box without it, you can't.

And the finished article, it happened so quickly and you daren't let go until the screws are in so the camera didn't get a look in.
The round object below the grease tube is the guide for the sun and planet gears, I tried to assemble the gear box without it, you can't.
And the finished article, it happened so quickly and you daren't let go until the screws are in so the camera didn't get a look in.
Do it now, you may never get another chance
Attachments:
Thanks: Quorneng
Please Log in or Create an account to join the conversation.
- Klipkopwildlife
-
Topic Author
- Offline
- Administrator
-
- I'm supposed to be retired!
11 Feb 2024 10:50 #19
by Klipkopwildlife
Do it now, you may never get another chance
Replied by Klipkopwildlife on topic Prusa Mk 4
The 3 plugs are the Extruder motor, Fan and the load cell.
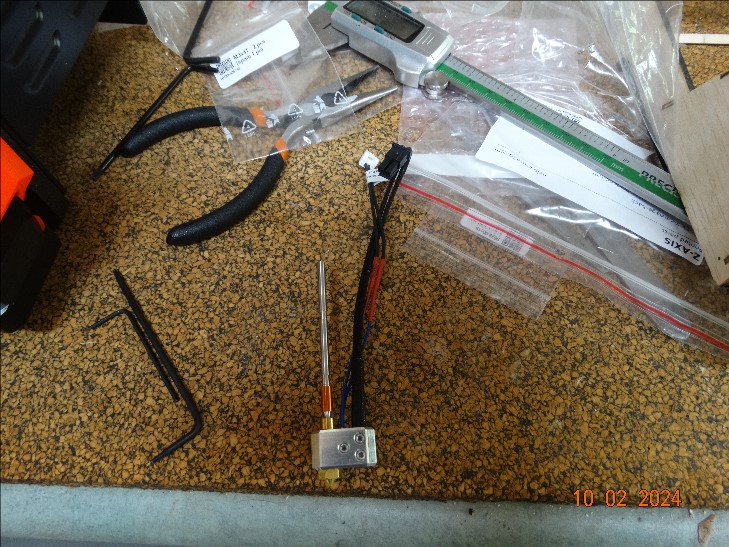
This is the Nozzle plus the heater and thermistor

And there it's all together, the nozzle is cleverly held in with 2 thumb screws, a fact that escaped me for a while, it kept dropping out!
The fan on the left is kept closed by magnets, you flip it open to access the thumb screws.
This is the Nozzle plus the heater and thermistor
And there it's all together, the nozzle is cleverly held in with 2 thumb screws, a fact that escaped me for a while, it kept dropping out!
The fan on the left is kept closed by magnets, you flip it open to access the thumb screws.
Do it now, you may never get another chance
Attachments:
Thanks: Eric, Quorneng
Please Log in or Create an account to join the conversation.
- Klipkopwildlife
-
Topic Author
- Offline
- Administrator
-
- I'm supposed to be retired!
12 Feb 2024 07:56 #20
by Klipkopwildlife
Do it now, you may never get another chance
Replied by Klipkopwildlife on topic Prusa Mk 4
And a close up of the action

Open
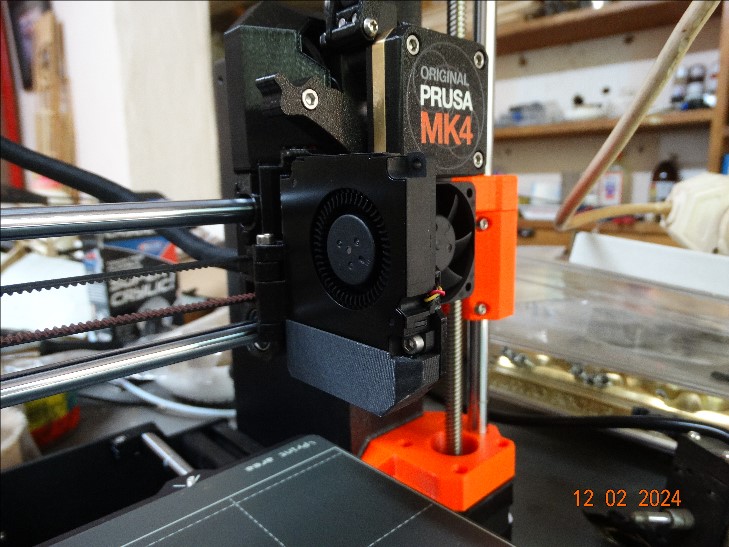
and closed, you can see the filament catch is currently open.
Open
and closed, you can see the filament catch is currently open.
Do it now, you may never get another chance
Attachments:
Thanks: Flytilbroke
Please Log in or Create an account to join the conversation.
- Klipkopwildlife
-
Topic Author
- Offline
- Administrator
-
- I'm supposed to be retired!
12 Feb 2024 09:09 - 12 Feb 2024 09:11 #21
by Klipkopwildlife
Do it now, you may never get another chance
Replied by Klipkopwildlife on topic Prusa Mk 4
Next is the screen assembly, the software uses the now standard method of turn until the required menu item appears, then press to select.

On to the heated bed and Y axis, it's a Prusa proprietary item (so probably expensive to replace) The top surface is magnetic.

Only 3 bearings and simply attached with a rubber mat between the bearing and the carriage.

Note the rubber feet in the X extrusion.
and the top side
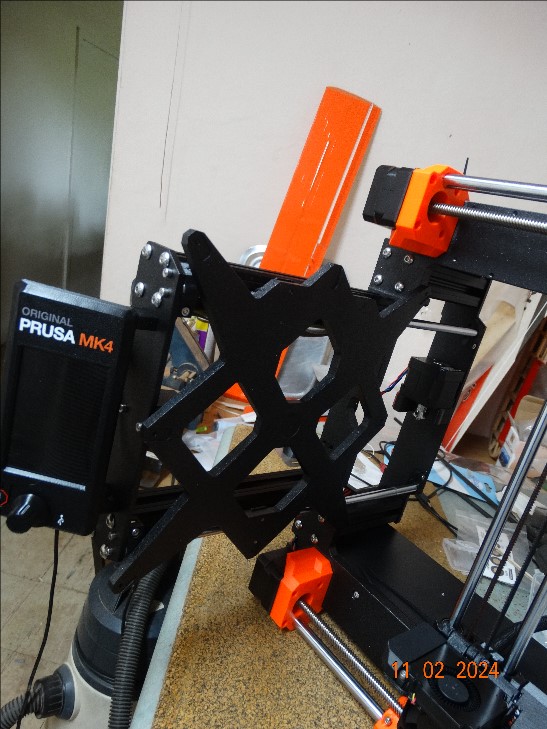
On to the heated bed and Y axis, it's a Prusa proprietary item (so probably expensive to replace) The top surface is magnetic.
Only 3 bearings and simply attached with a rubber mat between the bearing and the carriage.
Note the rubber feet in the X extrusion.
and the top side
Do it now, you may never get another chance
Attachments:
Last edit: 12 Feb 2024 09:11 by Klipkopwildlife.
Please Log in or Create an account to join the conversation.
- Klipkopwildlife
-
Topic Author
- Offline
- Administrator
-
- I'm supposed to be retired!
12 Feb 2024 09:22 #22
by Klipkopwildlife
Do it now, you may never get another chance
Replied by Klipkopwildlife on topic Prusa Mk 4
Next is the clever bit, it's quite a large casting and the bed is held down with 9 mountings

Only the centre screw is solid, the other 8 mountings are expansion joints!

all done

Only the centre screw is solid, the other 8 mountings are expansion joints!
all done
Do it now, you may never get another chance
Attachments:
Please Log in or Create an account to join the conversation.
- Klipkopwildlife
-
Topic Author
- Offline
- Administrator
-
- I'm supposed to be retired!
12 Feb 2024 09:25 #23
by Klipkopwildlife
Do it now, you may never get another chance
Replied by Klipkopwildlife on topic Prusa Mk 4
Final covers on

A nice touch, space for 2 spools on top each with its own filament feeder.

A nice touch, space for 2 spools on top each with its own filament feeder.
Do it now, you may never get another chance
Attachments:
Please Log in or Create an account to join the conversation.
- Klipkopwildlife
-
Topic Author
- Offline
- Administrator
-
- I'm supposed to be retired!
12 Feb 2024 09:49 #24
by Klipkopwildlife
Do it now, you may never get another chance
Replied by Klipkopwildlife on topic Prusa Mk 4
Something not covered in the assembly pdf was the importance of having the X carriage parallel to the bed. I used a wood block between the bed and the X rails. Winding the Z lead screws by hand I carefully lowered the Z carriage down until the rails just touched the block on each side. I did this several times to be absolutely sure.
Finally I downloaded the latest Firmware file to a stick (supplied) and plugged it into the USB socket of the control panel.
Always a moment of trepidation when you switch something on for the first time
.
.
.
What an anticlimax, the screen said loading and then wanted to do a first time test. What could I say?
Finally I downloaded the latest Firmware file to a stick (supplied) and plugged it into the USB socket of the control panel.
Always a moment of trepidation when you switch something on for the first time
.
.
.
What an anticlimax, the screen said loading and then wanted to do a first time test. What could I say?
Do it now, you may never get another chance
Thanks: Flytilbroke
Please Log in or Create an account to join the conversation.
- Klipkopwildlife
-
Topic Author
- Offline
- Administrator
-
- I'm supposed to be retired!
12 Feb 2024 11:00 - 12 Feb 2024 11:02 #25
by Klipkopwildlife
Do it now, you may never get another chance
Replied by Klipkopwildlife on topic Prusa Mk 4
Since it didn't do anything with the Firmware file the on board firmware was already up to date.
The printer then proceeded to drive the axes (axises) up down, left right, in out. There are no end stop switches, it's all done by current on the motor drivers.
Even the fans get checked
You get asked to put some filament in, then take it out again and finally tap the nozzle
Once the check was done I decided to try a test print, there was a file on the thumb drive for a key chain label, I just pressed the button and off it went, bed leveling all done for you at 9 points on the bed. When the bed had cooled I tried to get the label off the PEI plate, phew, talk about baby poo and blankets, I really battled, eventually I had to remove the PEI plate and bend it to release the part.
First print video is here

The printer then proceeded to drive the axes (axises) up down, left right, in out. There are no end stop switches, it's all done by current on the motor drivers.
Even the fans get checked
You get asked to put some filament in, then take it out again and finally tap the nozzle
Once the check was done I decided to try a test print, there was a file on the thumb drive for a key chain label, I just pressed the button and off it went, bed leveling all done for you at 9 points on the bed. When the bed had cooled I tried to get the label off the PEI plate, phew, talk about baby poo and blankets, I really battled, eventually I had to remove the PEI plate and bend it to release the part.
First print video is here
Do it now, you may never get another chance
Attachments:
Last edit: 12 Feb 2024 11:02 by Klipkopwildlife.
Thanks: Flytilbroke, Quorneng, THE BLACKBIRD
Please Log in or Create an account to join the conversation.
- Quorneng
-

- Offline
- Forum Master
-

Less
More
- Posts: 10058
- Thank you received: 19043
12 Feb 2024 13:10 #26
by Quorneng
Replied by Quorneng on topic Prusa Mk 4
From the videos I have seen removing the plate and flexing it is the way to remove a print particularly a flat thin one like that.
If you think about it using motor current to determine the limits is actually a cost effective way of doing it as It saves the wiring to the micro switches. Presumably it also provides some jam protection as well.
The A8 has no top limit switch. It does recognise that the highest possible print is 240 mm but when it finishes it leaves the bridge at that height. You have to remember to drop the bridge before starting the next job or it will automatically try to raise it by 10 mm to ensure the nozzle is clear of the bed! First time it stalled the Z motors and lost the step count so the manually set bed clearance was also lost
If you think about it using motor current to determine the limits is actually a cost effective way of doing it as It saves the wiring to the micro switches. Presumably it also provides some jam protection as well.
The A8 has no top limit switch. It does recognise that the highest possible print is 240 mm but when it finishes it leaves the bridge at that height. You have to remember to drop the bridge before starting the next job or it will automatically try to raise it by 10 mm to ensure the nozzle is clear of the bed! First time it stalled the Z motors and lost the step count so the manually set bed clearance was also lost
Thanks: Klipkopwildlife, Flytilbroke
Please Log in or Create an account to join the conversation.
- Eric
-
- Offline
- Moderator
-
Less
More
- Posts: 15406
- Thank you received: 14306
12 Feb 2024 13:58 #27
by Eric
if you are calm and collected when all about you are going berserk - you've missed something important!
Replied by Eric on topic Prusa Mk 4
Flexing the bed is what I've seen done as well, on a totally different hobby print. The work 'lets go' with a heart-rending SNAP!
if you are calm and collected when all about you are going berserk - you've missed something important!
Thanks: Klipkopwildlife, Flytilbroke
Please Log in or Create an account to join the conversation.
- Klipkopwildlife
-
Topic Author
- Offline
- Administrator
-
- I'm supposed to be retired!
13 Feb 2024 09:21 #28
by Klipkopwildlife
Do it now, you may never get another chance
Replied by Klipkopwildlife on topic Prusa Mk 4
Reference post #3, yesterday I received a quality of service request, oh boy, they really shouldn't have done that, I had a field day! Still no communication from BotShop, but the spec sheet on their website has been changed to the correct one. This morning I received a request from a Courier asking me to re-package the item and it will be picked up from the delivery address. Well that's only going to be Friday when I take Mary to the Chiropractor.
Do it now, you may never get another chance
Thanks: Eric, Quorneng
Please Log in or Create an account to join the conversation.
- Klipkopwildlife
-
Topic Author
- Offline
- Administrator
-
- I'm supposed to be retired!
21 Apr 2024 08:31 #29
by Klipkopwildlife
Do it now, you may never get another chance
Replied by Klipkopwildlife on topic Prusa Mk 4
Subsequently having the incorrect item back they asked me for my bank details, I'm still waiting for the money.
Do it now, you may never get another chance
Please Log in or Create an account to join the conversation.
- Eric
-
- Offline
- Moderator
-
Less
More
- Posts: 15406
- Thank you received: 14306
21 Apr 2024 18:24 #30
by Eric
if you are calm and collected when all about you are going berserk - you've missed something important!
Replied by Eric on topic Prusa Mk 4
It wasn't somewhere in Northern South Africa, was it, where that lawyer with the millions of dollars to give away is supposed to live?

if you are calm and collected when all about you are going berserk - you've missed something important!
Thanks: Klipkopwildlife
Please Log in or Create an account to join the conversation.
Time to create page: 0.329 seconds