
- Posts: 10058
- Thank you received: 19043
×
Here's one for the serious builders. Show us your ideas
A W Ensign
- Ex-Member
- Topic Author
- Visitor
-

15 Aug 2016 10:32 #1
by Ex-Member
A W Ensign was created by Ex-Member
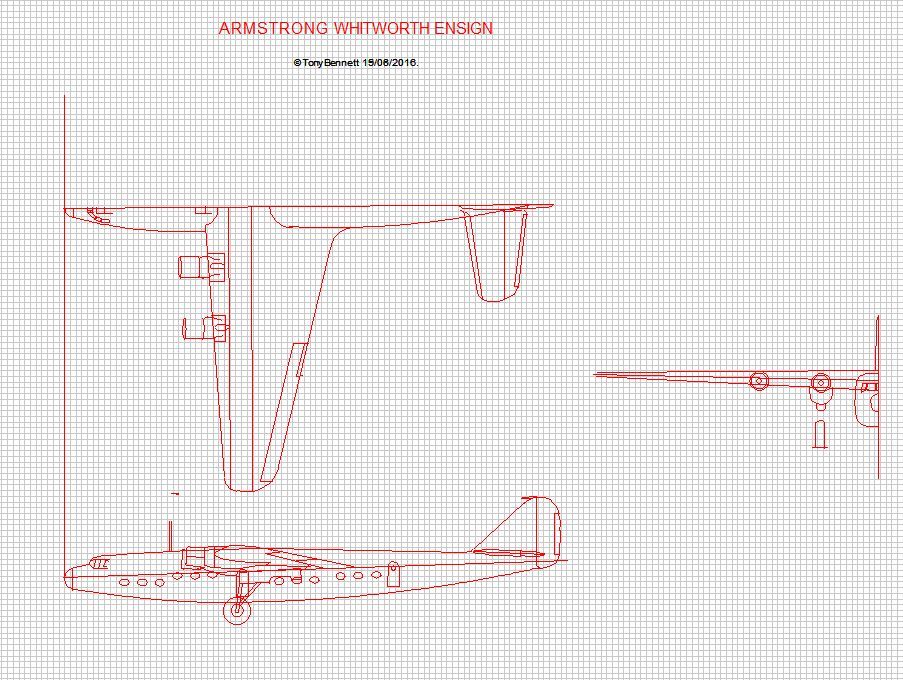
Started a new drawing this morning.
Please Log in or Create an account to join the conversation.
- Quorneng
-

- Offline
- Forum Master
-

Less
More
15 Aug 2016 11:16 #2
by Quorneng
Replied by Quorneng on topic A W Ensign
Very nice.
And in those days you didn't need a set of 'air stairs' to get on board - no higher off the ground than a horse drawn carriage!
And in those days you didn't need a set of 'air stairs' to get on board - no higher off the ground than a horse drawn carriage!
Please Log in or Create an account to join the conversation.
- Ex-Member
- Topic Author
- Visitor
-
15 Aug 2016 12:53 #3
by Ex-Member
Replied by Ex-Member on topic A W Ensign
Looking at making it an 80" span.
four 300watt brushless motors.
so i have to be able to keep it under 12lb when finished.
fingers crossed.
four 300watt brushless motors.
so i have to be able to keep it under 12lb when finished.
fingers crossed.
Please Log in or Create an account to join the conversation.
- Ex-Member
- Topic Author
- Visitor
-
16 Aug 2016 18:07 #4
by Ex-Member


where we are with the design so far.
looooooooooong way to go yet with this one.
Replied by Ex-Member on topic A W Ensign
where we are with the design so far.
looooooooooong way to go yet with this one.
Please Log in or Create an account to join the conversation.
- Ex-Member
- Topic Author
- Visitor
-
18 Aug 2016 12:39 #5
by Ex-Member
Replied by Ex-Member on topic A W Ensign
had to revise the fuselage formers a touch as i want to fit out the cabins with seats.
so i have had to add doorways and open up other areas to take the seating.
revised fuselage plan below.

Tony B
so i have had to add doorways and open up other areas to take the seating.
revised fuselage plan below.
Tony B
Please Log in or Create an account to join the conversation.
- Ex-Member
- Topic Author
- Visitor
-
19 Aug 2016 13:46 - 19 Aug 2016 13:51 #6
by Ex-Member
Replied by Ex-Member on topic A W Ensign
while waiting the electrics for the varsity i decided to print off the fuselage parts.
i need to cut 2 cores for the fuselage, one needs to be slightly different to the other as i am aiming to have the cabins fitted out in this model.
there are three cabins and a promenade to sort.

i need to cut 2 cores for the fuselage, one needs to be slightly different to the other as i am aiming to have the cabins fitted out in this model.
there are three cabins and a promenade to sort.
Last edit: 19 Aug 2016 13:51 by Ex-Member.
Please Log in or Create an account to join the conversation.
- Quorneng
-
- Offline
- Forum Master
-
Less
More
- Posts: 10058
- Thank you received: 19043
19 Aug 2016 14:51 #7
by Quorneng
Replied by Quorneng on topic A W Ensign
I will be interested to see how you achieve the cabins, presumably the cruciform core will have to be substantially cut away.
Please Log in or Create an account to join the conversation.
- Ex-Member
- Topic Author
- Visitor
-
19 Aug 2016 18:59 #8
by Ex-Member
Replied by Ex-Member on topic A W Ensign
that is the plan simon.
will be interesting.
thinking of balsa stringers round the window sections to add some strength.
will be interesting.
thinking of balsa stringers round the window sections to add some strength.
Please Log in or Create an account to join the conversation.
- Ex-Member
- Topic Author
- Visitor
-
21 Aug 2016 09:46 - 21 Aug 2016 10:06 #9
by Ex-Member
Replied by Ex-Member on topic A W Ensign
This was last nights work.
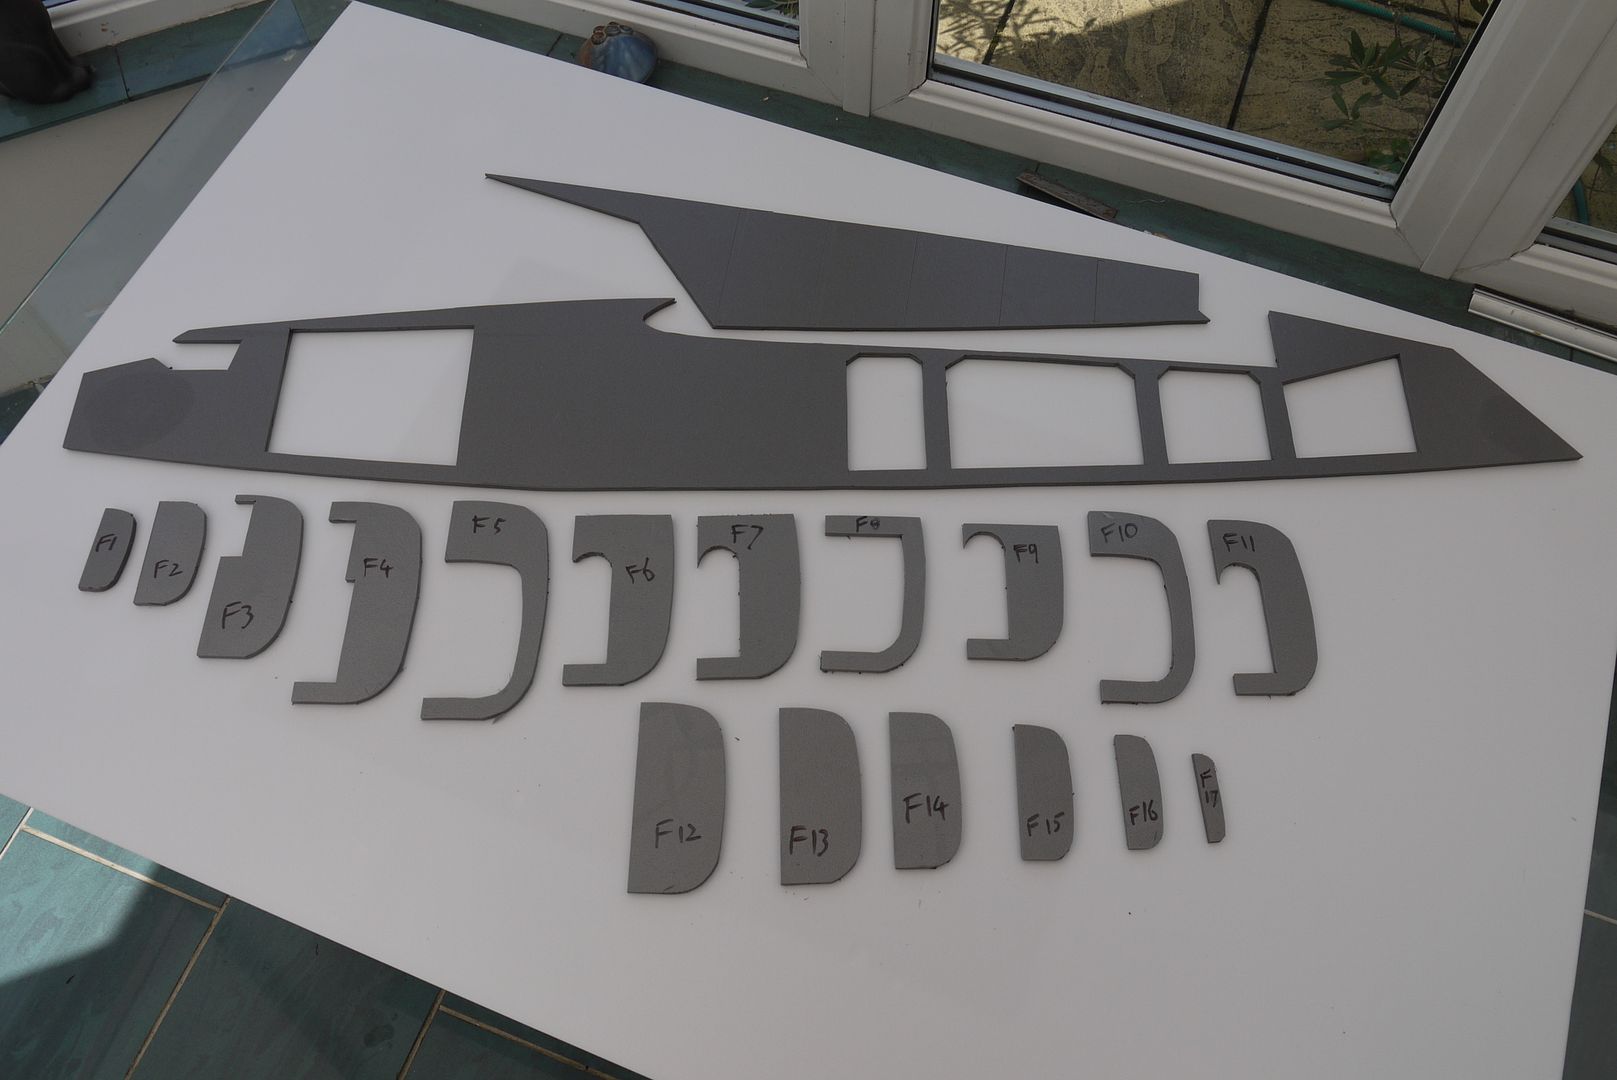
ones side of the fuselage all cut and ready for assembly.
the other side will be different as some of the formers will be altered to allow for corridors and toilets.
i am having two 3mm Depron cores and will build the fuselage in two halves, only joining them together once fully sheeted and fitted out.
makes running wires and fitting out the cabins easier than trying to do it to a one piece fuselage.
windows need to be designed next.
ones side of the fuselage all cut and ready for assembly.
the other side will be different as some of the formers will be altered to allow for corridors and toilets.
i am having two 3mm Depron cores and will build the fuselage in two halves, only joining them together once fully sheeted and fitted out.
makes running wires and fitting out the cabins easier than trying to do it to a one piece fuselage.
windows need to be designed next.
Last edit: 21 Aug 2016 10:06 by Ex-Member.
Please Log in or Create an account to join the conversation.
- Ex-Member
- Topic Author
- Visitor
-
21 Aug 2016 20:41 #10
by Ex-Member
Replied by Ex-Member on topic A W Ensign
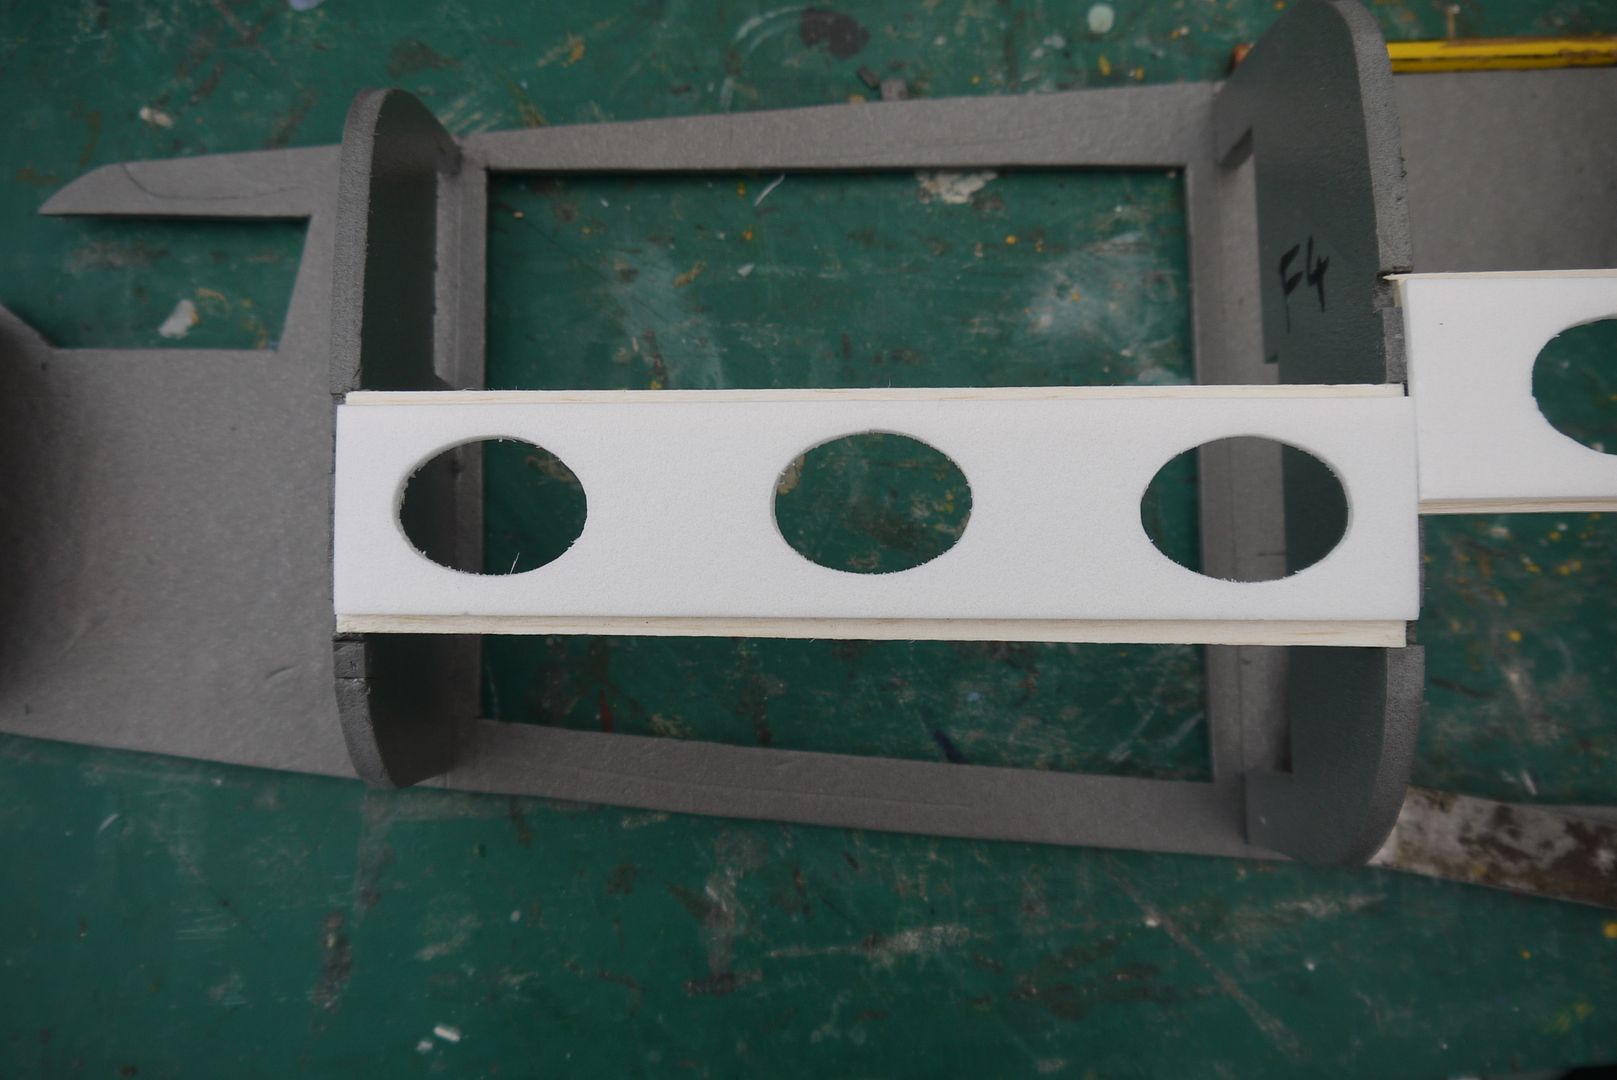
Formers have all been glued in place now and i have started on the windows.
these are cut from 3mm White Depron and glued to a 6x3mm balsa frame.
the frames are then glued into the relative formers.
i plan to sheet the whole fuselage in white depron and will then line the inside of the windows with clear acetate.
still waiting for the varsity bits to turn up.
these are cut from 3mm White Depron and glued to a 6x3mm balsa frame.
the frames are then glued into the relative formers.
i plan to sheet the whole fuselage in white depron and will then line the inside of the windows with clear acetate.
still waiting for the varsity bits to turn up.
Please Log in or Create an account to join the conversation.
- Ex-Member
- Topic Author
- Visitor
-
31 Aug 2016 19:03 #11
by Ex-Member
Replied by Ex-Member on topic A W Ensign
waiting for the filler on the Varsity to dry.
so i did a bit of sheeting to the Ensign fuselage.

so i did a bit of sheeting to the Ensign fuselage.
Please Log in or Create an account to join the conversation.
- Ex-Member
- Topic Author
- Visitor
-
03 Sep 2016 20:44 #12
by Ex-Member
Replied by Ex-Member on topic A W Ensign
Sheeted most of the fuselage this morning.

This is the inside view.

This is the inside view.
Please Log in or Create an account to join the conversation.
- Ex-Member
- Topic Author
- Visitor
-
22 Oct 2016 17:33 #13
by Ex-Member
Replied by Ex-Member on topic A W Ensign
Well i have got back onto this one at last.
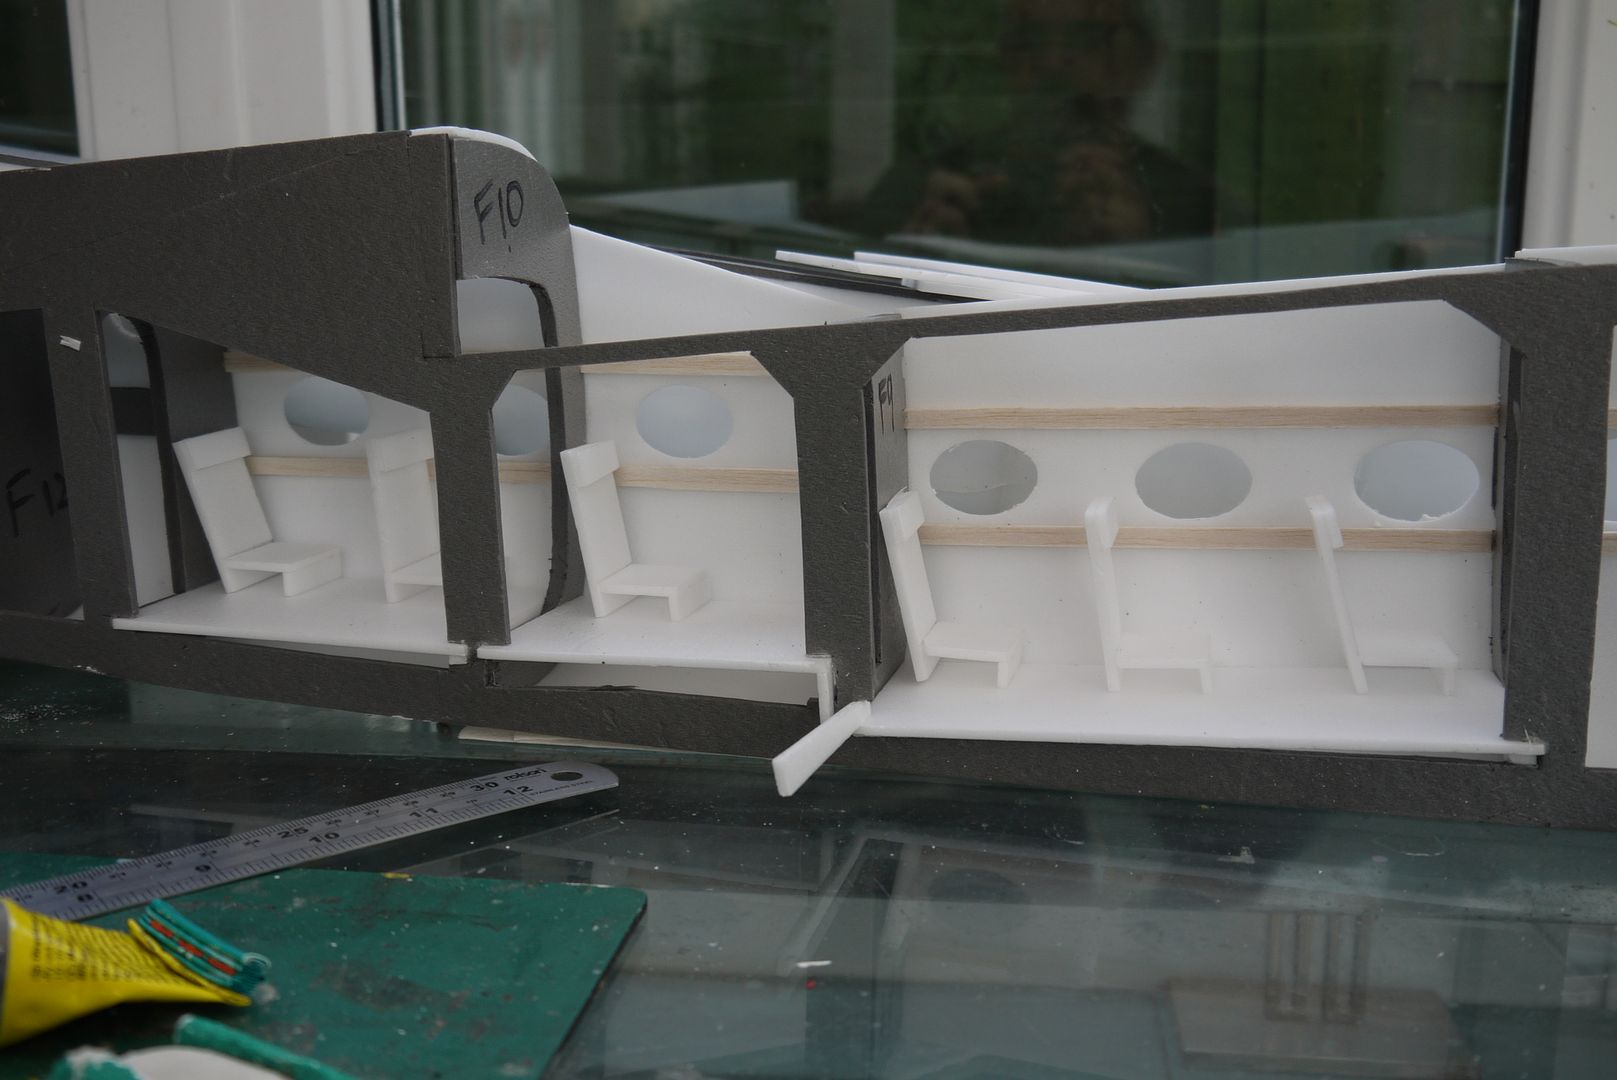
Today i made up 27 seats for the passengers.
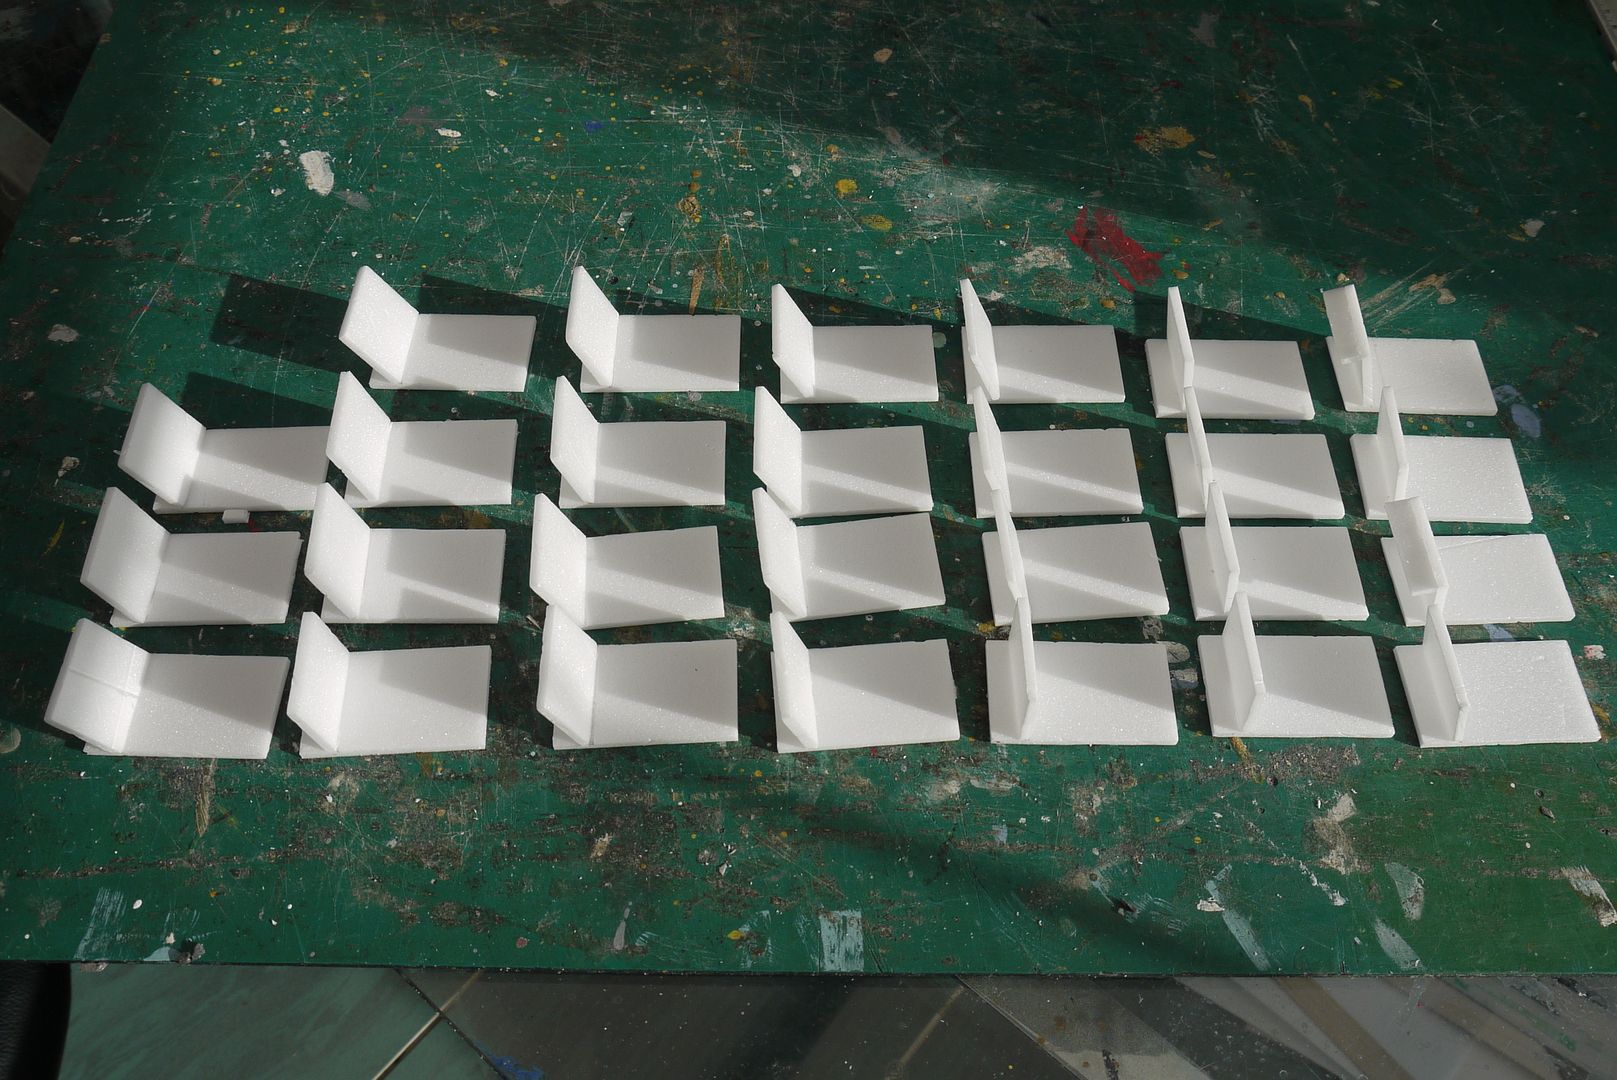
Then i had the fun job of starting to fit the floors.
these have to be angled so that they are level when the plane flies and as it flies nose down it is not easy.
still i have some fitted, will do more tomorrow...i hope.
Tony B
Today i made up 27 seats for the passengers.
Then i had the fun job of starting to fit the floors.
these have to be angled so that they are level when the plane flies and as it flies nose down it is not easy.
still i have some fitted, will do more tomorrow...i hope.
Tony B
Please Log in or Create an account to join the conversation.
- Ex-Member
- Topic Author
- Visitor
-
22 Oct 2016 18:34 #14
by Ex-Member
Replied by Ex-Member on topic A W Ensign
Anyone know what colour the seats and interior walls/ floors would have been.
cos all i can find are black and white pictures.
Tony B
Owner proprietor of B.E.A.
Bennett's Electric Aircraft
cos all i can find are black and white pictures.
Tony B
Owner proprietor of B.E.A.
Bennett's Electric Aircraft
Please Log in or Create an account to join the conversation.
- Quorneng
-
- Offline
- Forum Master
-
Less
More
- Posts: 10058
- Thank you received: 19043
23 Oct 2016 00:07 #15
by Quorneng
Replied by Quorneng on topic A W Ensign
Here you go Tony.
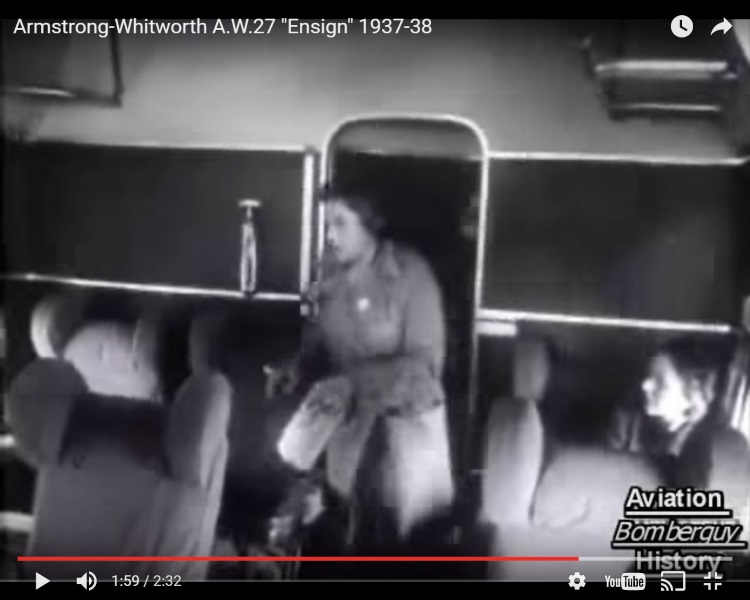
From a 1957 Flight Global article describing the history of the Ensign
"Furnishing was designed by L.A. Rumbold & Co Ltd and the interior finished through out in green and cream upholstery."
This is a still from a movie showing the inside of an Ensign which seems to suggest the seats were all cream with some of the panelling green.
This site has nice detailed drawings of the interior.
From a 1957 Flight Global article describing the history of the Ensign
"Furnishing was designed by L.A. Rumbold & Co Ltd and the interior finished through out in green and cream upholstery."
This is a still from a movie showing the inside of an Ensign which seems to suggest the seats were all cream with some of the panelling green.
This site has nice detailed drawings of the interior.
Thanks: Klipkopwildlife, Ex-Member, boz, Firewood
Please Log in or Create an account to join the conversation.
Time to create page: 0.213 seconds