
- Forum
- Forum Categories
- Reviews - Model Flying Shops, Products, Kits
- HobbyKing NEMESIS. Poly's bought an electric ARTF.
HobbyKing NEMESIS. Poly's bought an electric ARTF.
- Phil Wood
-
 Topic Author
- Offline
- Inactivated User
-

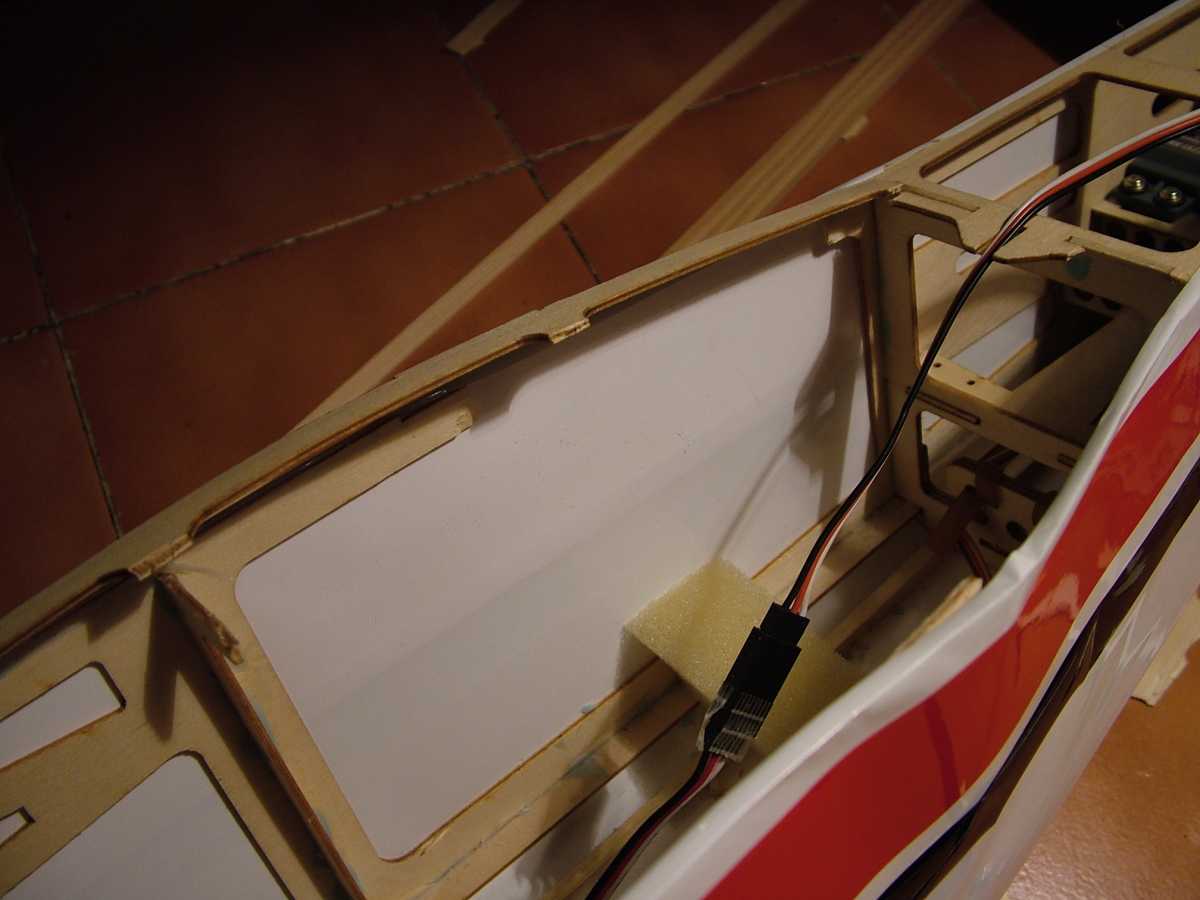
This is the Fuz side half way down to the tail. You can see that all but one short piece of the wood is still there, but it has popped apart & the longeron, (possibly technically a Stringer), looks ... errr, too long.

I think this is just down to a bit of tension in the covering & it does pop nicely back in place.
I'm going to cut a strip of hardwood to replace the missing bit, not forgetting that I need it to be flush on the outer edge so that there won't be any creases once the covering is replaced.
When the top strip is popped back & glued, I can rest assured that the measurements on both sides will be spot on.
I just own the forum .... you guys make it great thanks.
Please Log in or Create an account to join the conversation.
- Ex-Member
- Visitor
-

Please Log in or Create an account to join the conversation.
- The Beard
-

- Offline
- Forum Master
-

- Posts: 9272
- Thank you received: 2167
Please Log in or Create an account to join the conversation.
- old fart
-

- Offline
- Forum Veteran
-

- Posts: 2571
- Thank you received: 705

There is nothing like a dream to create the future.
Electrickery is the work of the devil.
Please Log in or Create an account to join the conversation.
- Eric
-

- Offline
- Moderator
-

- Posts: 15406
- Thank you received: 14306
if you are calm and collected when all about you are going berserk - you've missed something important!
Please Log in or Create an account to join the conversation.
- Phil Wood
-
Topic Author
- Offline
- Inactivated User
-
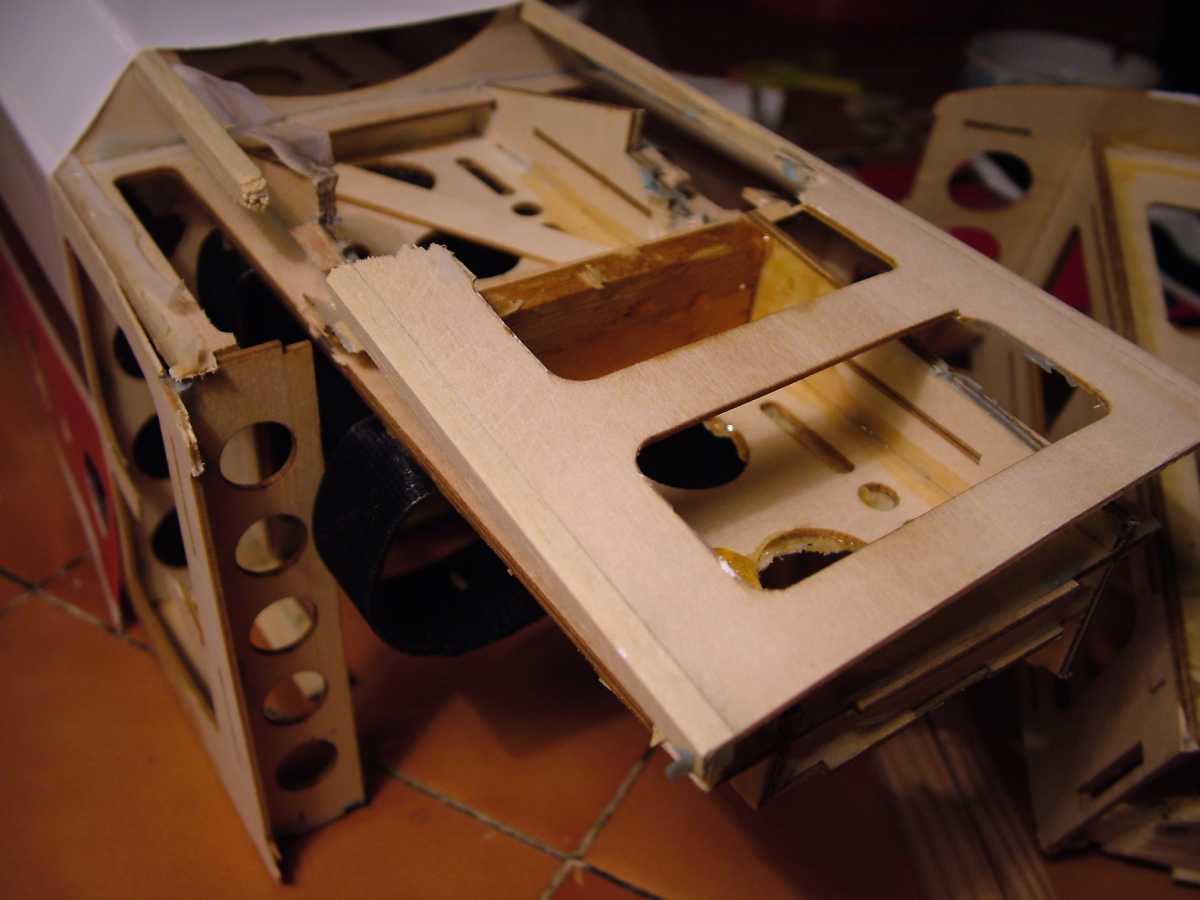
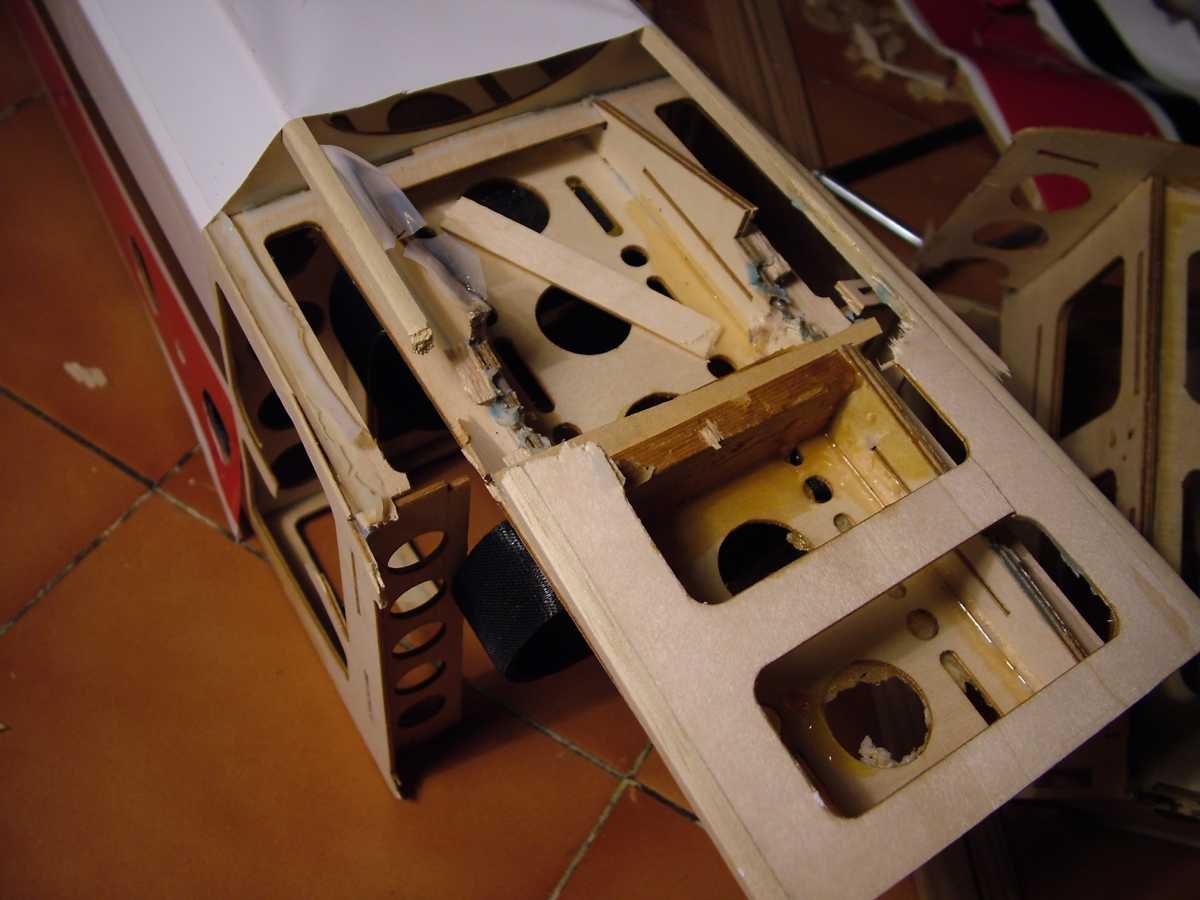
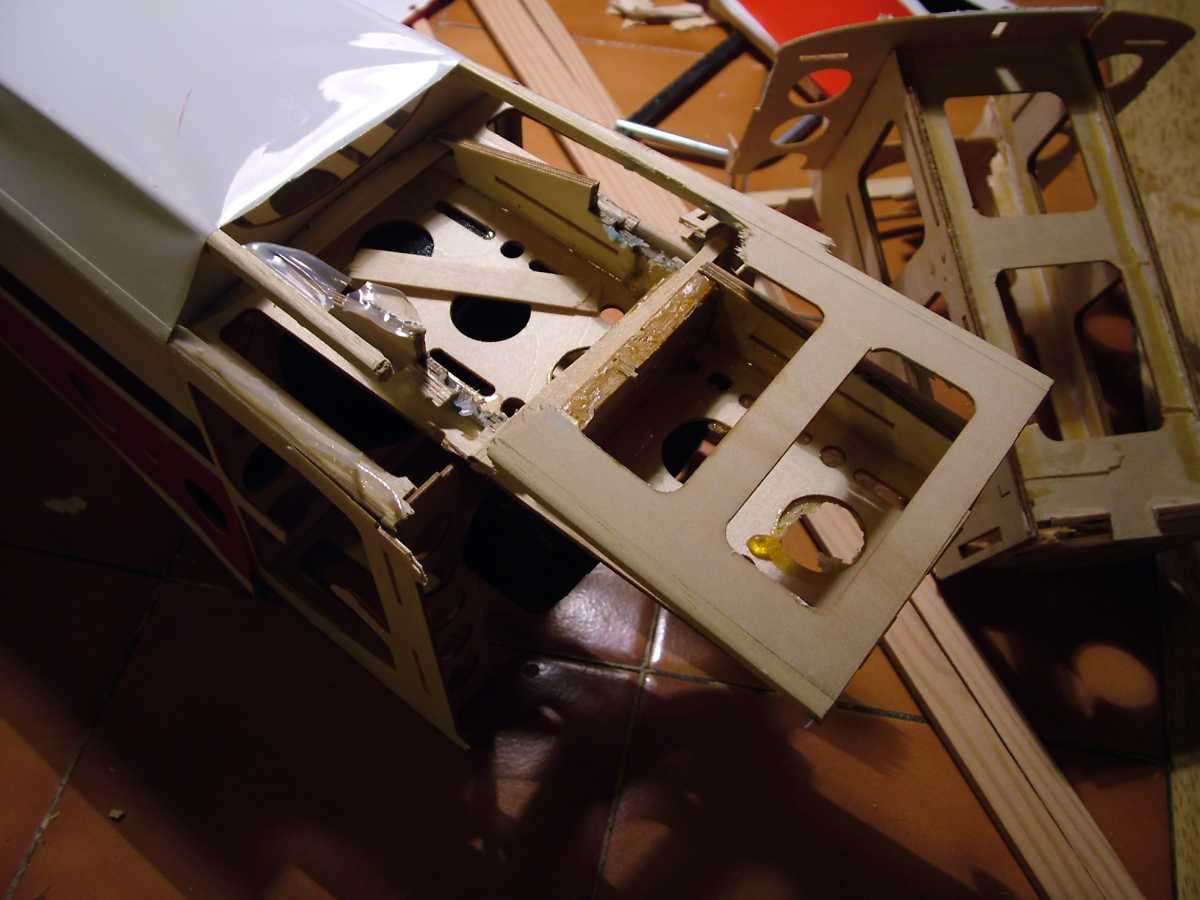
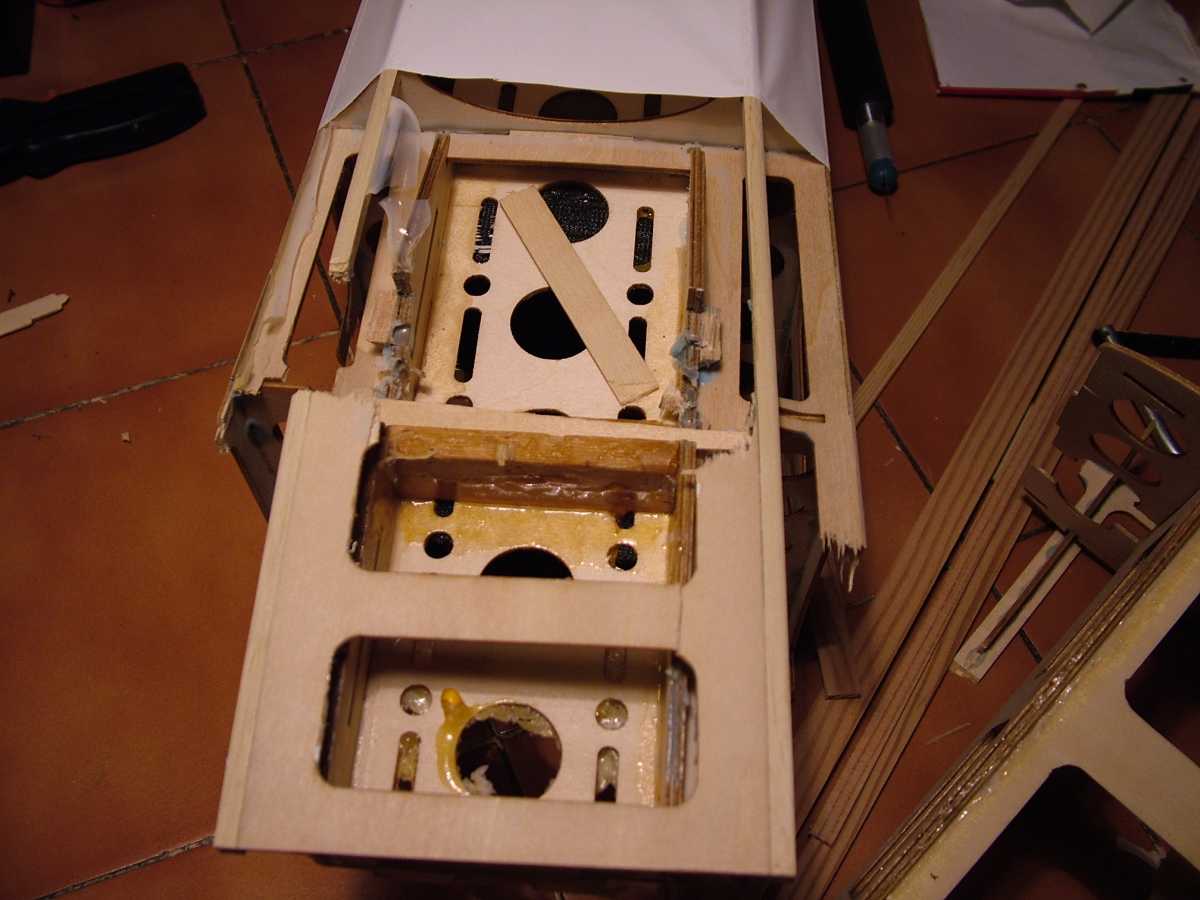
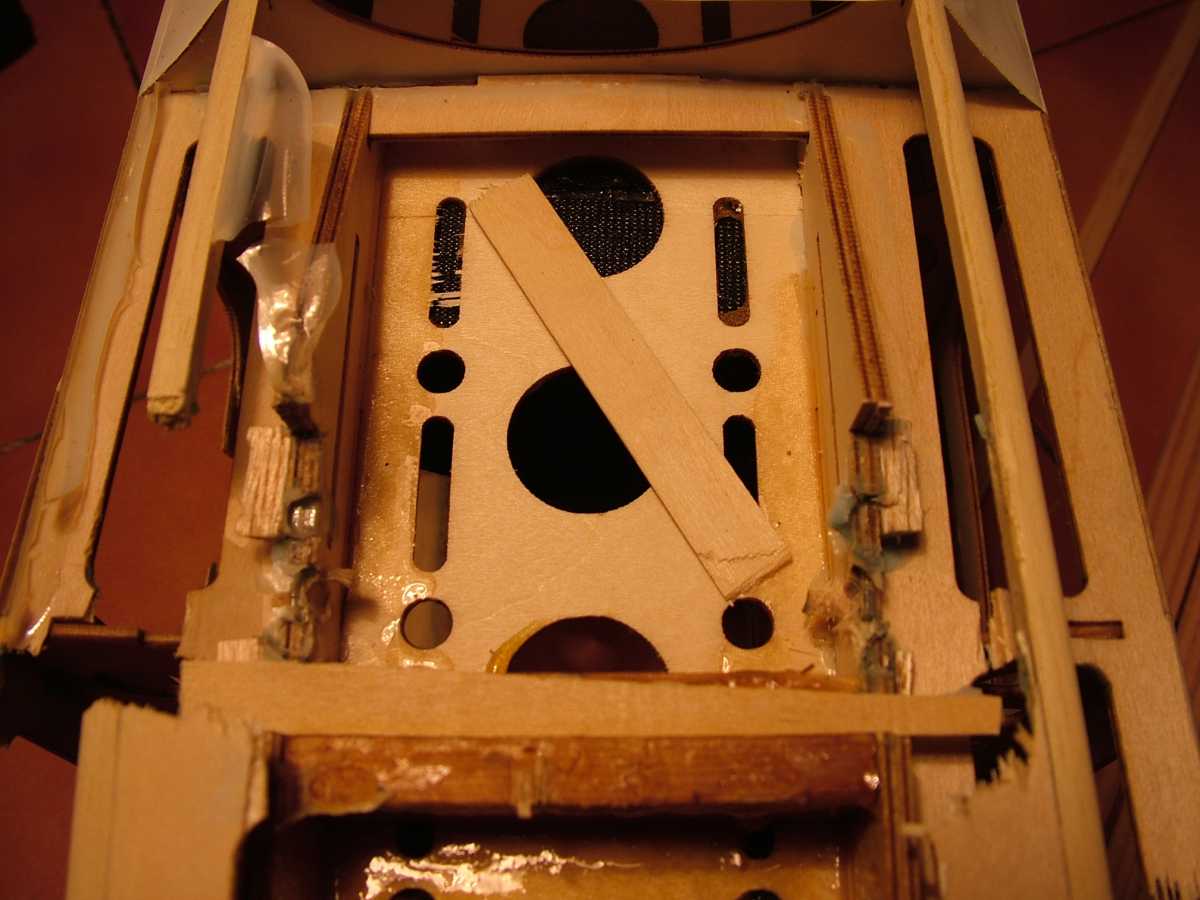
What makes it worse is the fact that there are so many small shattered pieces & I think a lot of the bits have been lost at the crash site.
I did try to piece it back together with the minimum of stripping at first, but then decided that the covering & useless splintered bits were just getting in the way ..... eventually I took the covering & the front end completely off & treated it as a separate unit.

I just own the forum .... you guys make it great thanks.
Please Log in or Create an account to join the conversation.
- Phil Wood
-
Topic Author
- Offline
- Inactivated User
-
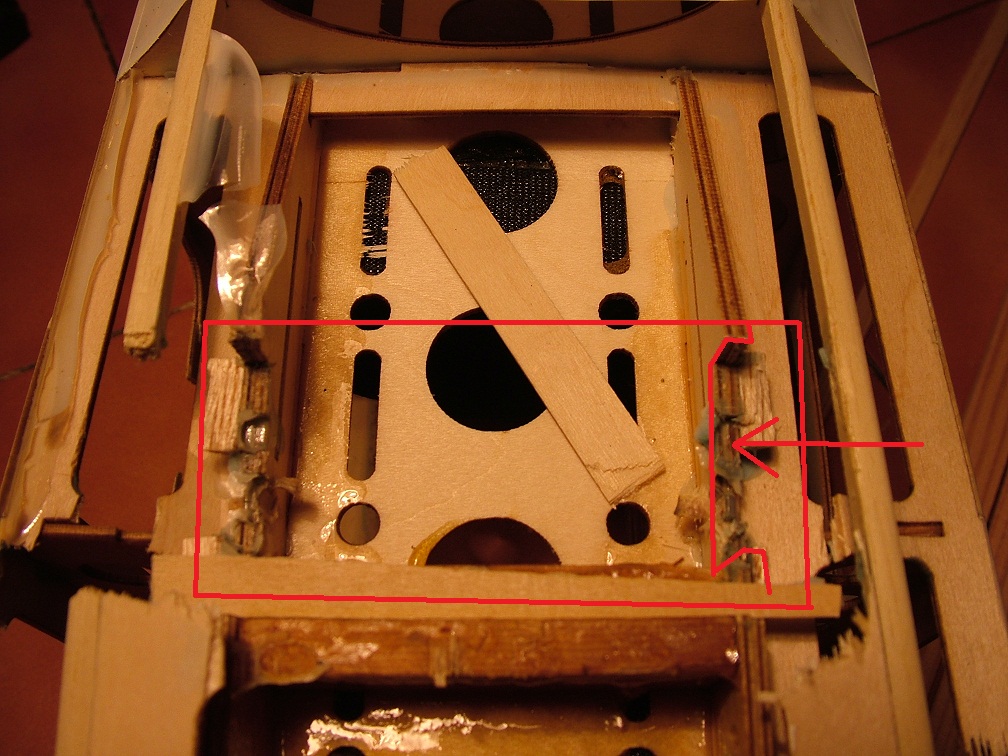
The U/C mount was one of the worst. ..... the alloy UC is heavy enough to be steel, but has no elasticity at all. All you have to do is hit a stone on the runway & it's bent!!!!

The worst of it though is the thin piece of ply that it's bolted to.
Look at this picture. This is a view from the underside & the red rectangular outlined area is where a thin piece of ply was glued in place with flour & water ..... that's what the aluminium U/C was bolted to.
Obviously, as the model comes in to land, it will attempt to pull the U/C backwards a little (A lot if landing on grass) .... this will easily pull the thin ply plate out of this recessed cut out.
To make matters worse, it was impossible to get at this area to strengthen it because of the covering on the bottom, ... & the "holed" sheet of ply on the other side.
I did manage to get some supporting bearers into place before its maiden, but not enough to survive a crash.
Now I have plenty of access room before it's recovered & will make sure it's strong enough for Garry to trample on.
![[badass]](/media/kunena/emoticons/bad_boys_20.gif "[badass]")
I just own the forum .... you guys make it great thanks.
Please Log in or Create an account to join the conversation.
- Phil Wood
-
Topic Author
- Offline
- Inactivated User
-
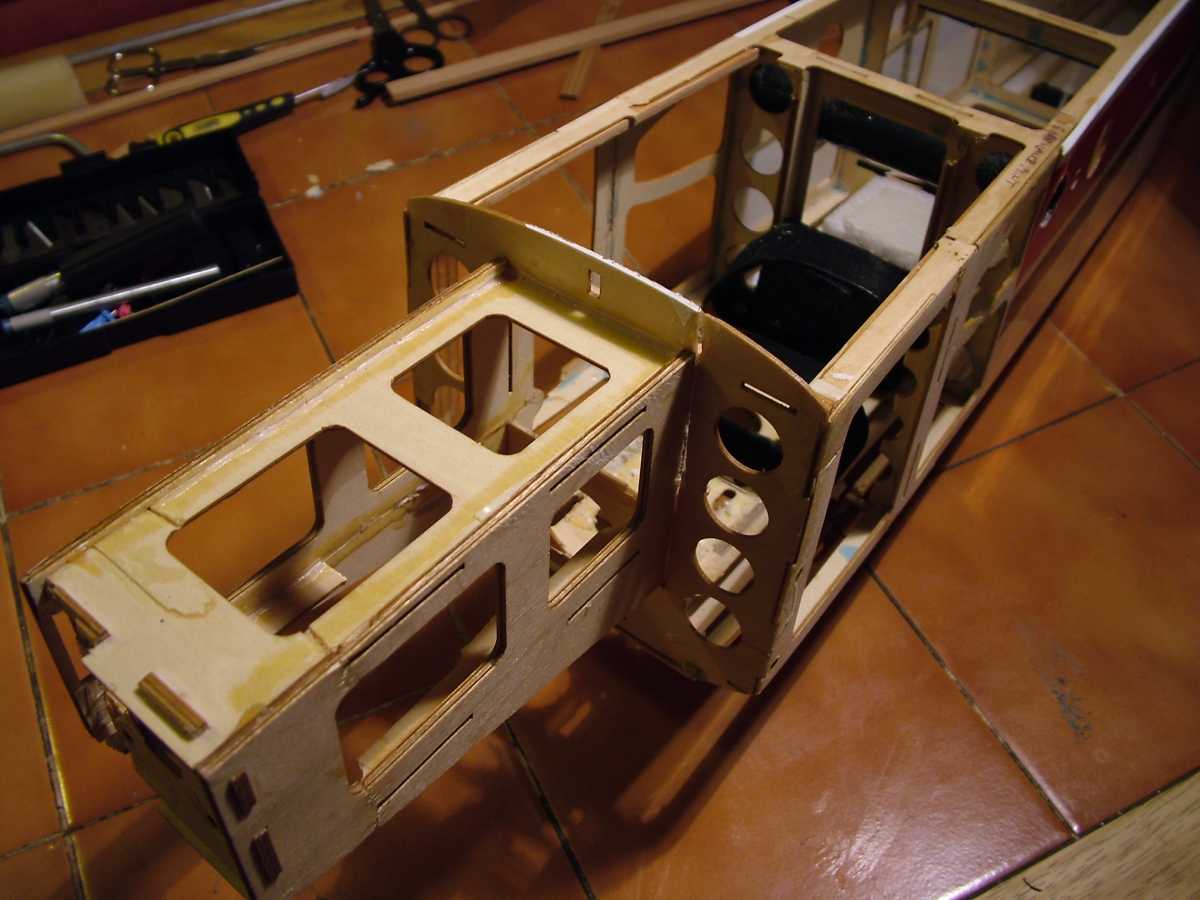
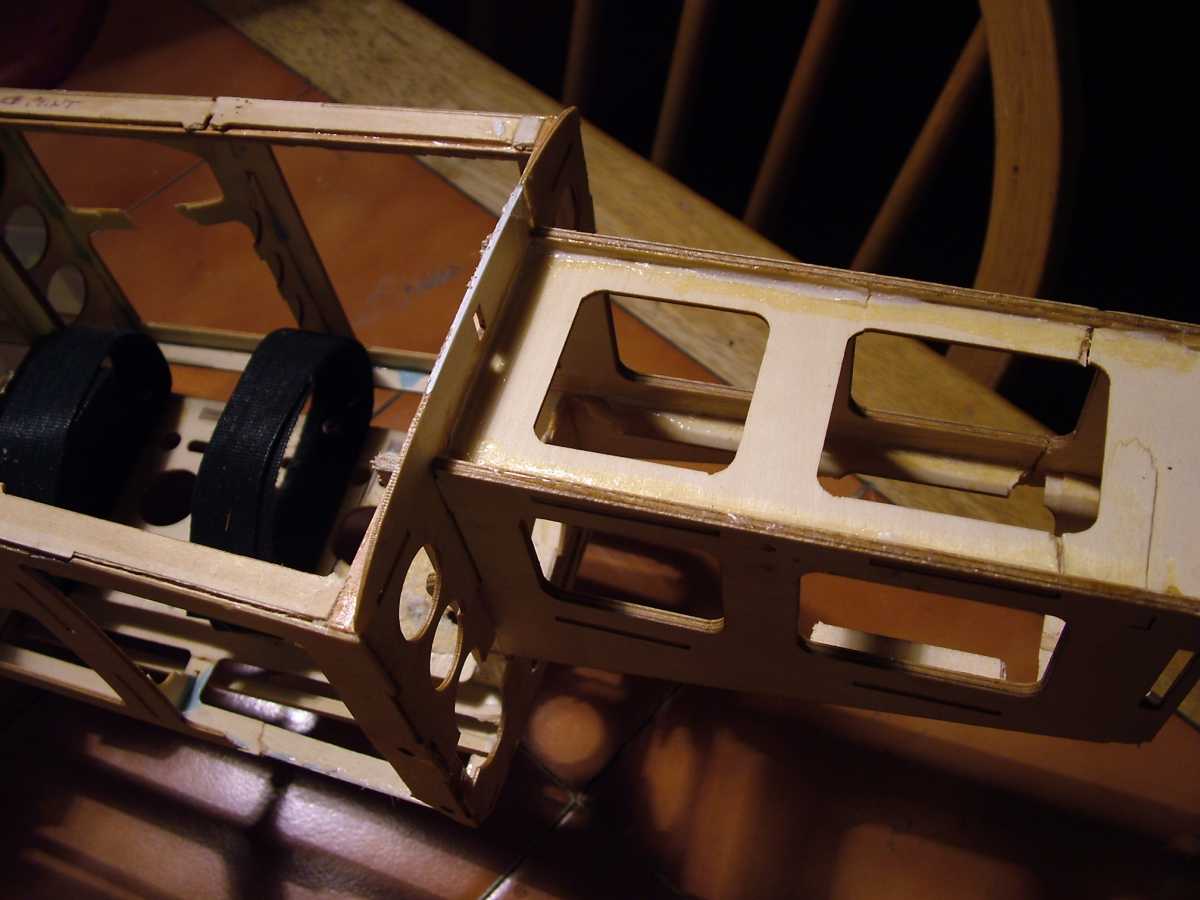
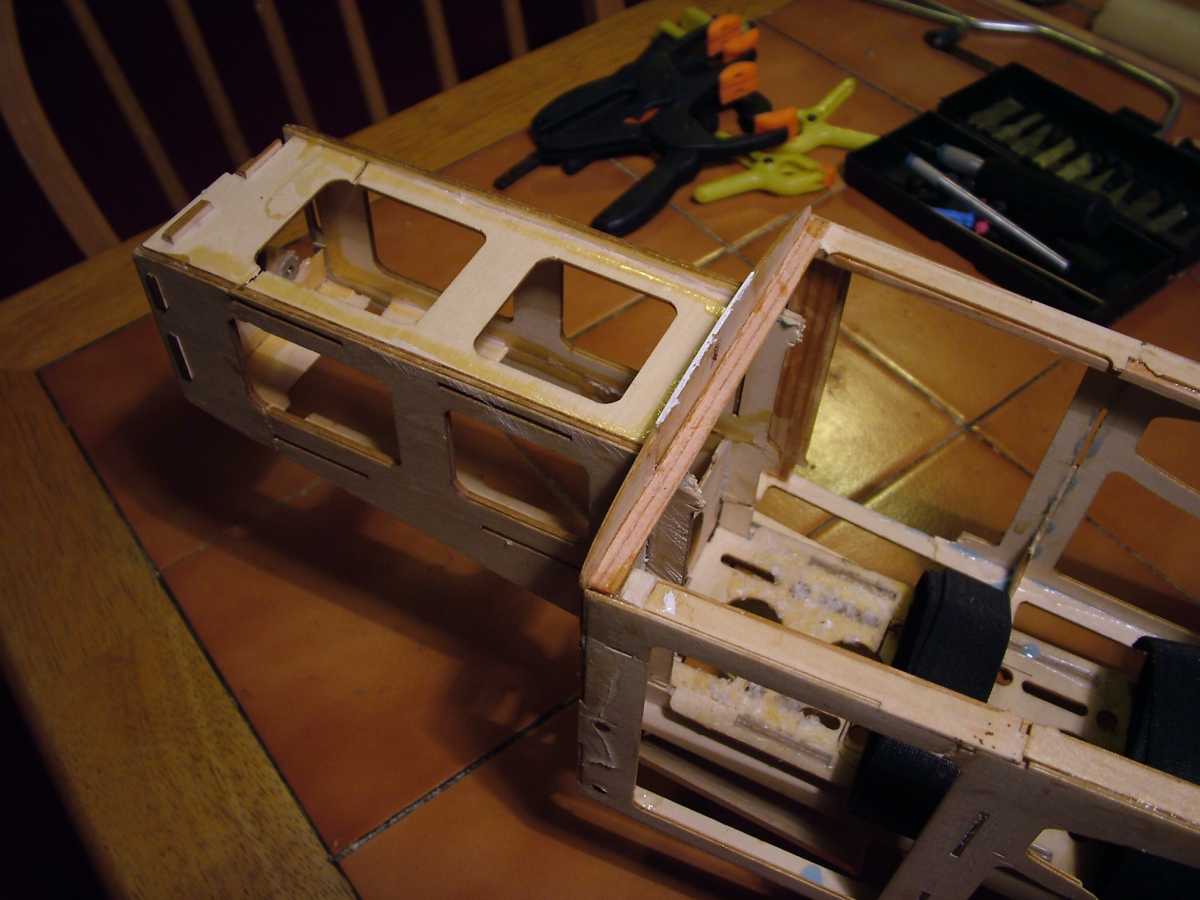
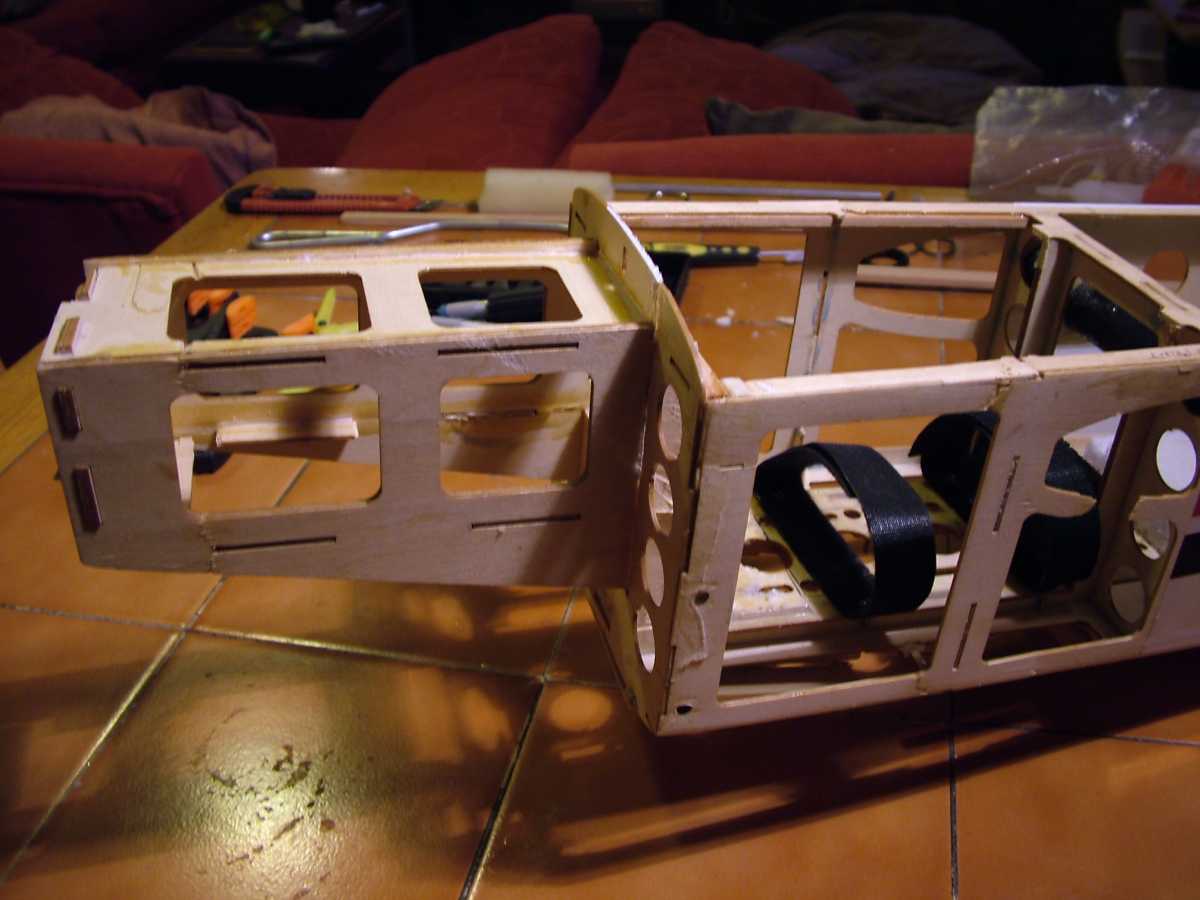
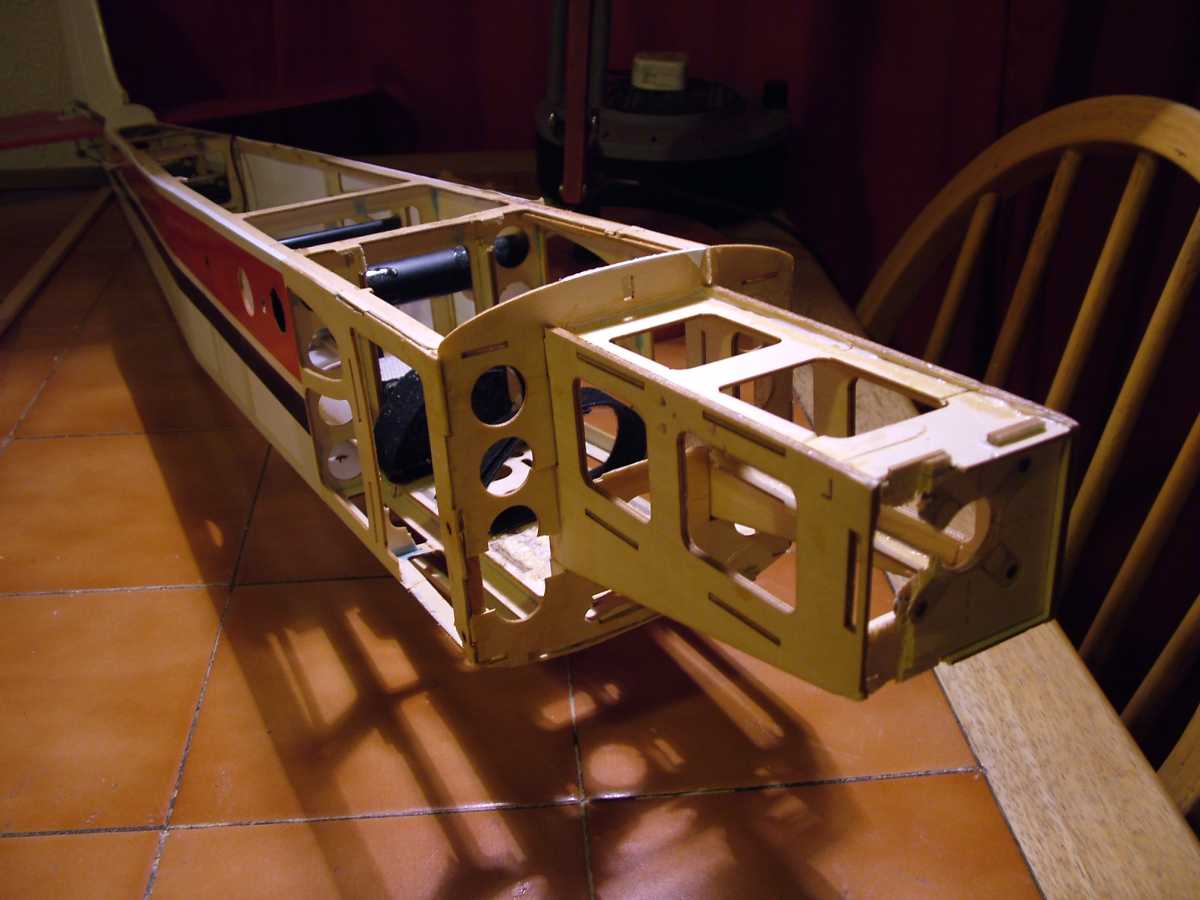
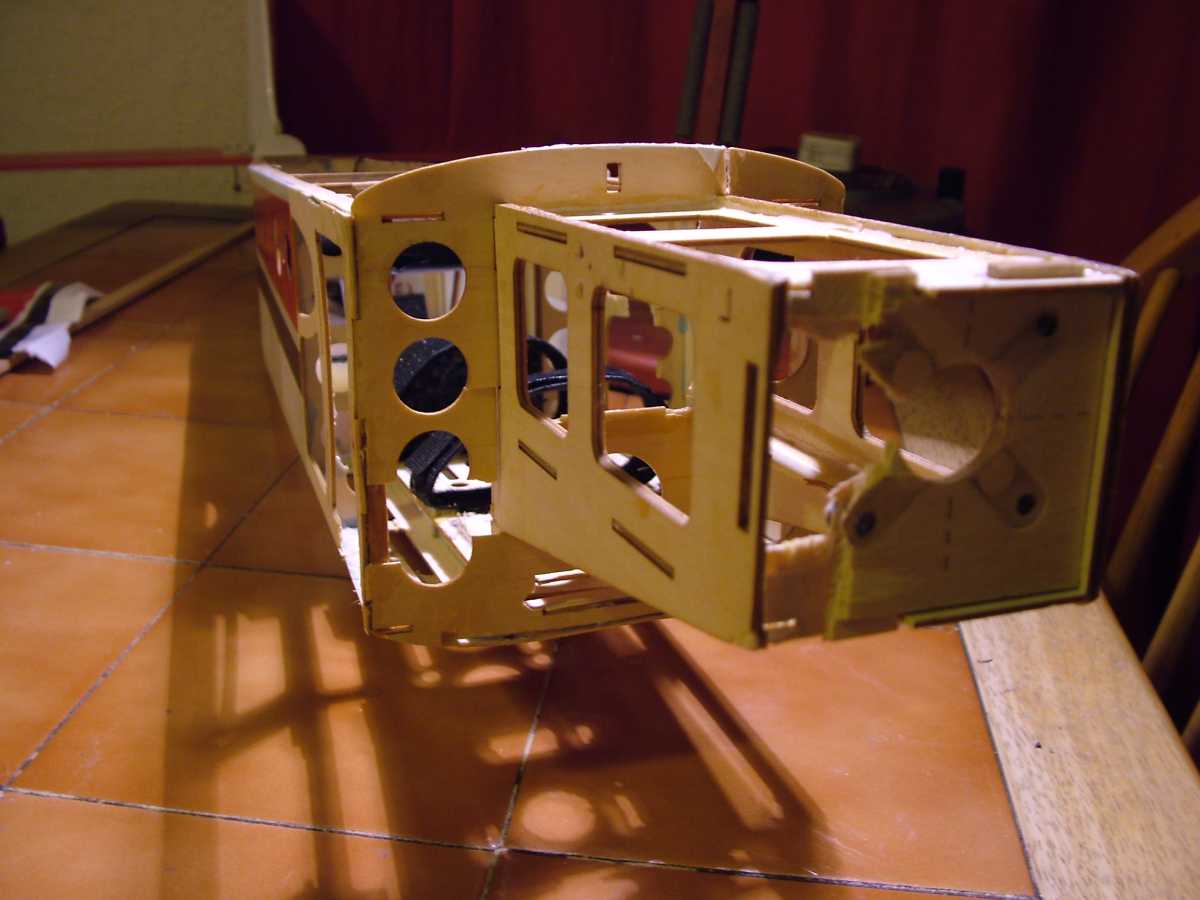
It's impossible to get the joins perfect & even if each joint added just 1/2 mm to the length of one side, several of these would lengthen that side to significantly throw the motor side thrust completely off.
I got the important bits into place & everything looks correctly aligned, there are several places that still need building up (as you can see) .... Then the whole front end will be reinforced with a combination of aluminium mesh & fiber glass, keeping an eye on the weight of course.
The recovering will follow that & I'll start planning a flying trip.

I just own the forum .... you guys make it great thanks.
Please Log in or Create an account to join the conversation.
- Eric
-
- Offline
- Moderator
-
- Posts: 15406
- Thank you received: 14306
if you are calm and collected when all about you are going berserk - you've missed something important!
Please Log in or Create an account to join the conversation.
- The Beard
-
- Offline
- Forum Master
-
- Posts: 9272
- Thank you received: 2167
Please Log in or Create an account to join the conversation.
- alan cantwell
-

- Offline
- Inactivated User
-
- Posts: 2290
- Thank you received: 1918
i have 2 sides
no you dont,
yes i do,
Please Log in or Create an account to join the conversation.
- Phil Wood
-
Topic Author
- Offline
- Inactivated User
-

I have actually already finished the repairs but I took some pictures along the way so I thought I'd resurrect this thread and show you how I did it.
Just to backtrack a bit and in case anyone doesn't want to read back through the previous posts here's the story so far.
The model worked fine for a few flights, not the easiest model to fly, in fact quite scary, it was fast, sensitive & agile, .... just what you'd expect from a Pylon Racer.
Garry was unfortunate enough to give it a try and when he took it a bit of a distance away it lost all radio contact. .... He shouted to me that the radio was dead & the pair of us stood and watched as it spiraled in & crashed into very long grass. .... We later found out the Orange Rx we thought was full range, was in fact intended for a Park Flyer unless it had a satellite.
The front end was splinters and there was some damage along the length of the fuselage, but the wings escaped with just a minor dent on one leading edge.
Here's how I went about the repairs.
Some previous posts show that I tacked the front end together with cyano just to get an accurate shape of how it should be. ... This was important because the side & down thrust are built into it.
The next step was to use some ply to cut a completely new front to fit OVER the old one.... the stuff I used measures 3.7mm thickness.
I simply marked around the old sides right up to the front former & then chop off the whole front apart from about 3/4 of an inch.

Edit ... It's half four in the morning & I'm getting tired so I'll carry on tomorrow. It won't get left another 8 months this time because I'll have Garry kicking me if I don't show the finished model very soon.

I just own the forum .... you guys make it great thanks.
Please Log in or Create an account to join the conversation.
- Ex-Member
- Visitor
-

Please Log in or Create an account to join the conversation.
- Phil Wood
-
Topic Author
- Offline
- Inactivated User
-
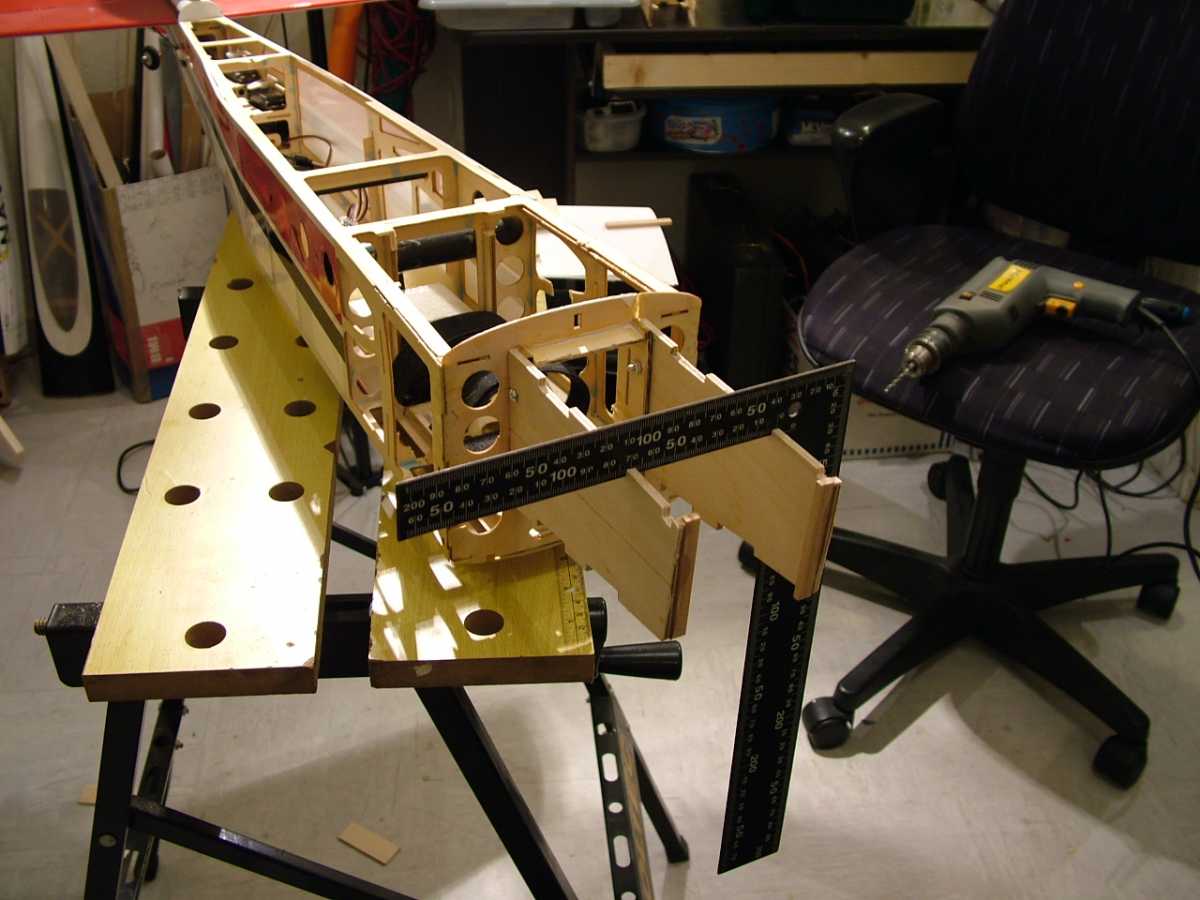
What I'm attempting to do is build a "Box" that is an oversize copy of the old front & will fit permanently in place over the 3/4 inch stub once complete..... this way I should keep the geometry the same.
This new front is going to be heavier than old one, but a few grams extra won't make much difference on a model of this weight, plus it's got power to spare.

The crucial part here is to keep checking the geometry, at this point I've already added two strips of hardwood which will hold the motor firewall. (For pedantic members, yes I know balsa is a hardwood, but you know what I mean
 ) and I'm getting ready to start adding cross bearers...... Once it's a complete "box" it should hold its shape & then it should just be a matter of matching up the bolt holes at the final gluing and fitting.
These are bolts BTW, not screws. I've drilled straight through the sides & the stubs using a drill bit the same size as the bolts, this way they'll serve to locate the two parts accurately.
Pol.
I just own the forum .... you guys make it great thanks.
Please Log in or Create an account to join the conversation.
- Phil Wood
-
Topic Author
- Offline
- Inactivated User
-
I'm also missing a load of pictures somewhere. I'm sure I took them so they'll be in the bowels of this computer somewhere, but you all know what a piece of wood looks like when you've drilled a load of holes in it.
I've also now just had another horrible thought.... did I properly tighten the screws that hold the motor to it's mounting plate????
I know I'll have done the job right, but it'll bug me now unless I check.

It's gone five O' clock in the morning and I'm getting too tired to do it now, but when I start my next shift tonight I'll whip the cowl back off & check my screw tightness, I'll also take some more pictures of the completed front end showing the holes.
Pol.
I just own the forum .... you guys make it great thanks.
Please Log in or Create an account to join the conversation.
- Forum
- Forum Categories
- Reviews - Model Flying Shops, Products, Kits
- HobbyKing NEMESIS. Poly's bought an electric ARTF.